
ODS Workshop Week 11
Kosmas Hench & Kiran Dhanjal-Adams
2021-02-25
Intro
Disclaimer: I often refer to a branch called “master” throughout this workshop. Unfortunately conventions seem to be shifting and the default branch on github/ gitkraken repository is lately often called “main”. Therefore, you might need to swap “main” for “master” — especially when copying the command line commands…
Before we start the workshop, we assume that you have completed the homework and therefore you have a repository called project_folder_xx (with xx being your initials) that contains a file A.txt (full of “A”s).
In this workshop we are going to add three more files (B.txt, C.txt and D.txt — exciting, I know 🤯) and we are also going to “copy” someone elses repository. Along the way, we are going to be using branching, merging, forking and we are going to file a pull request on github.
So, at the end of the day, you are going to have two repositories with a total of eight files 🎉:

Singleplayer
Break Out [1]
For the first new file (B.txt), we will be on our own — as my dad used to complain: “Alles muss man selber machen!” 😉.
Branching
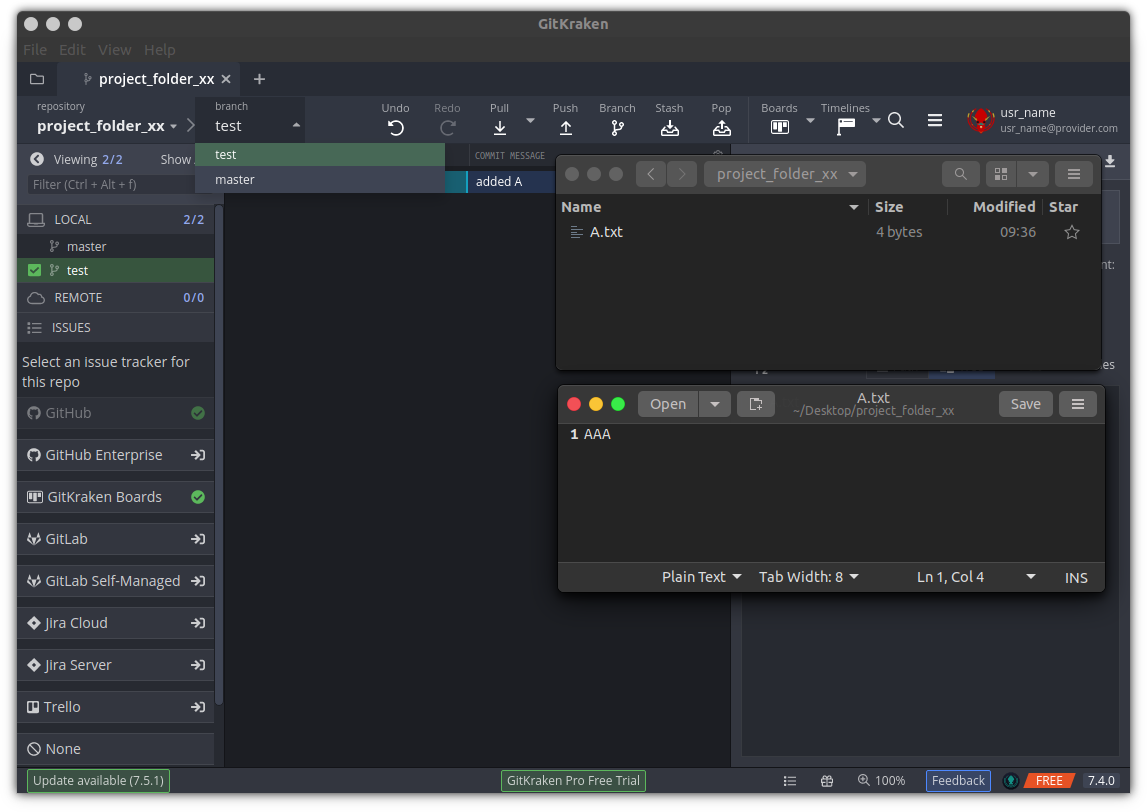
We start the workshop by creating the branch called test:
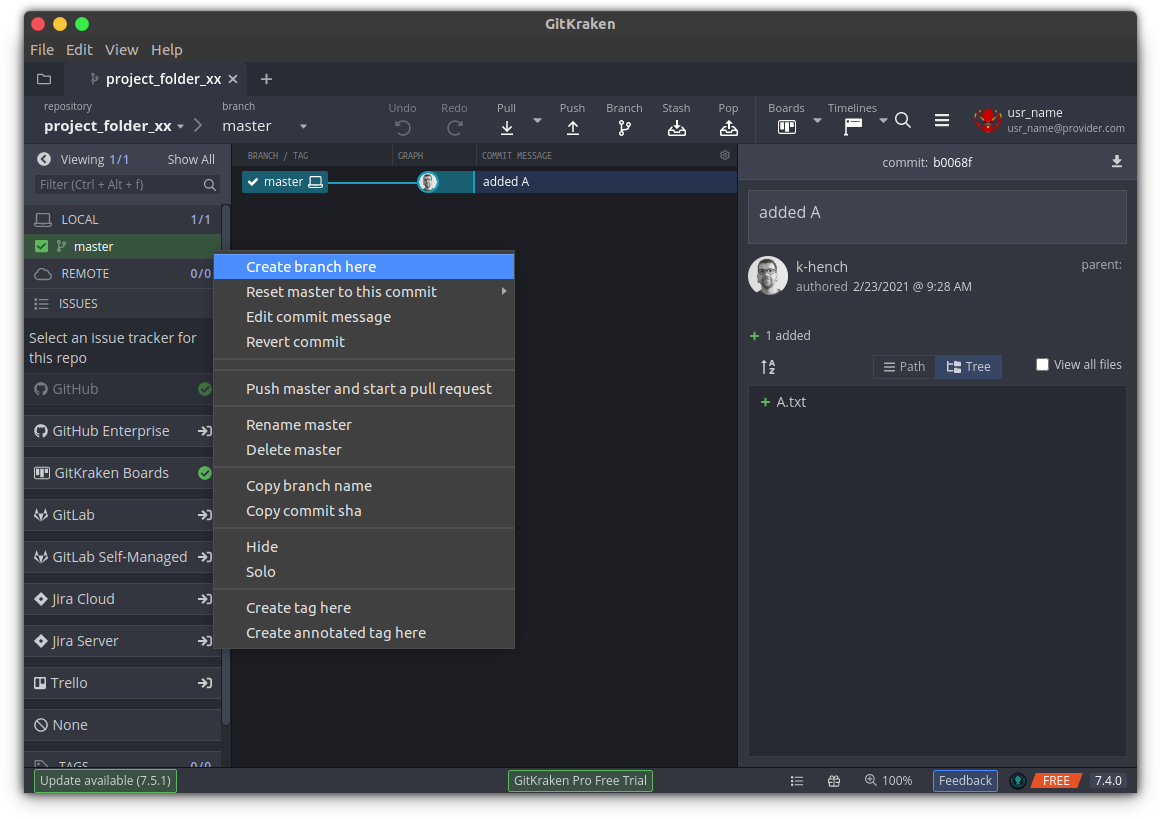
git branch testYou can toggle between different branches: Switching to the master branch by clicking on “master” in the branch panel…

… and back to Test:
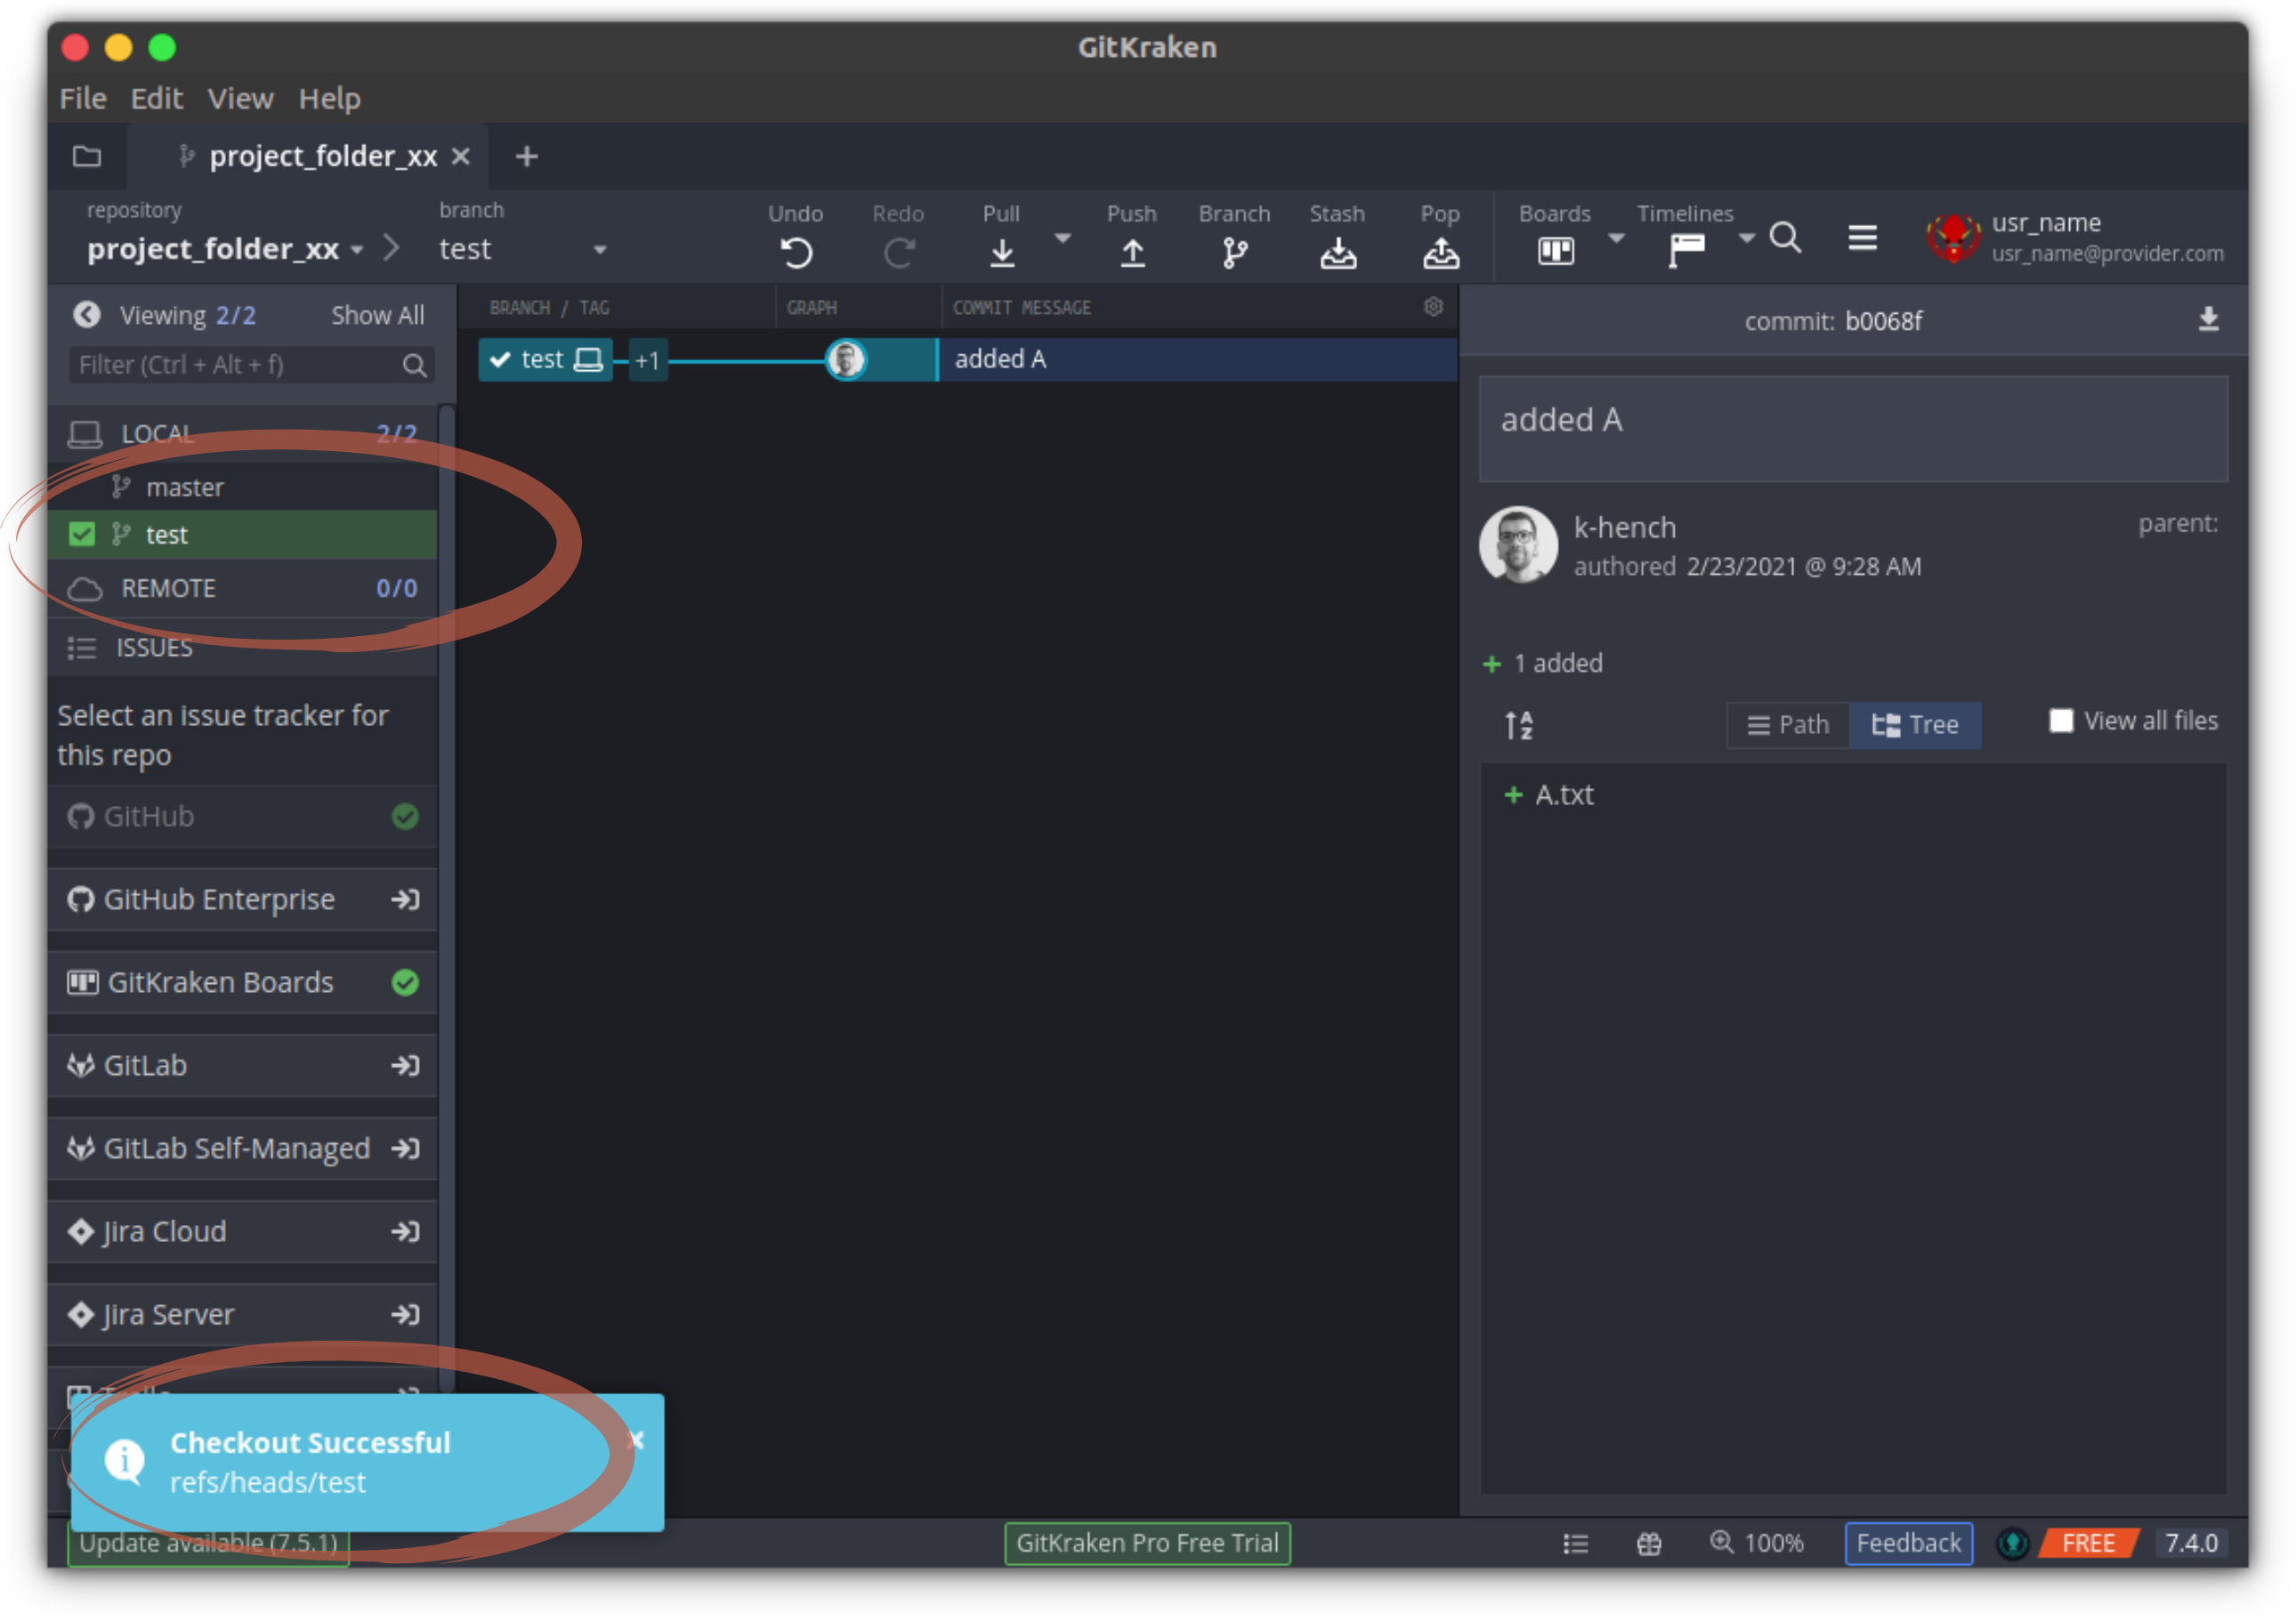
git checkout testBreak Out [2]
Diff
Now, we change a file on the test branch
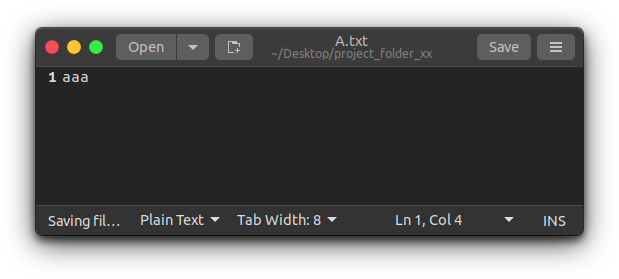
echo "aaa" > A.txtIn gitkraken, we can look at the diff (the differences within a file) by comparing the current versions (with lower case “a”s) with the versions of the last commit (which was still upper case “A”s):
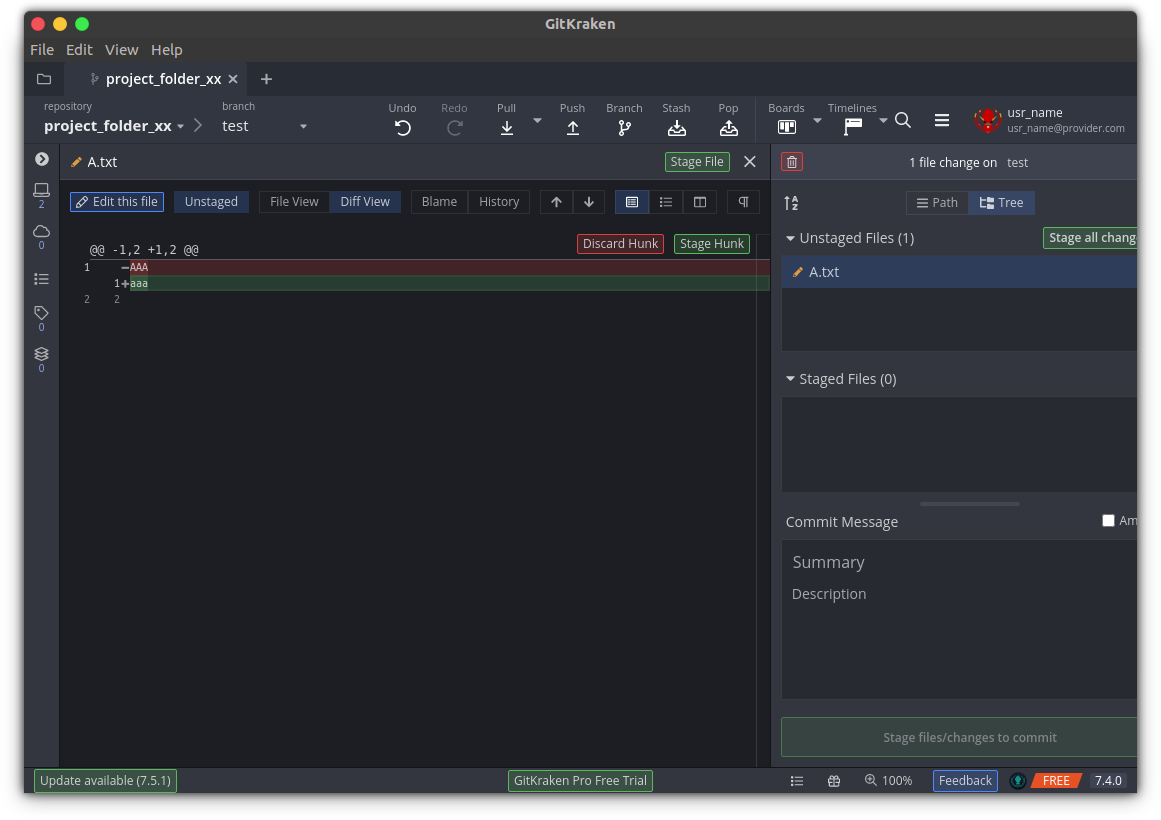
git diff A.txtdiff --git a/A.txt b/A.txt
index 43d5a8e..72943a1 100644
--- a/A.txt
+++ b/A.txt
@@ -1 +1 @@
-AAA
+aaaWith the command line, you can also create a diff between branches (at this point, this will look the same though):
git diff master A.txtdiff --git a/A.txt b/A.txt
index d6d6d41..b2a7546 100644
--- a/A.txt
+++ b/A.txt
@@ -1 +1 @@
-AAA
+aaaThe changes in A where only to demonstrate the use of diff, for the progression of the workshop we are going to undo the changes and turn the content of A.txt on the test branch back to capital “A”s. (Note, that we didn’t even commit those changes.)
echo "AAA" > A.txtMerging
Still on the branch test, we are going to create a second file called B.txt (containing the exciting text “BBB” 🙄)
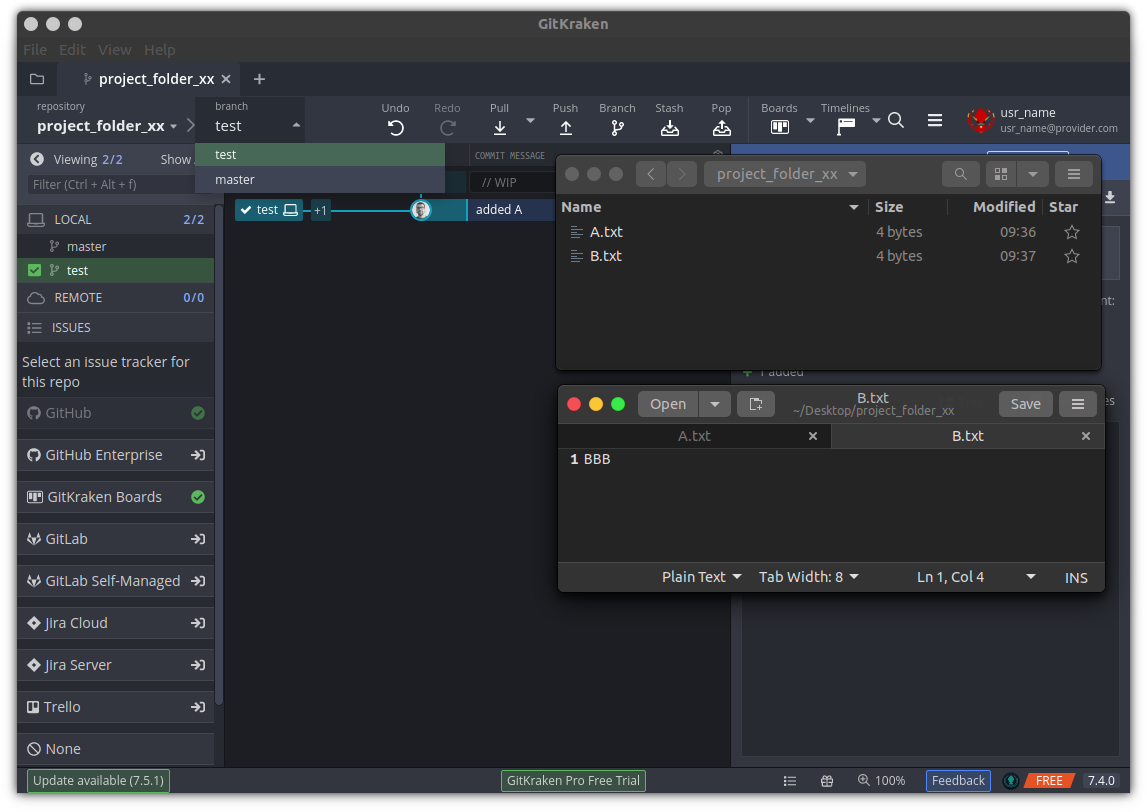
echo "BBB" > B.txtAfter creating B.txt, we need to stage it and commit this change.

git add B.txt
git commit -m "added B"
Now, we switch back to the master branch… 
git checkout master… and merge the changes
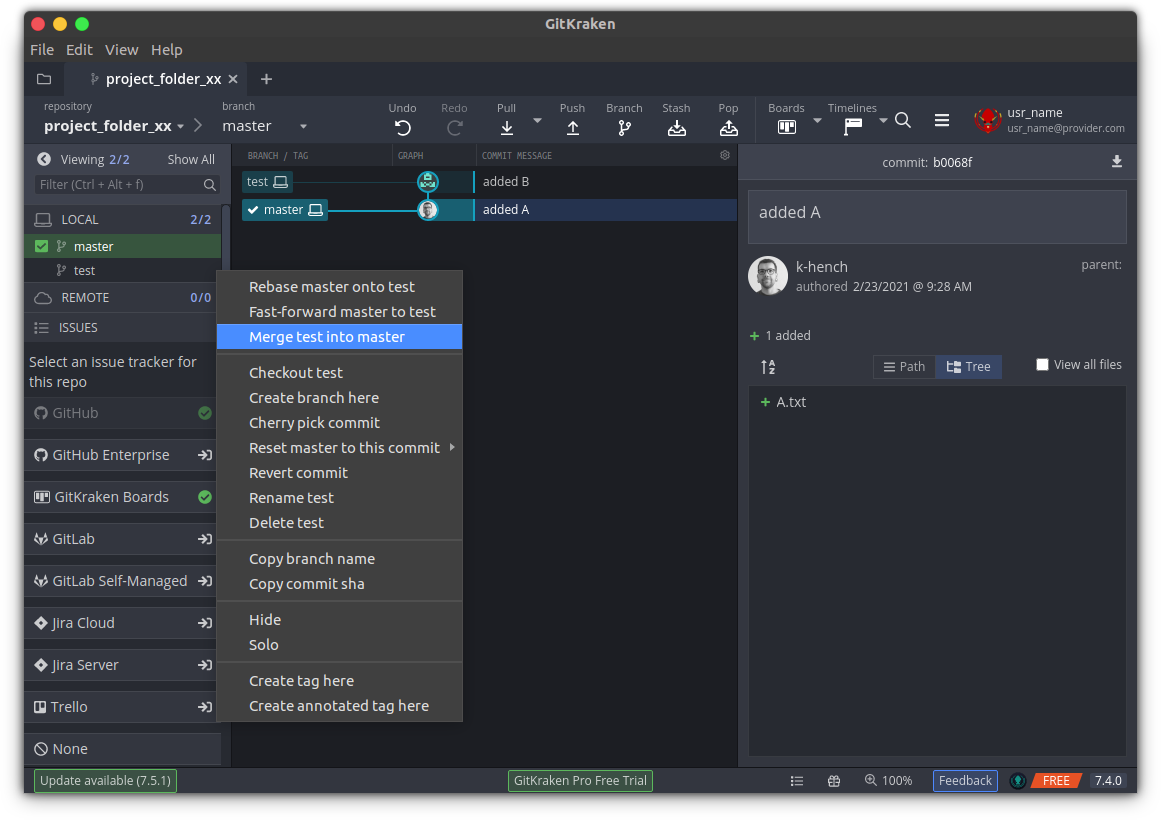
git merge test We can now see that B.txt has also appeared on the master branch:
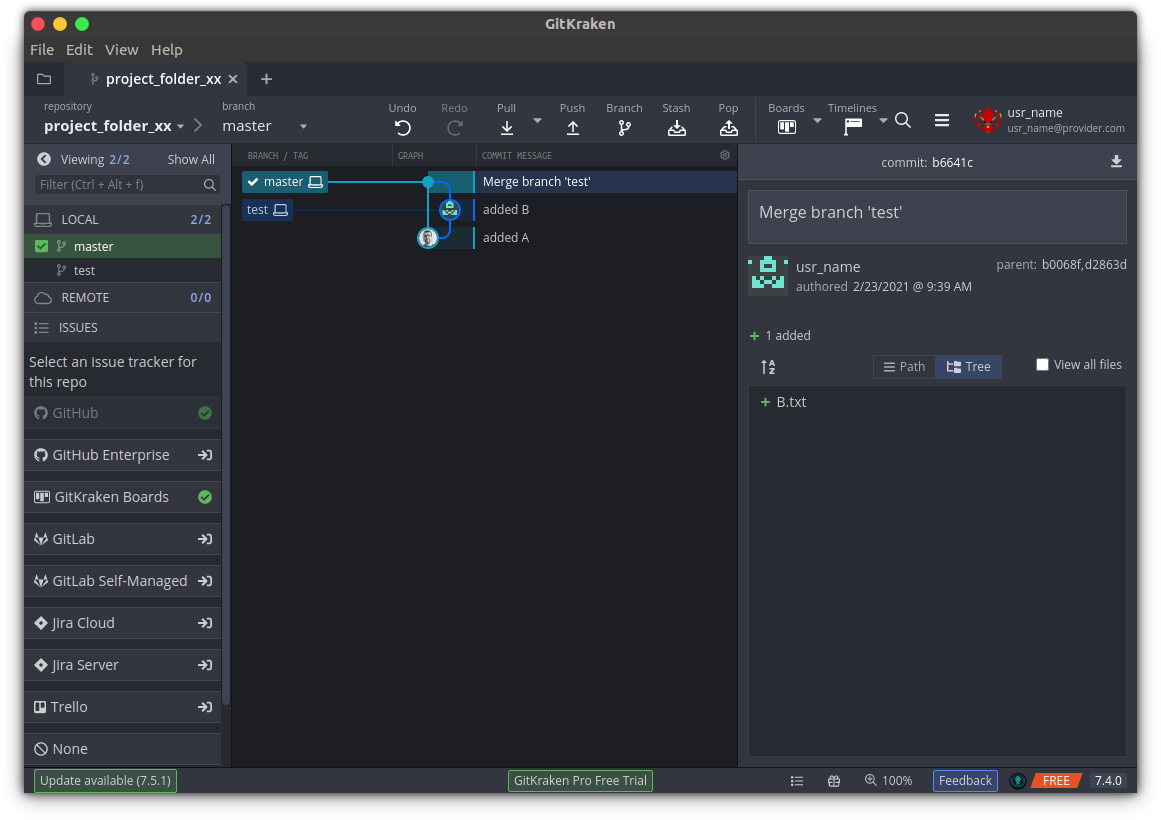
ls
#> A.txt B.txt
Break Out [3]
Resolving a Merge Conflict
So far everything went smoothly (in theory 🤞). Now, lets see what happens when the two branches that we are trying to merge contain conflicting files…
For this, we are going to modify A.txt in both the master and the test branch. The key here is the we are going to introduce different changes on either branch.
We start by adding a line of lower case “a”s (“aaa”) to A.txt while we are on the master branch:

echo "aaa" >> A.txtAs always, we stage and commit the changes in A.txt on the master branch.
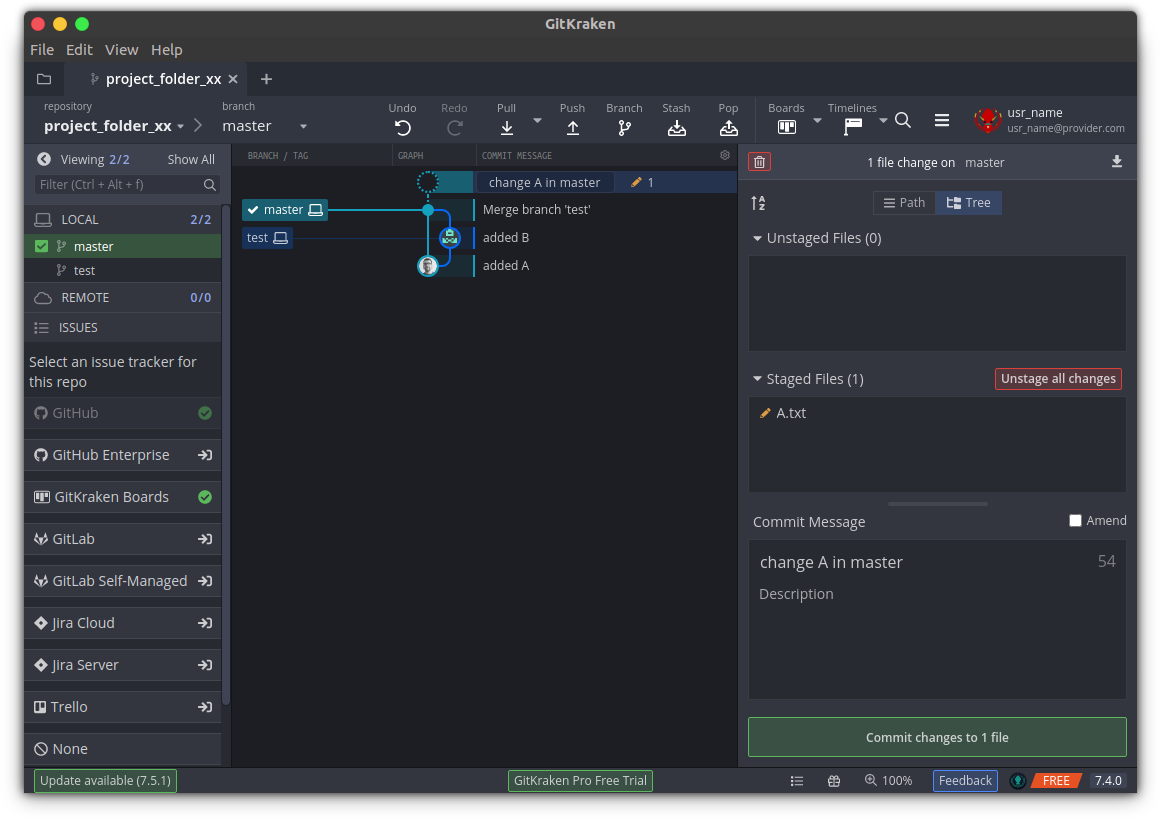
git add A.txt
git commit -m "change A in master"
Now, we switch to the test branch.

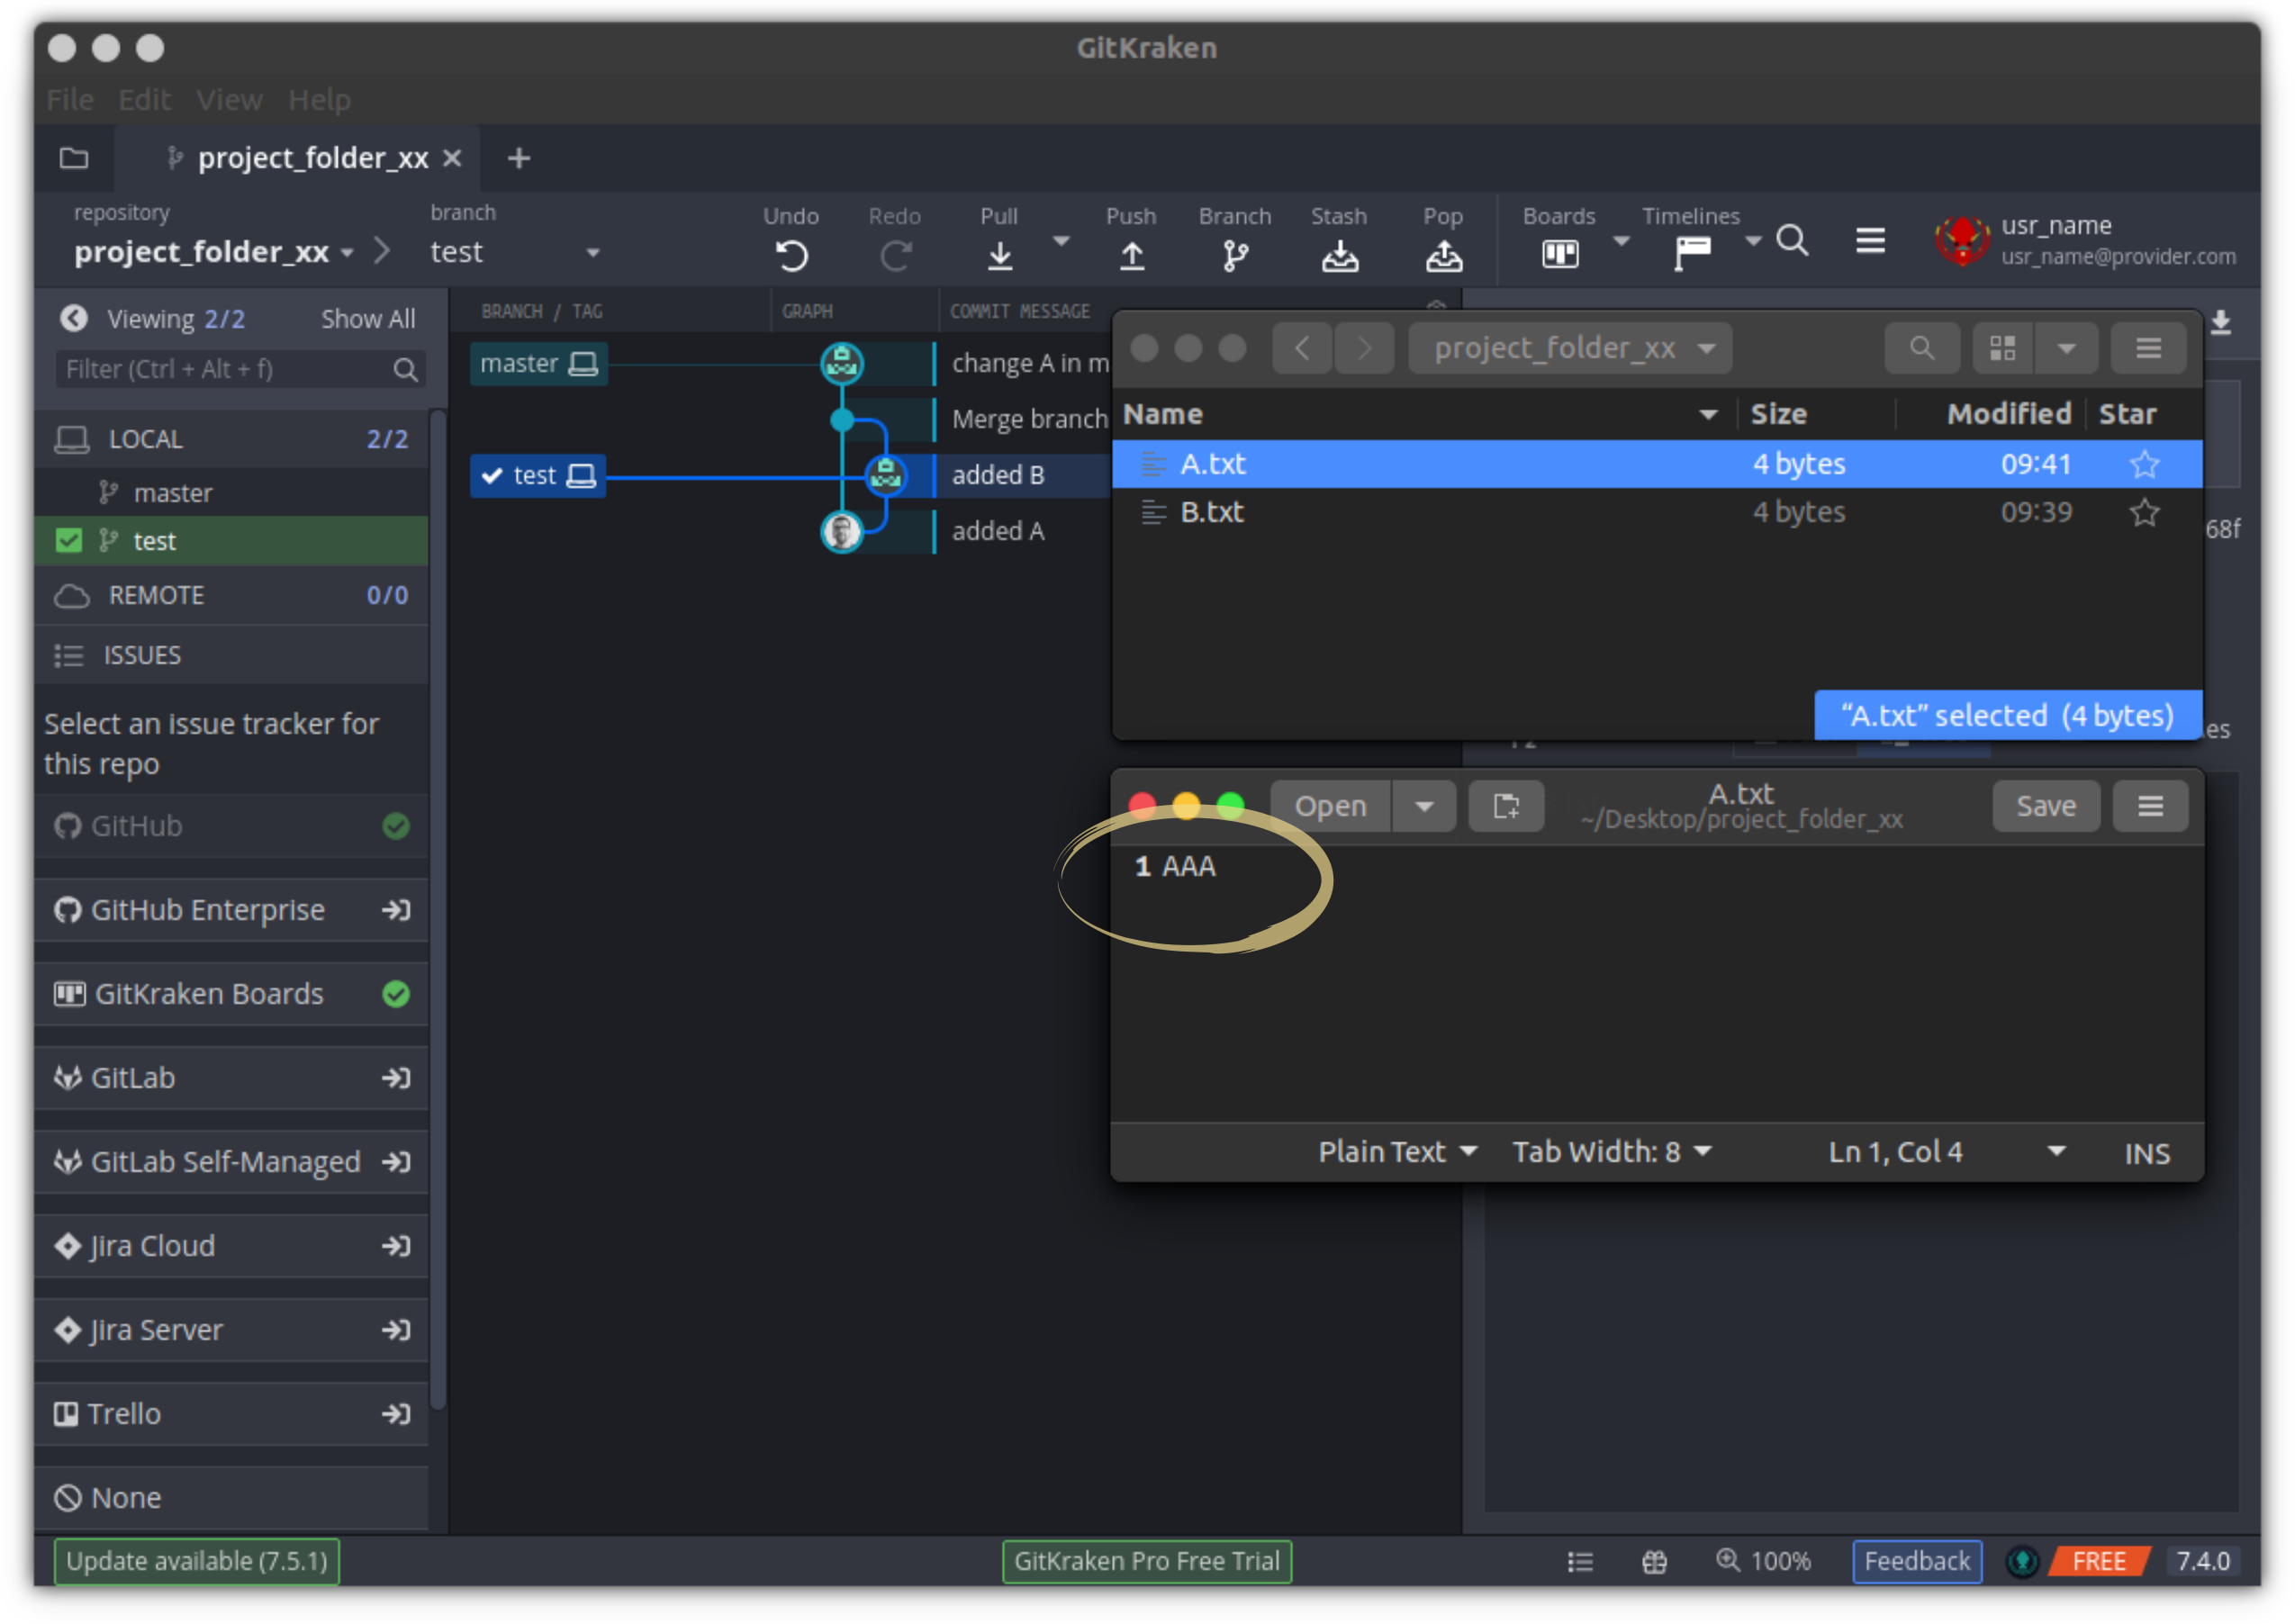
git checkout testOn thing that might have gone unnoticed so far, is the fact that the switching branches does actually effect the physical files in your folder (actually that is not that surprising when you think about the fact that we want to use git to look at the exact configuration of our repository at a given time point/ on a specific branch).
Now, our test branch does not know about the latest changes on master (the change A in master commit). Hence, if you open A.txt on test, it will still only contain the original single line.
Note: if you keep your file open in an external text editor during the change of branches, you might get a warning along the lines of “The file has changed on disc. Do you want to save the changes or reload the file.” (or similar, or not — this depends on the text editor you are using). Don’t save, rather close the file (un-saved) and re-open it.
We are now going to change A.txt differently on test than we did on master by adding a line of “B”s.
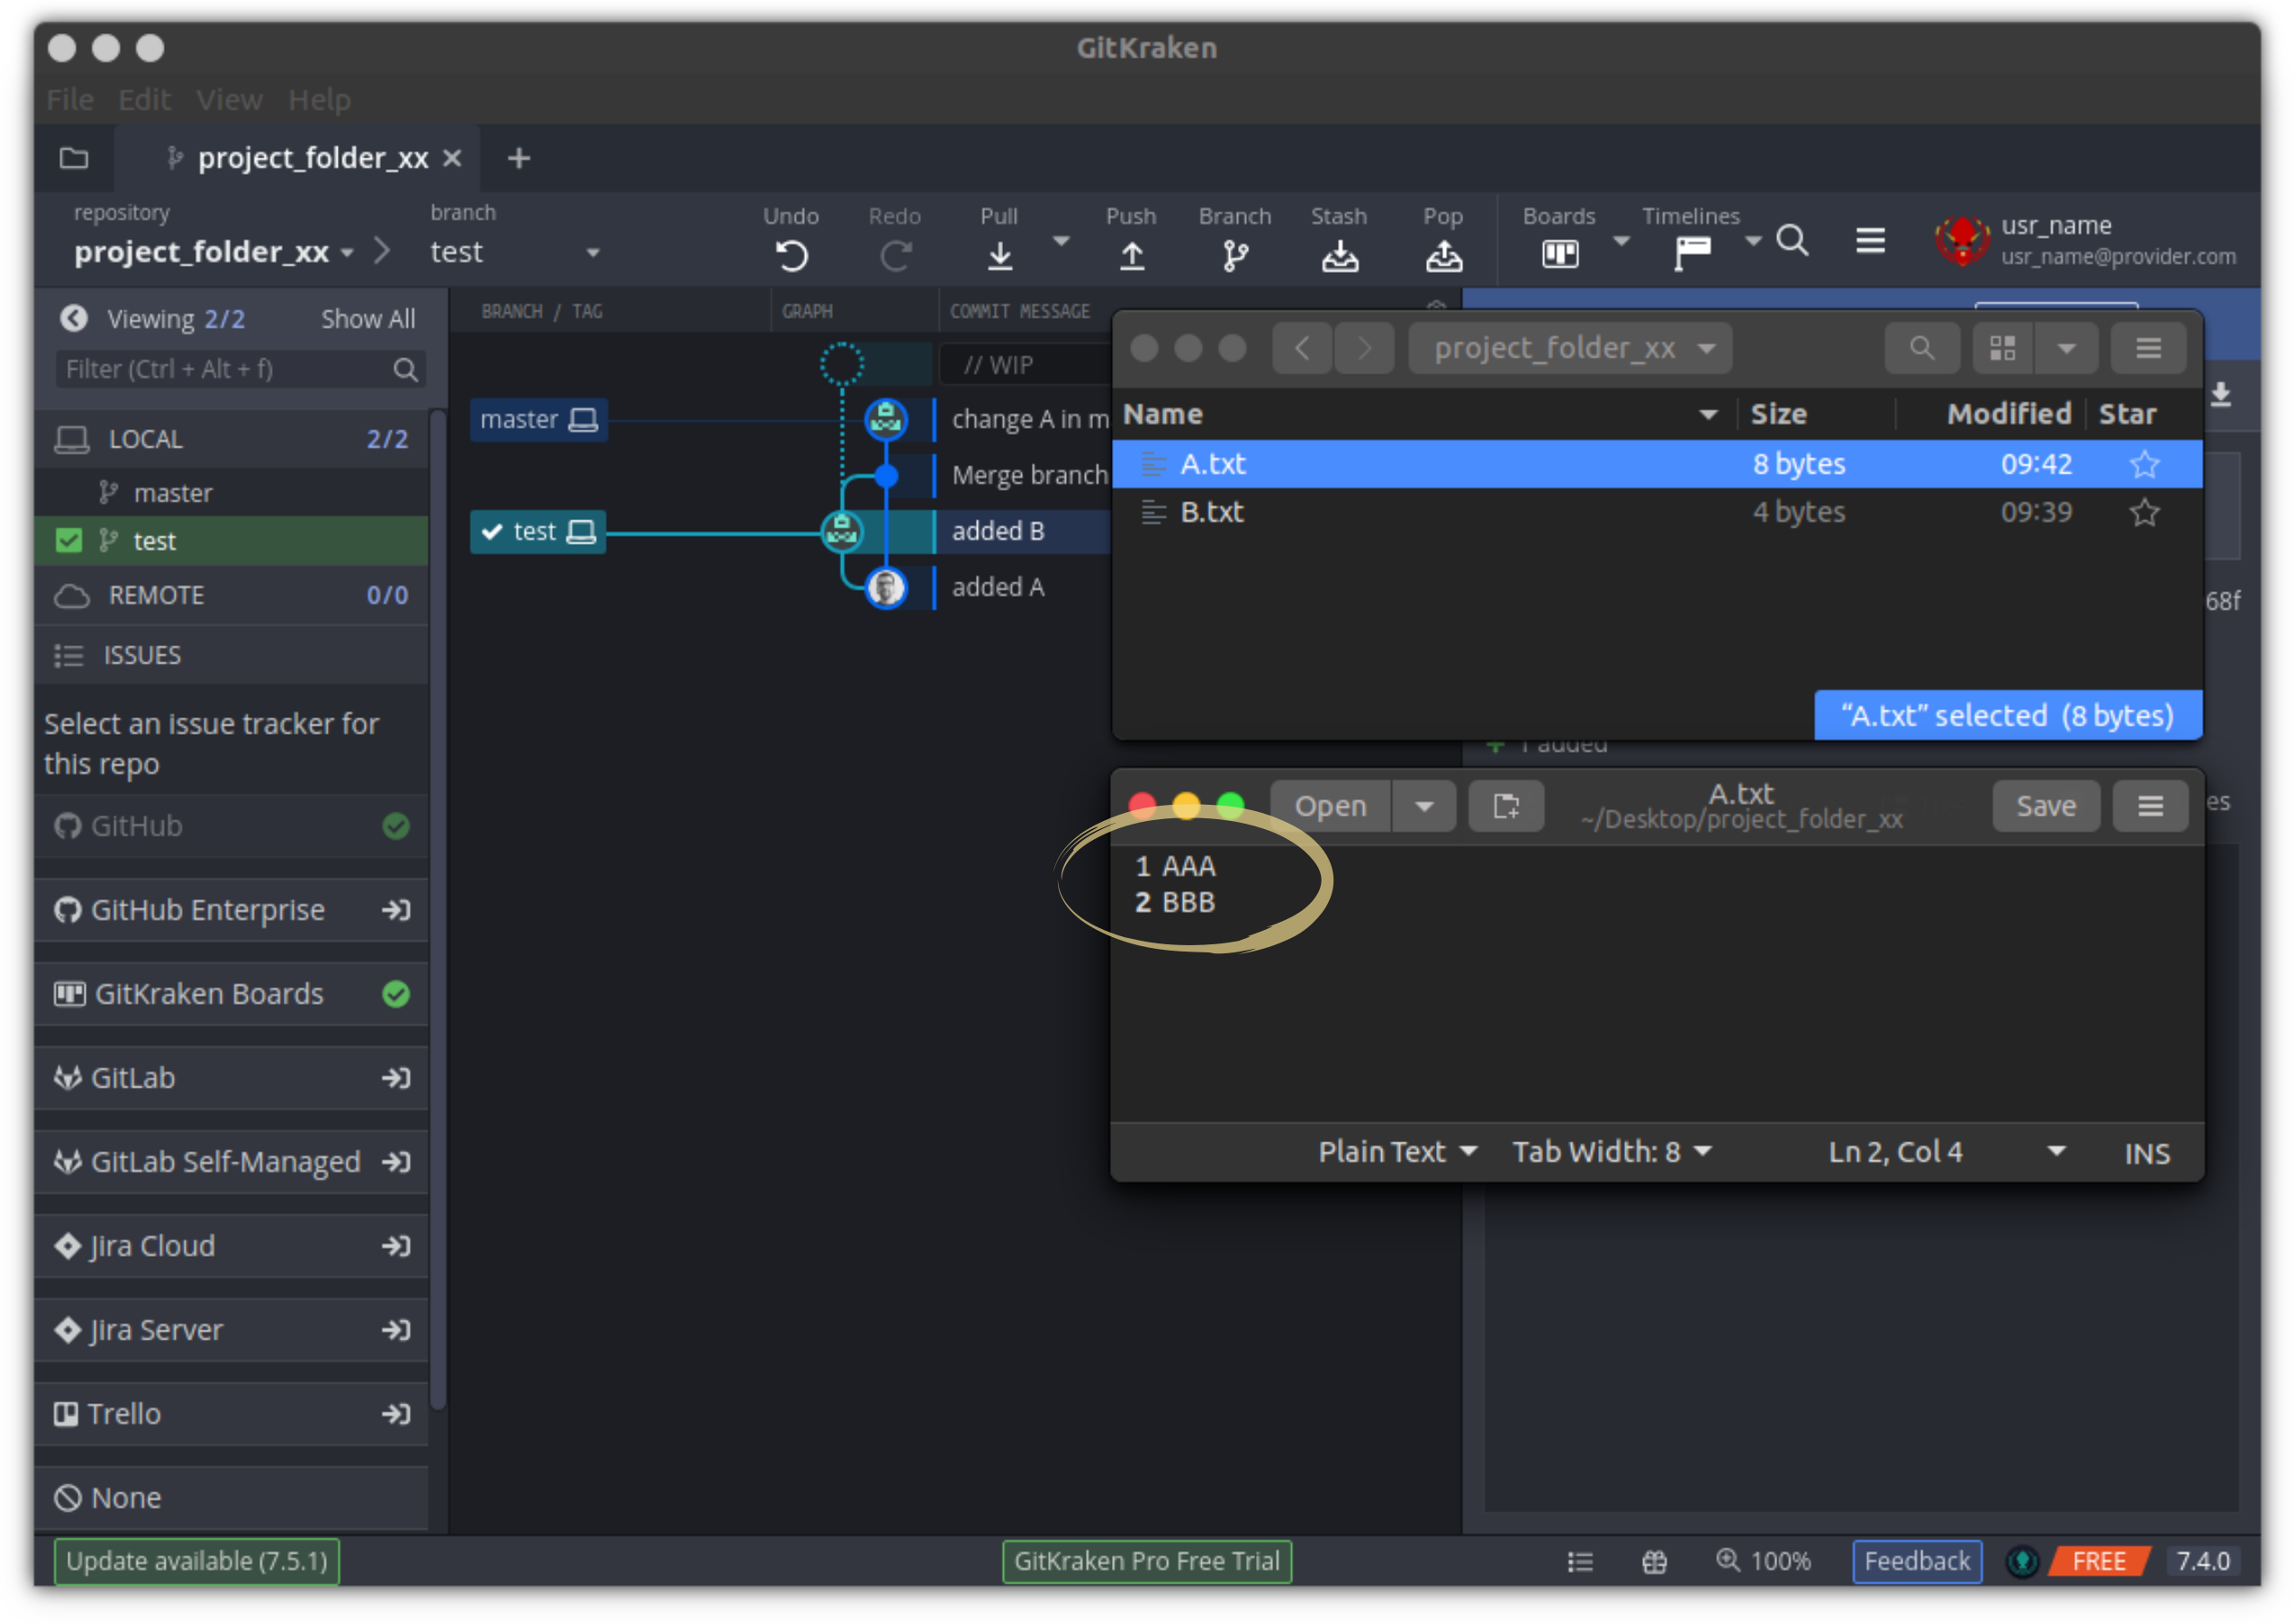
echo "BBB" >> A.txtAlso on test, we need to stage and commit the changes in A.txt.
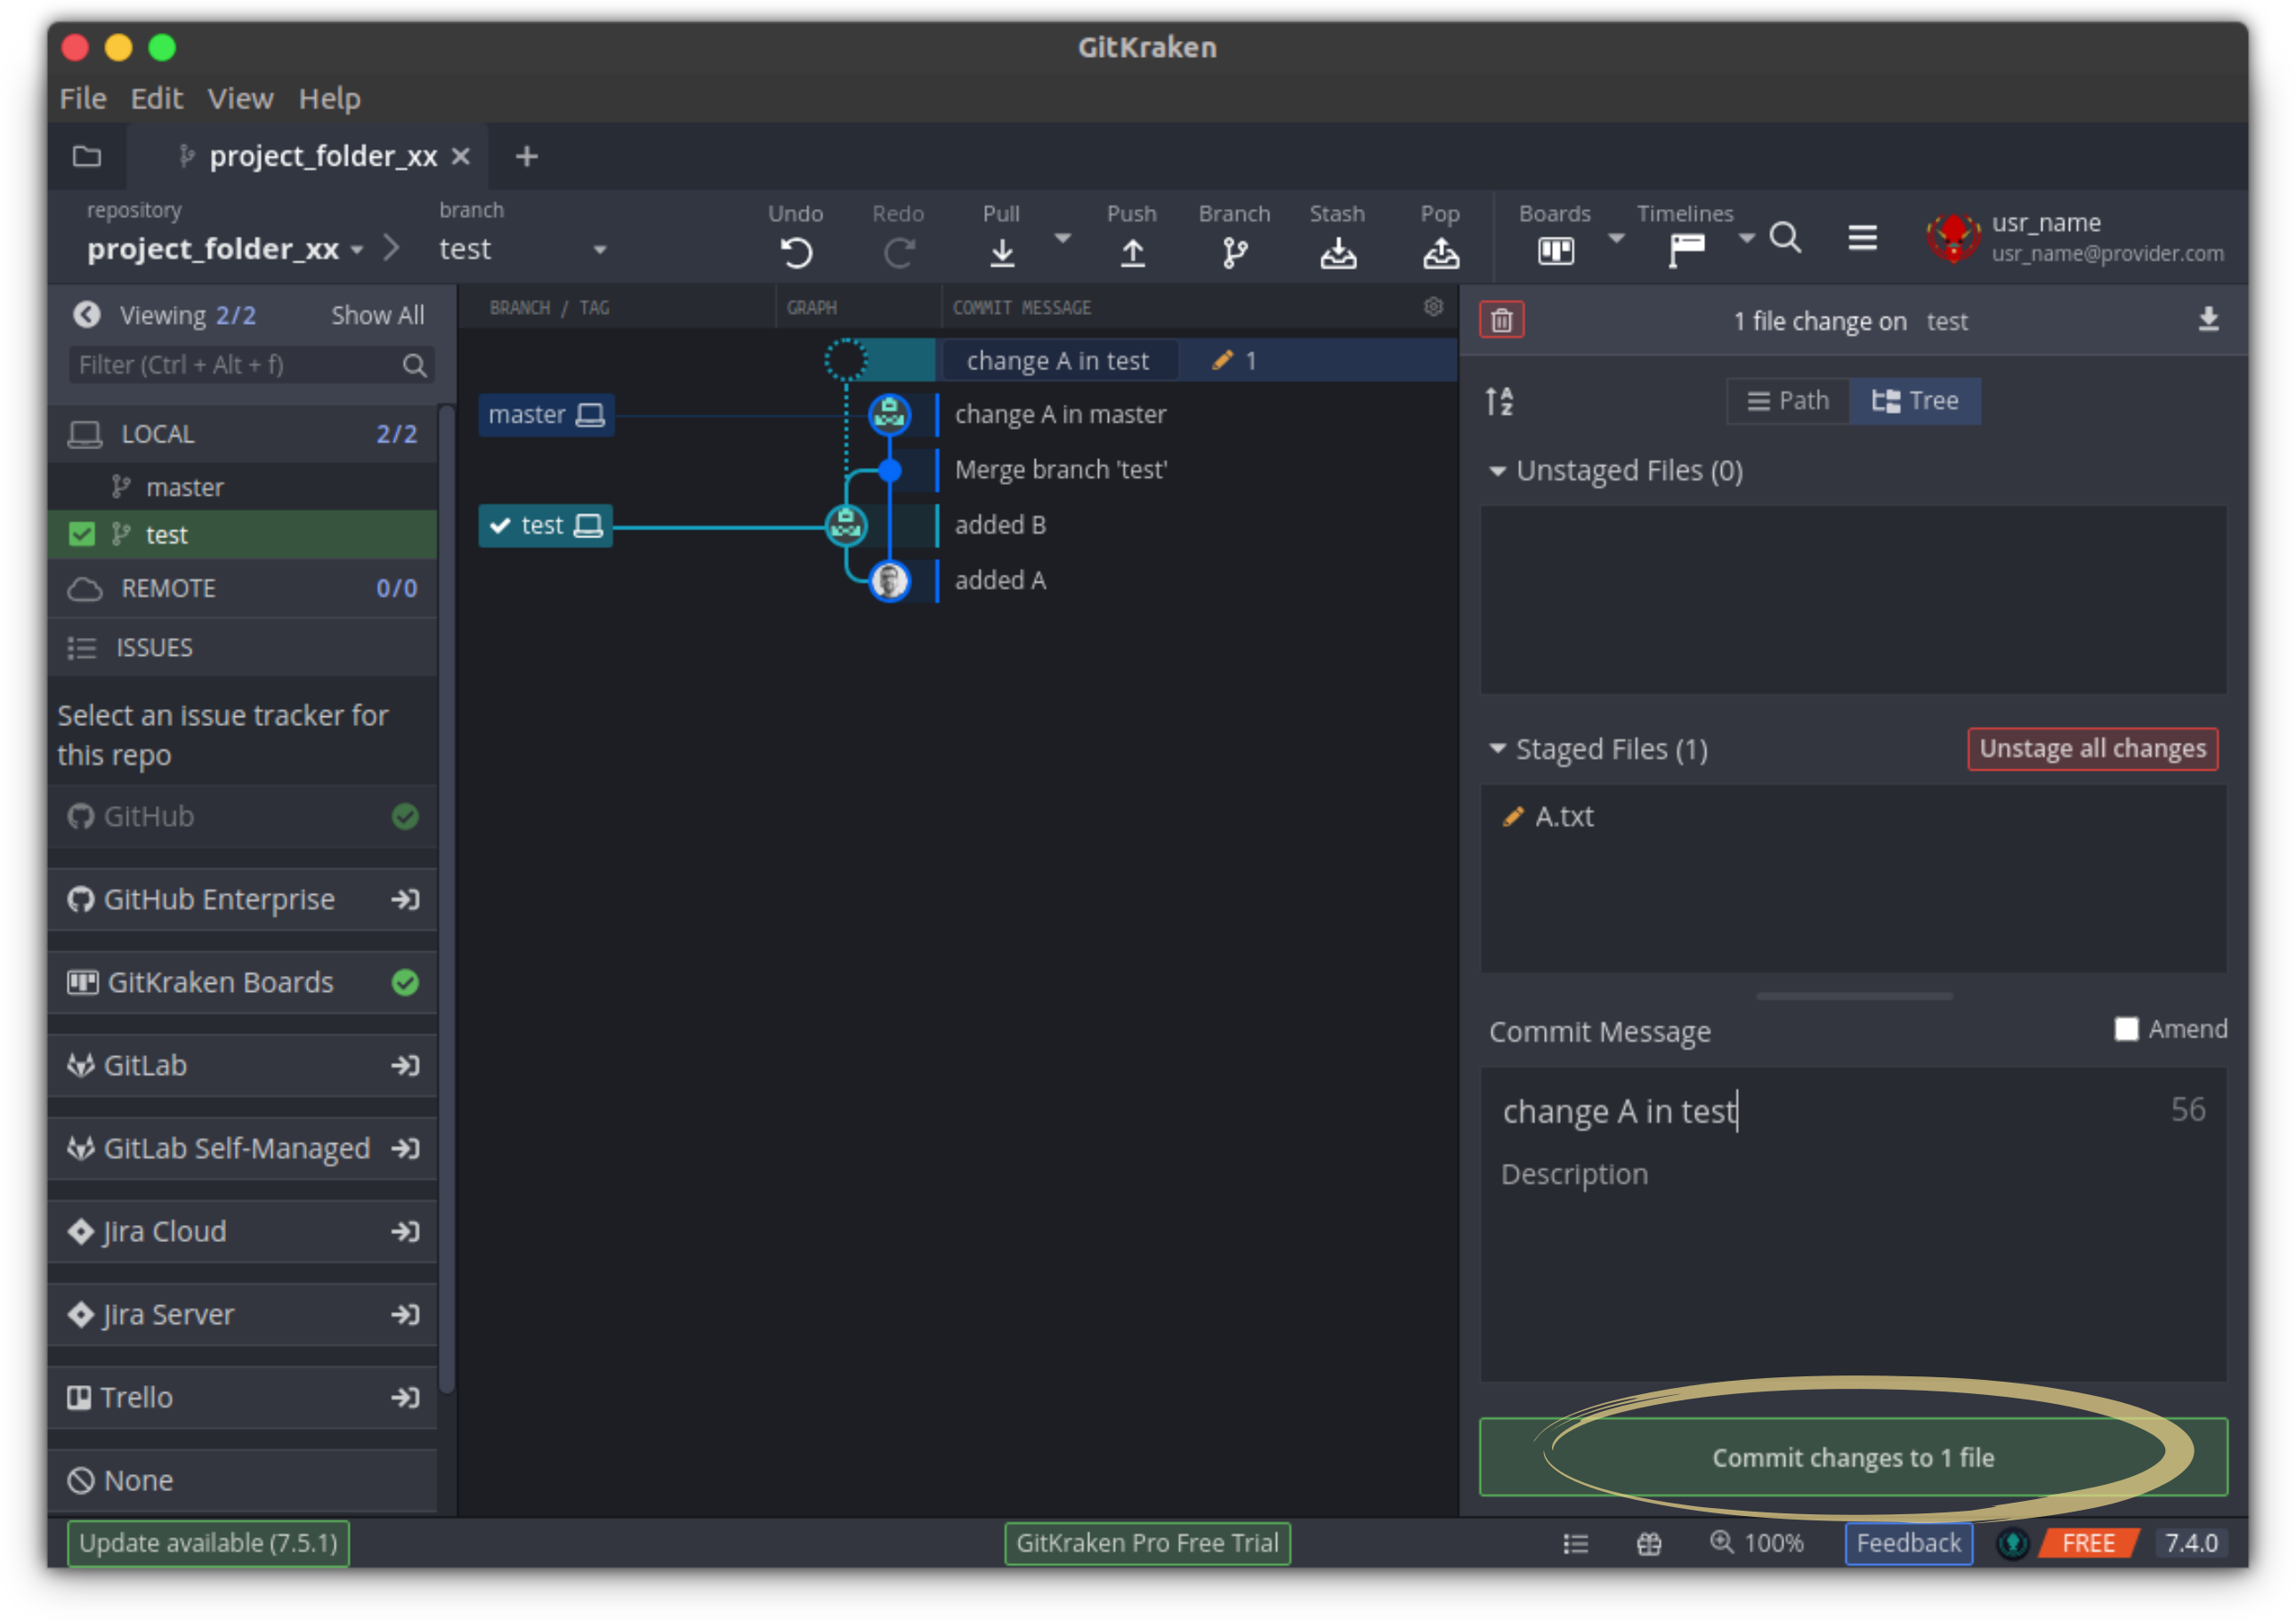
git add A.txt
git commit -m "change A in test"
We are done setting up the conflict, so now we return to master for the merge-attempt:

git checkout masterTo now merge the changes from test into master, we again right-click on test in the branch-panel and select Merge test into master.
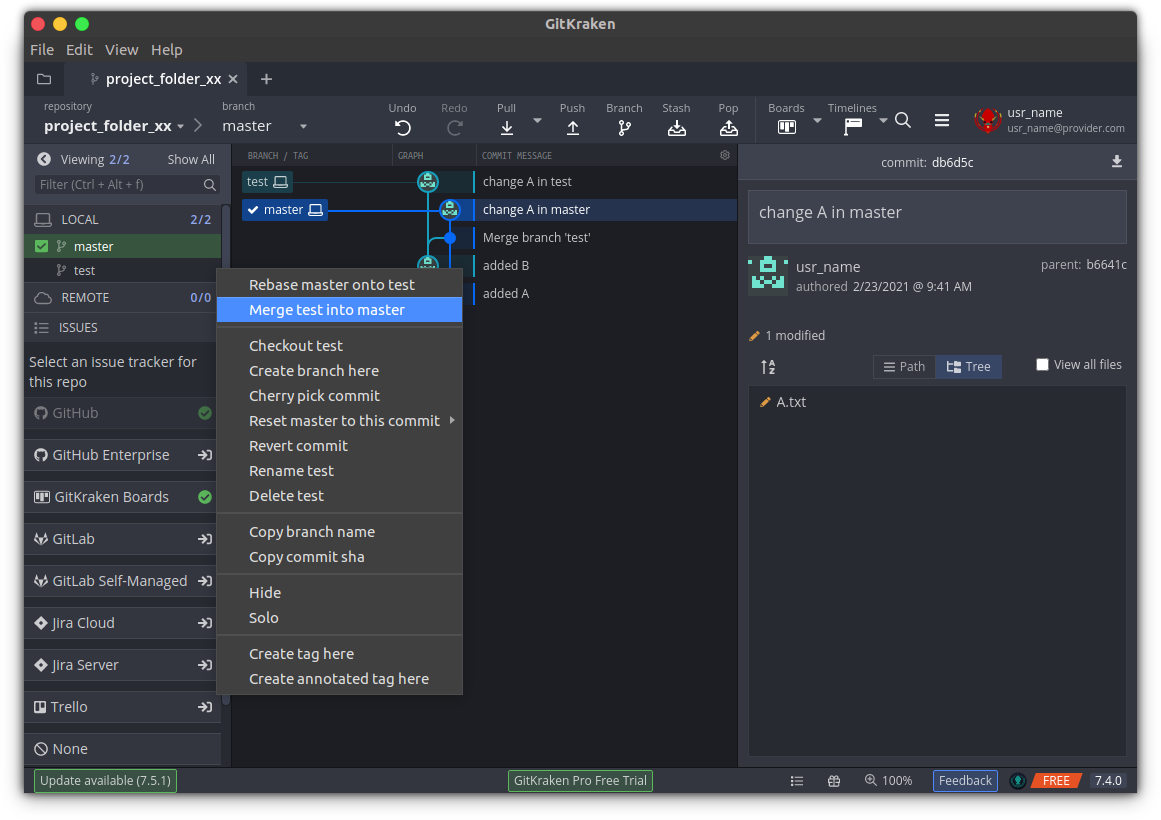
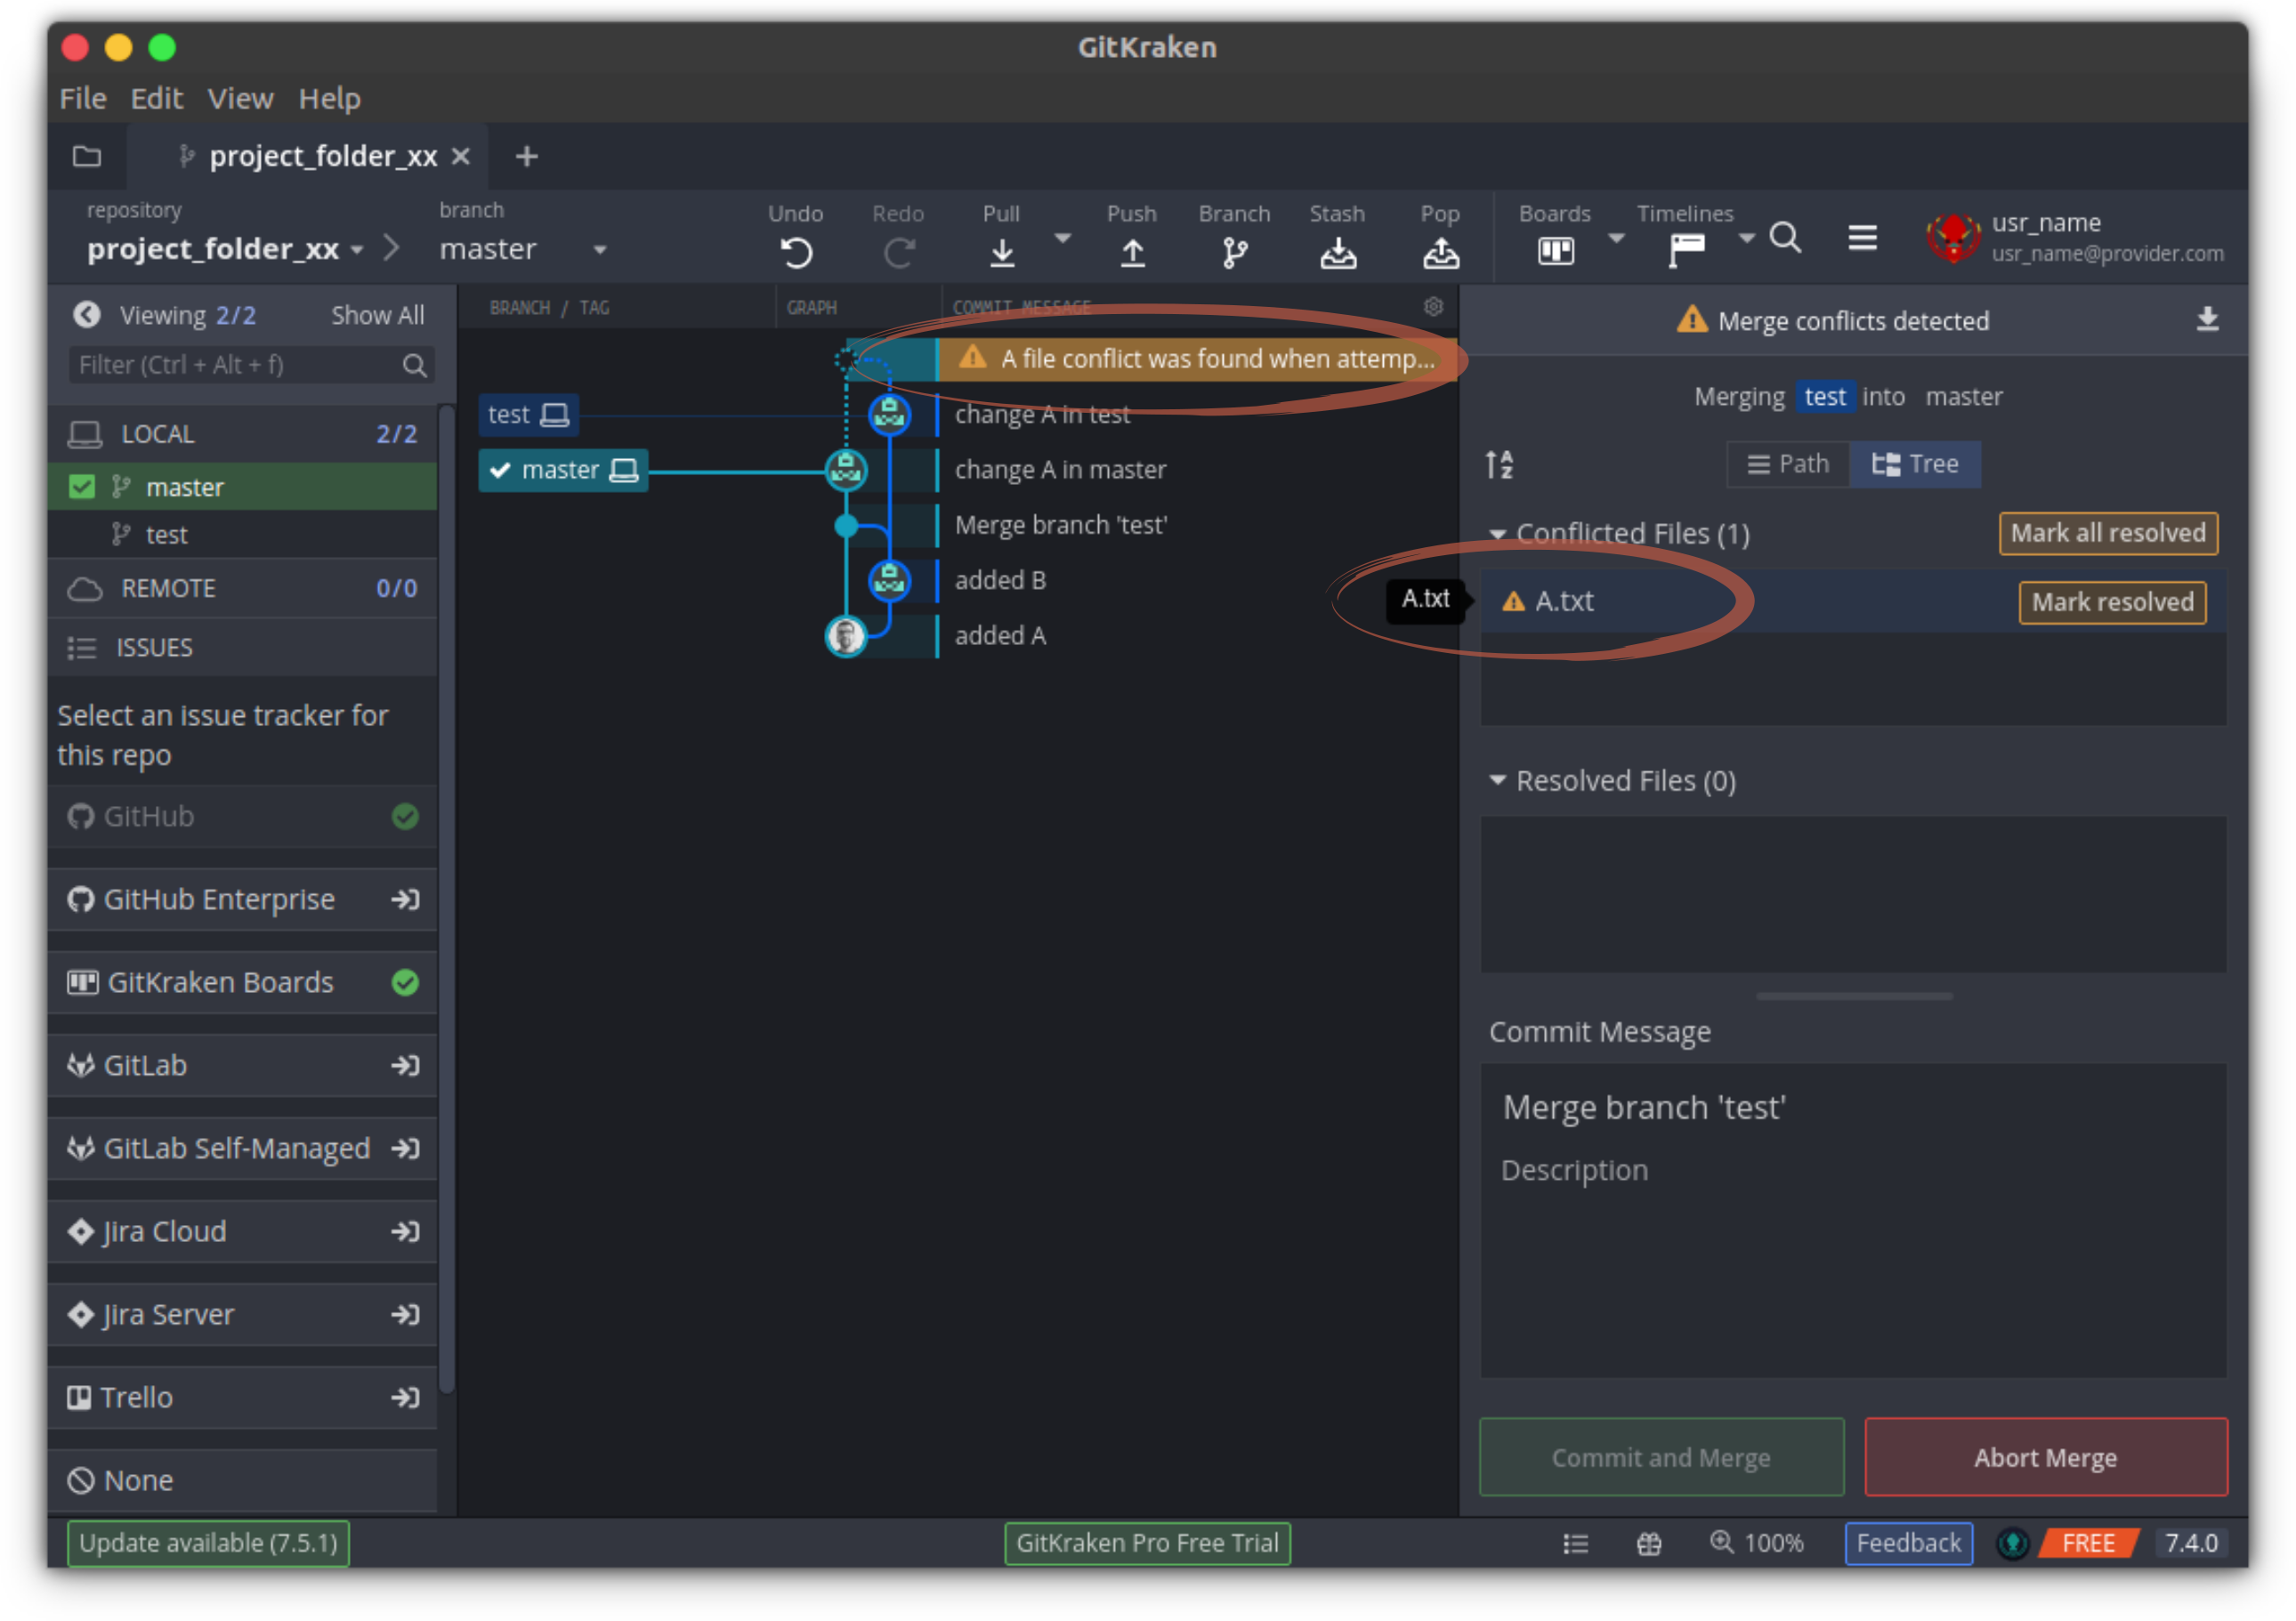
git merge test This is the moment when s**t hits the fan, as git does not know how to handle the conflicting versions of A.txt and throws the error “merge failed”. Git is kind of paralyzed by this and needs your manual intervention to resolve the conflict.

We can inspect the mess (the conflicting file(s)) by clicking on A.txt in the (now open) conflict panel.
In the side by side mode, we see the offending lines in the two versions. It appears that gitkraken has a tool to help solving the conflict – alas, we are being paywalled (at least I am 🙄).

So we have to bite the bullet and solve the merge conflict by hand. To do this, re-open A.txt in our external text editor — it has changed quite a bit 🤨:
AAA           <-- agreement between both branches
<<<<<<<<<<< HEAD
aaa           <-- additions from our current branch (master) that are not in test
===========
BBB           <-- additions form the imported branch (test) that are not in master
>>>>>>>>>>> test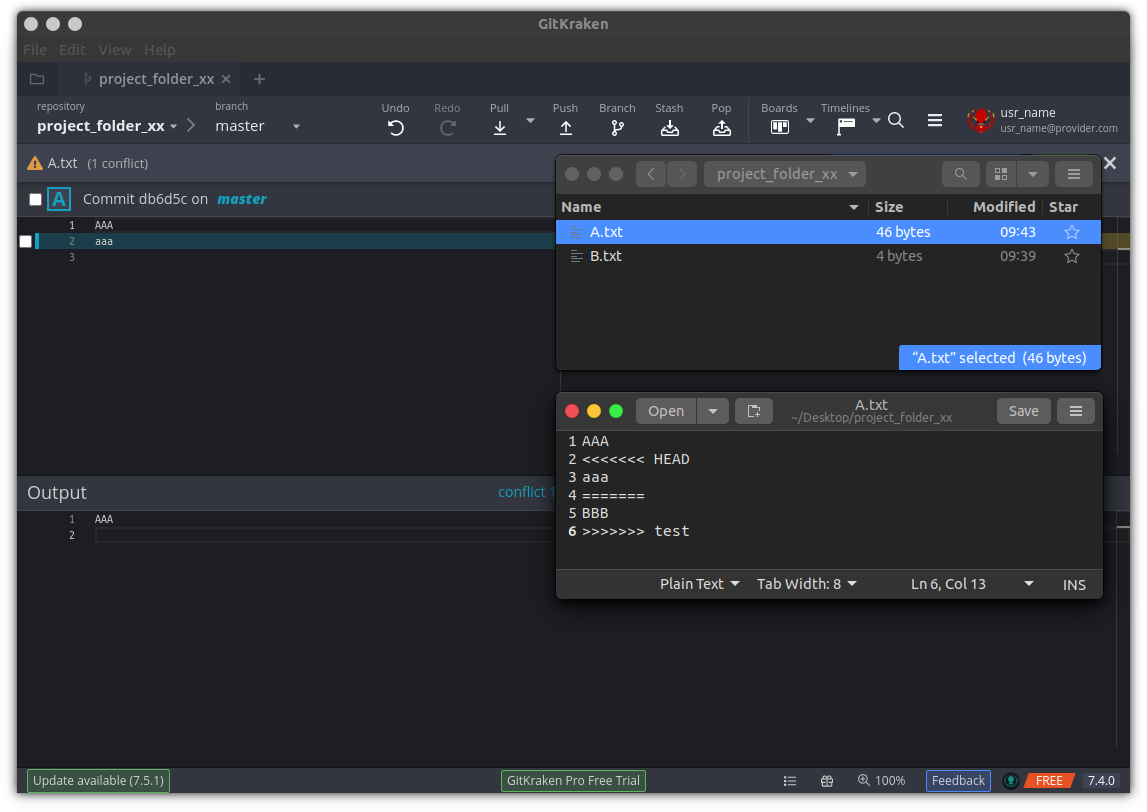
## you can use any command line editor you like ;) eg.
nano A.txt
# or
vim A.txt
# or
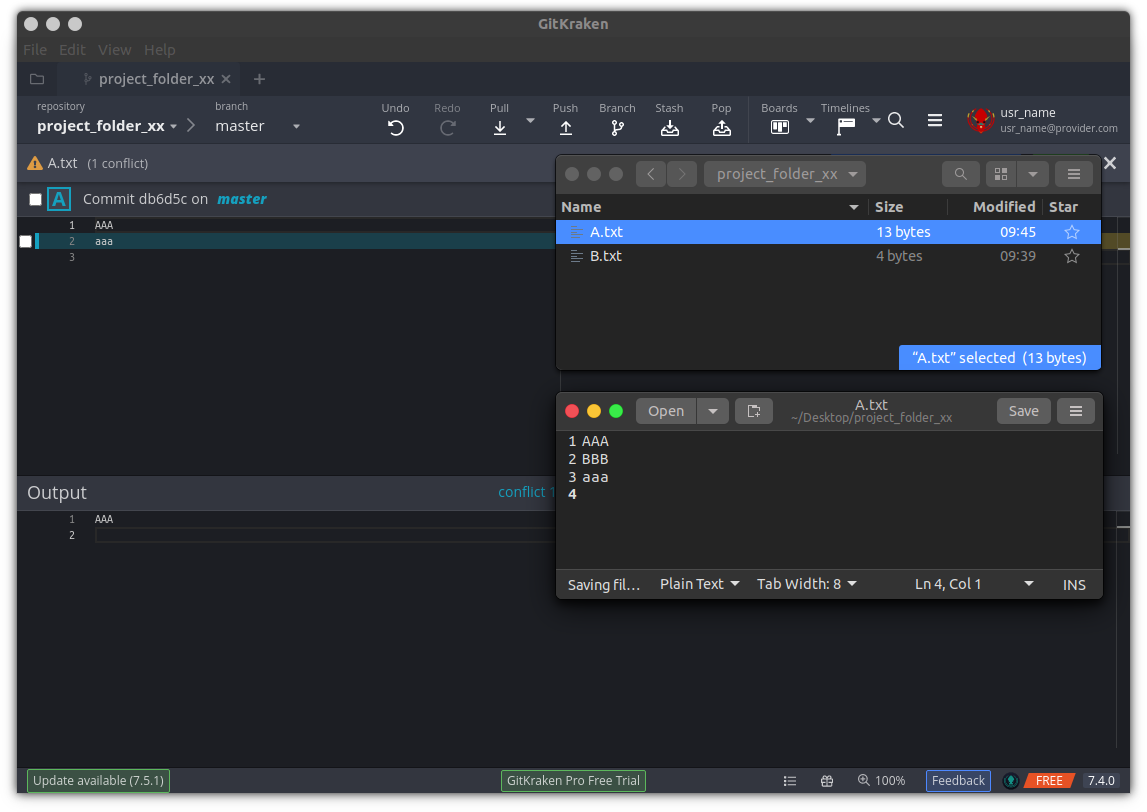
emacs A.txt # get rid of the backup A.txt~ afterwars thoughNow, git does not know if any of the two versions is to be preferred, if a sort of compromise/mix of them is intended or if both changes are to be discarded. Any of the following examples would in principle be logical, so you as user need to judge what version is the right one:
AAA  |  AAA  |  AAA  |  AAA  |  AAA
     |  aaa  |  BBB  |  aaa  |  BBB
     |       |       |  BBB  |  aaa
To settle for a solution, modify A.txt in your text editor to represent the desired state and save it.
Now, you can hit the “Mark all resolved button”…
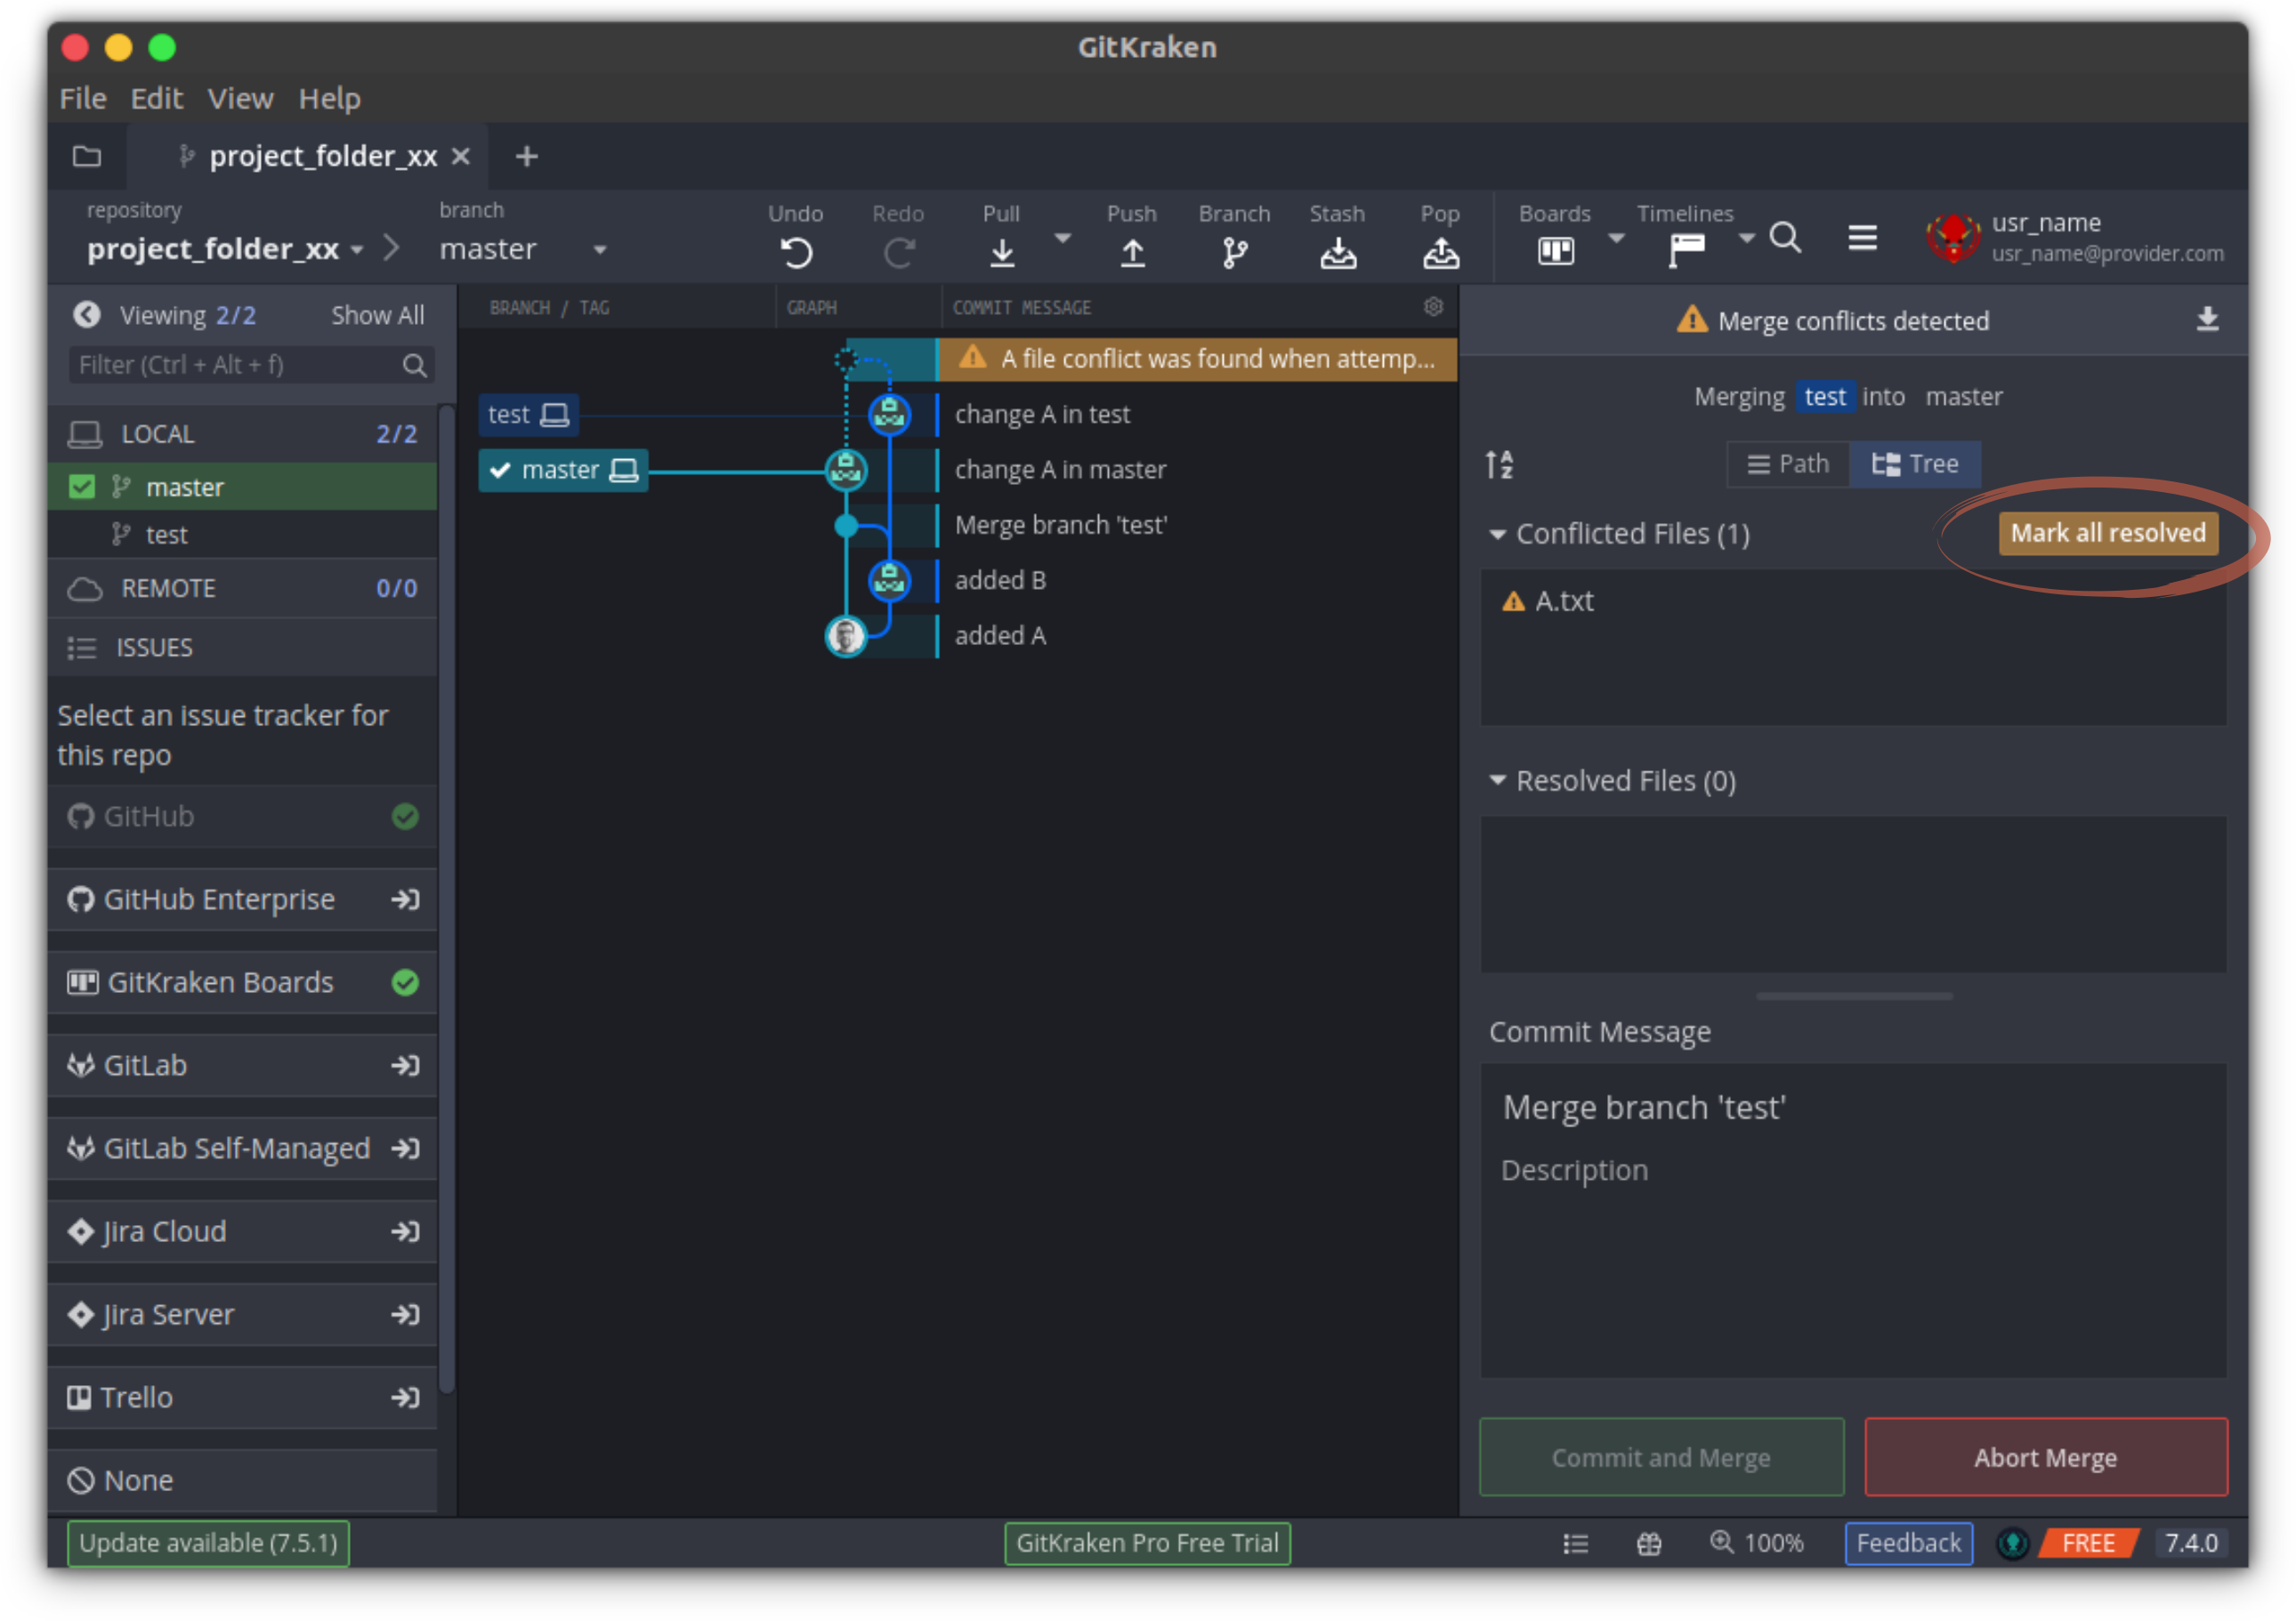
git add A.txt… and commit the resolved conflict …

git commit -m "conflict in A resolved"… which completes the pending merge:
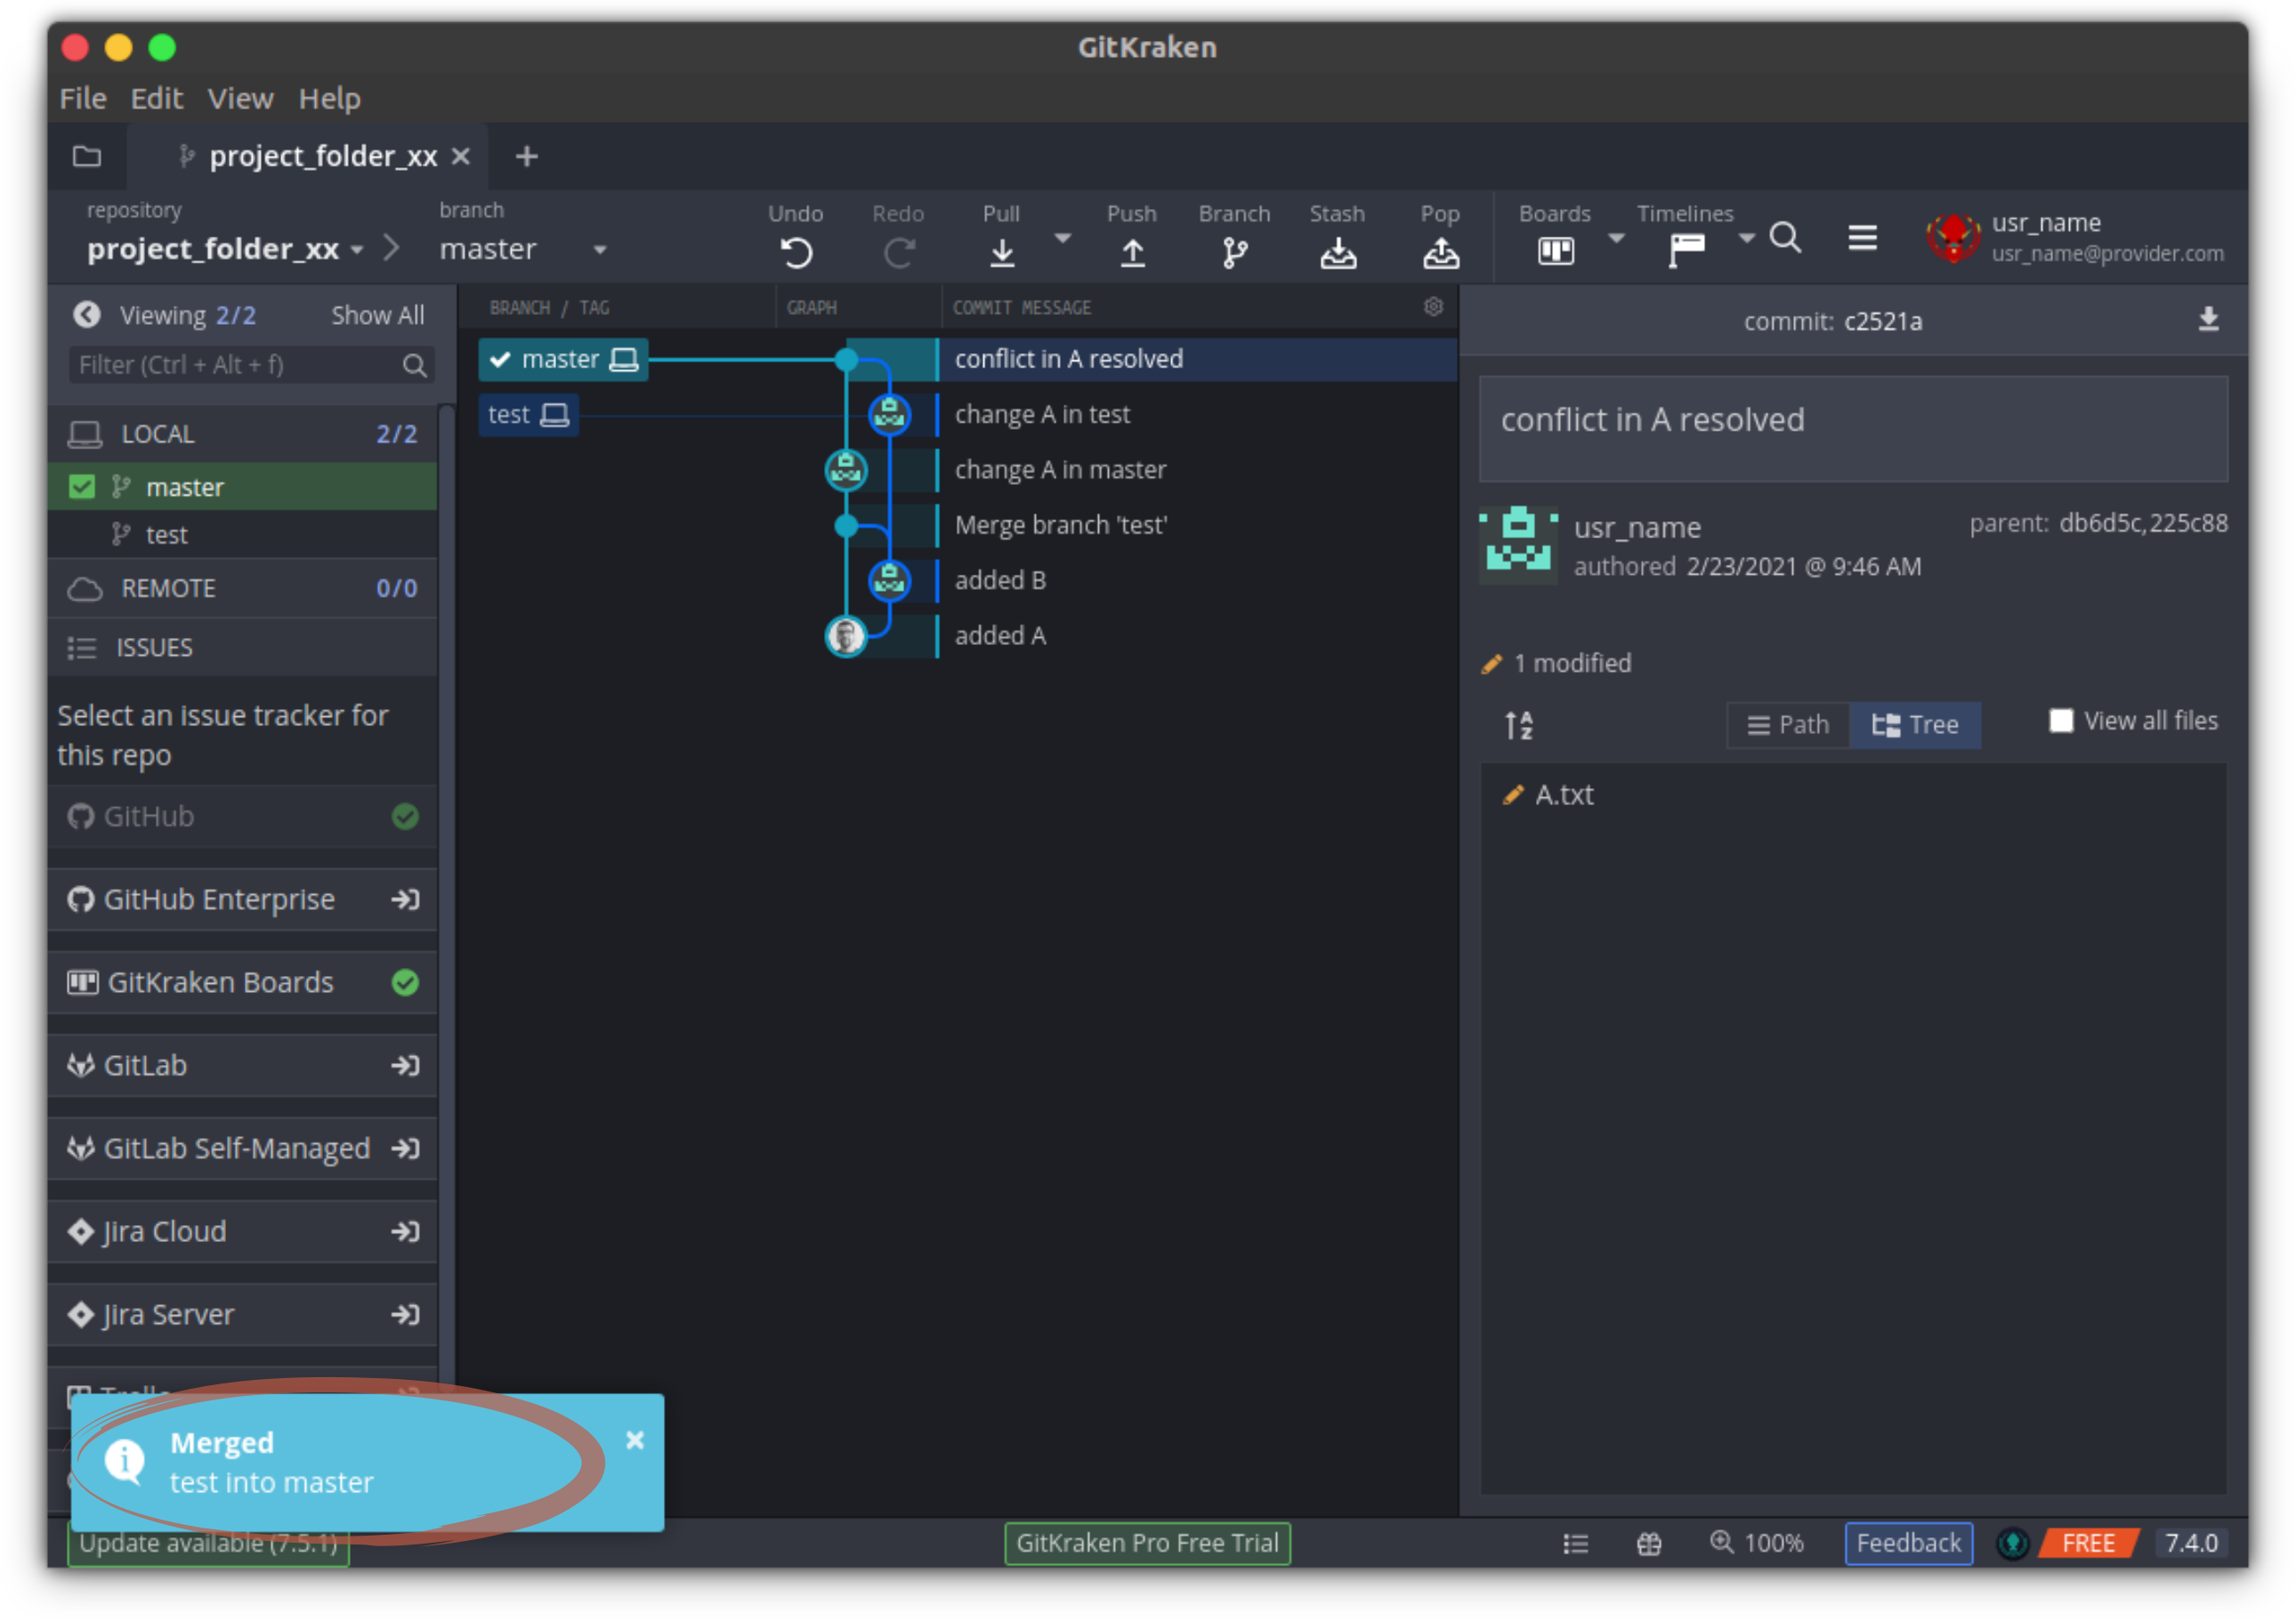
You are done with the Single player part of the workshop 👏 — remember to push the latest changes to also update your repository on github before you get yourself a ☕
Multiplayer
Break Out [4]
Now, for the rest of our files (C.txt and D.txt), we are going to invite a friend 😄. Creating C.txt will be a tit-for-tat situation: we will treat our friend to a C.txt and they are going to provide one for our repository.
In the following I will be talking a lot about the red player and the blue player — you will be both! You should play the red players role for changes in your own repository (project_folder_xx) and the blue players role for changes in the repository of your friend (project_folder_yy).
Forking a repository
Yet, before we are able to deal files around, we will need to get connected somehow. Although it is possible to directly clone our friends repository from their github account to our laptop, we will not be able to push our changes to their github account.
We will therefore need to take a detour and create a connected instance of their repository on our own github account. Specifically, we will fork their repository on github.
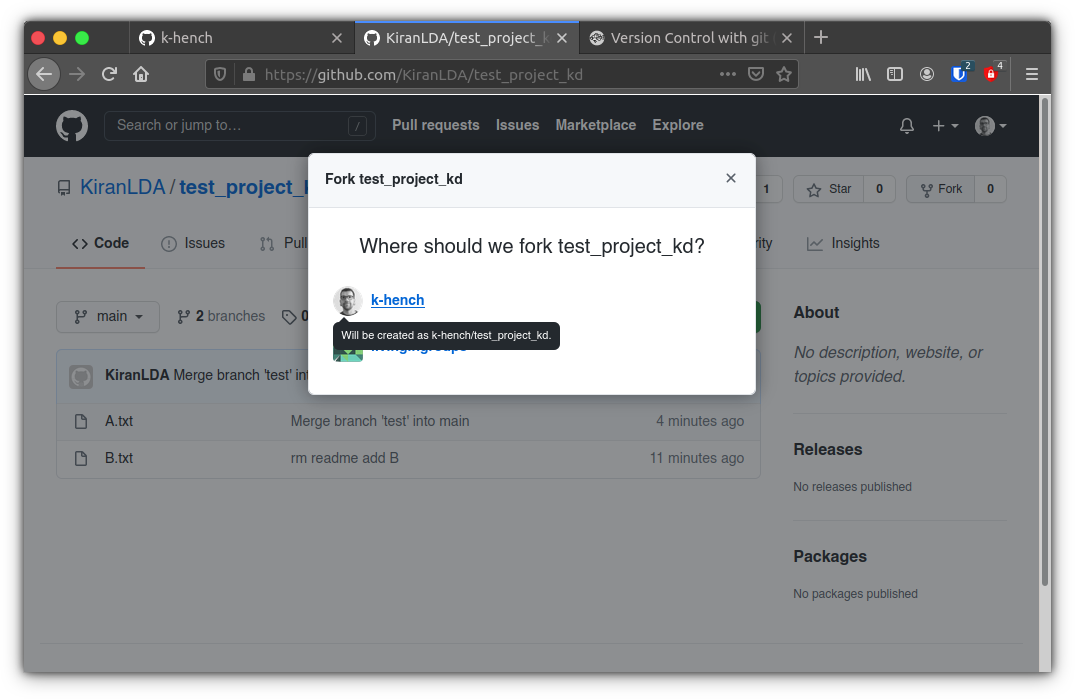
To do this, log onto github and then find the project_folder_yy (yy being your friends initials) on their account. When you have found it, you can create a copy for you own account by clicking the fork button:

# there is no command line way for the github sections (that I know of) - every one needs to do the clicky parts... 😑If you are a member of our github group (livingingroups), you might be asked if you’d like to spam the group or if the repo should be copied to your private account — please choose your private account 🙄…
After the successful forking, you should find the copy on your own github account. Remember that both of you should fork their friends repository — so make sure to fork and be forked 🤨.
Now, as nice as it is to have a copy of our friends on github, if we want to add content to this repo, we will need to make a local clone of this repo on our laptop.
Cloning a repository from github in gitkraken is quite similar to intitalizing a new repository. So, like in the begining of the homework, click on the folder icon in the upper left corner and choose the Clone menu. In the GitHub.com sub-menu, you should be able to select the forked repository from the drop-down menu and clone it to your Desktop.
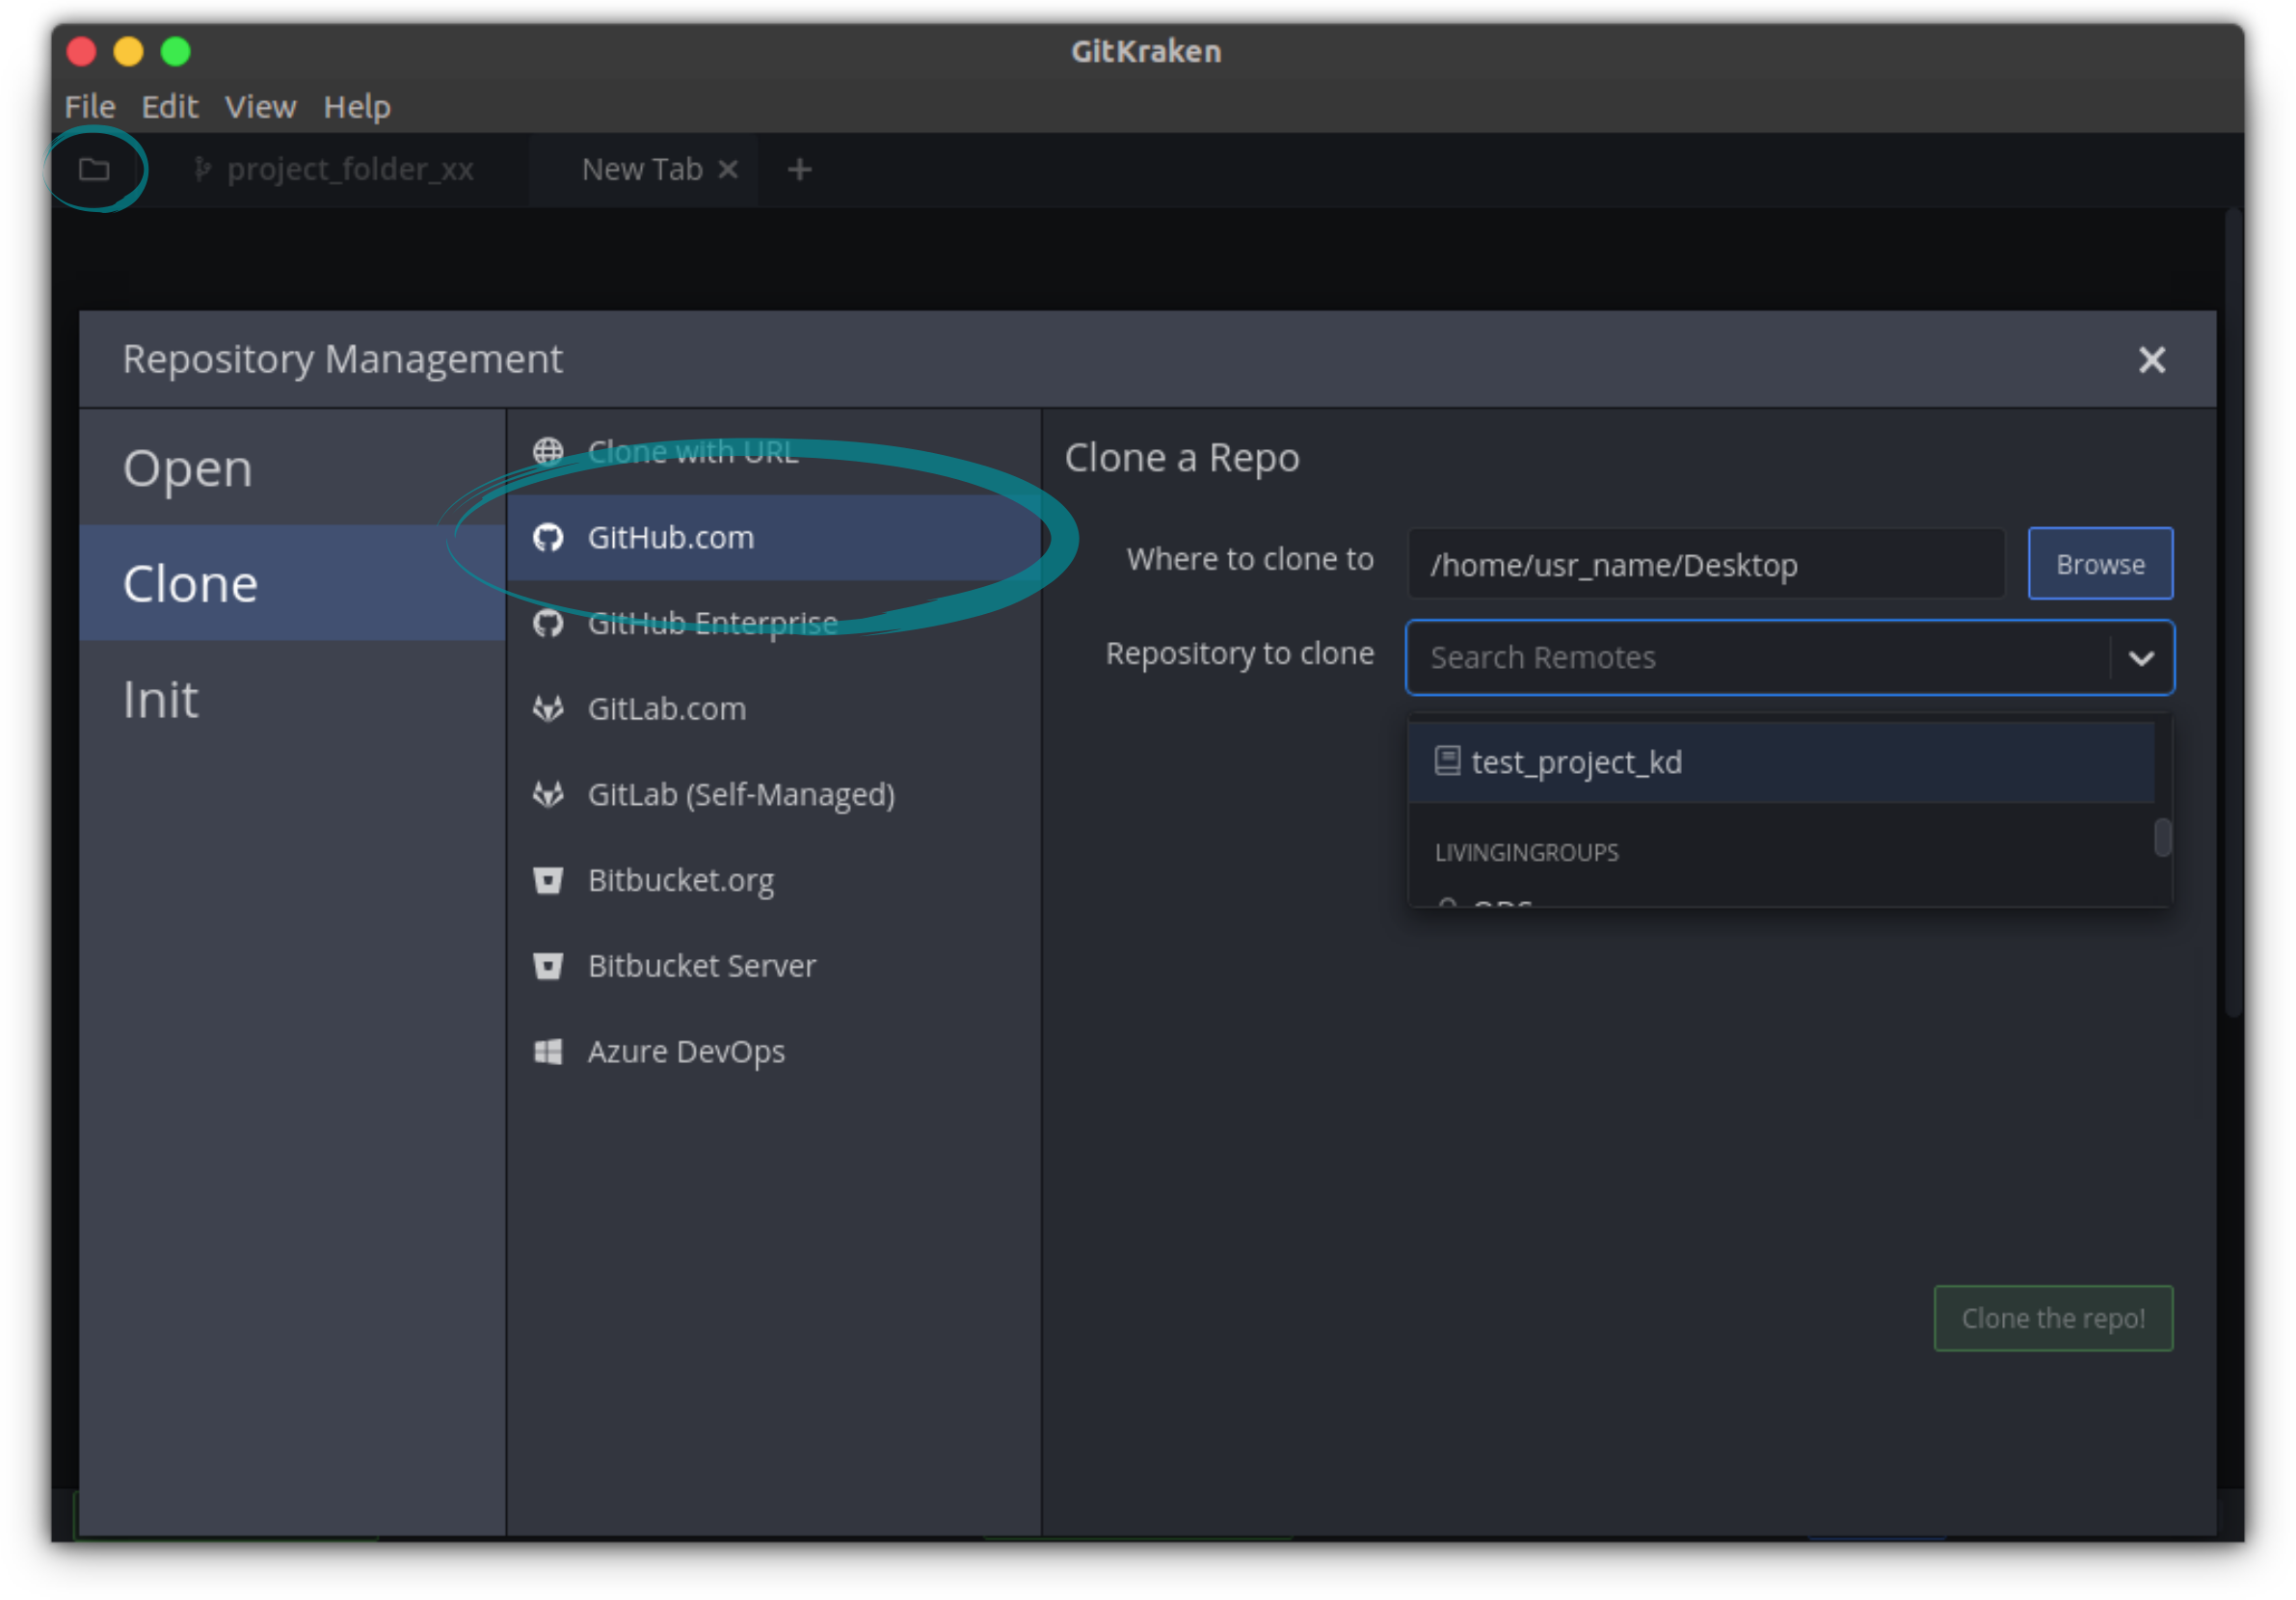
cd ~/Desktop
git clone https://github.com/your_usr_name/project_folder_yy.git
After successful cloning, you can open the cloned repo of you friend in a second tab in gitkraken. You will see the history of changes you friend has made during the homework and the Single player part of this workshop (version control — remember? 😉)

cd project_folder_yy
git log --oneline
(Hopefully,) all looks good so far — still there one thing missing before the setup of the fork is fully completed:
The issue is, that currently our local version of the forked repository is aware of your friends github repository only indirectly. As you will see later today, we also want to have a direct connection between our local repository and the original authors github instance it originated from. To achieve this, we’ll create a second remote that we’ll call “upstream” and that will connect our local repository directly with your friends github version:

So, far we only have had a single remote (git speak for a connection to an external instance of the repository). This was used to connect the local repository to your github account and which is called “origin”.
To add a second remote, click on the “+” button in the REMOTE panel on the left:

Using the GitHub option, you should then be able to select your friends github instance of the repository from the drop-down menu and name this remote “upstream”.
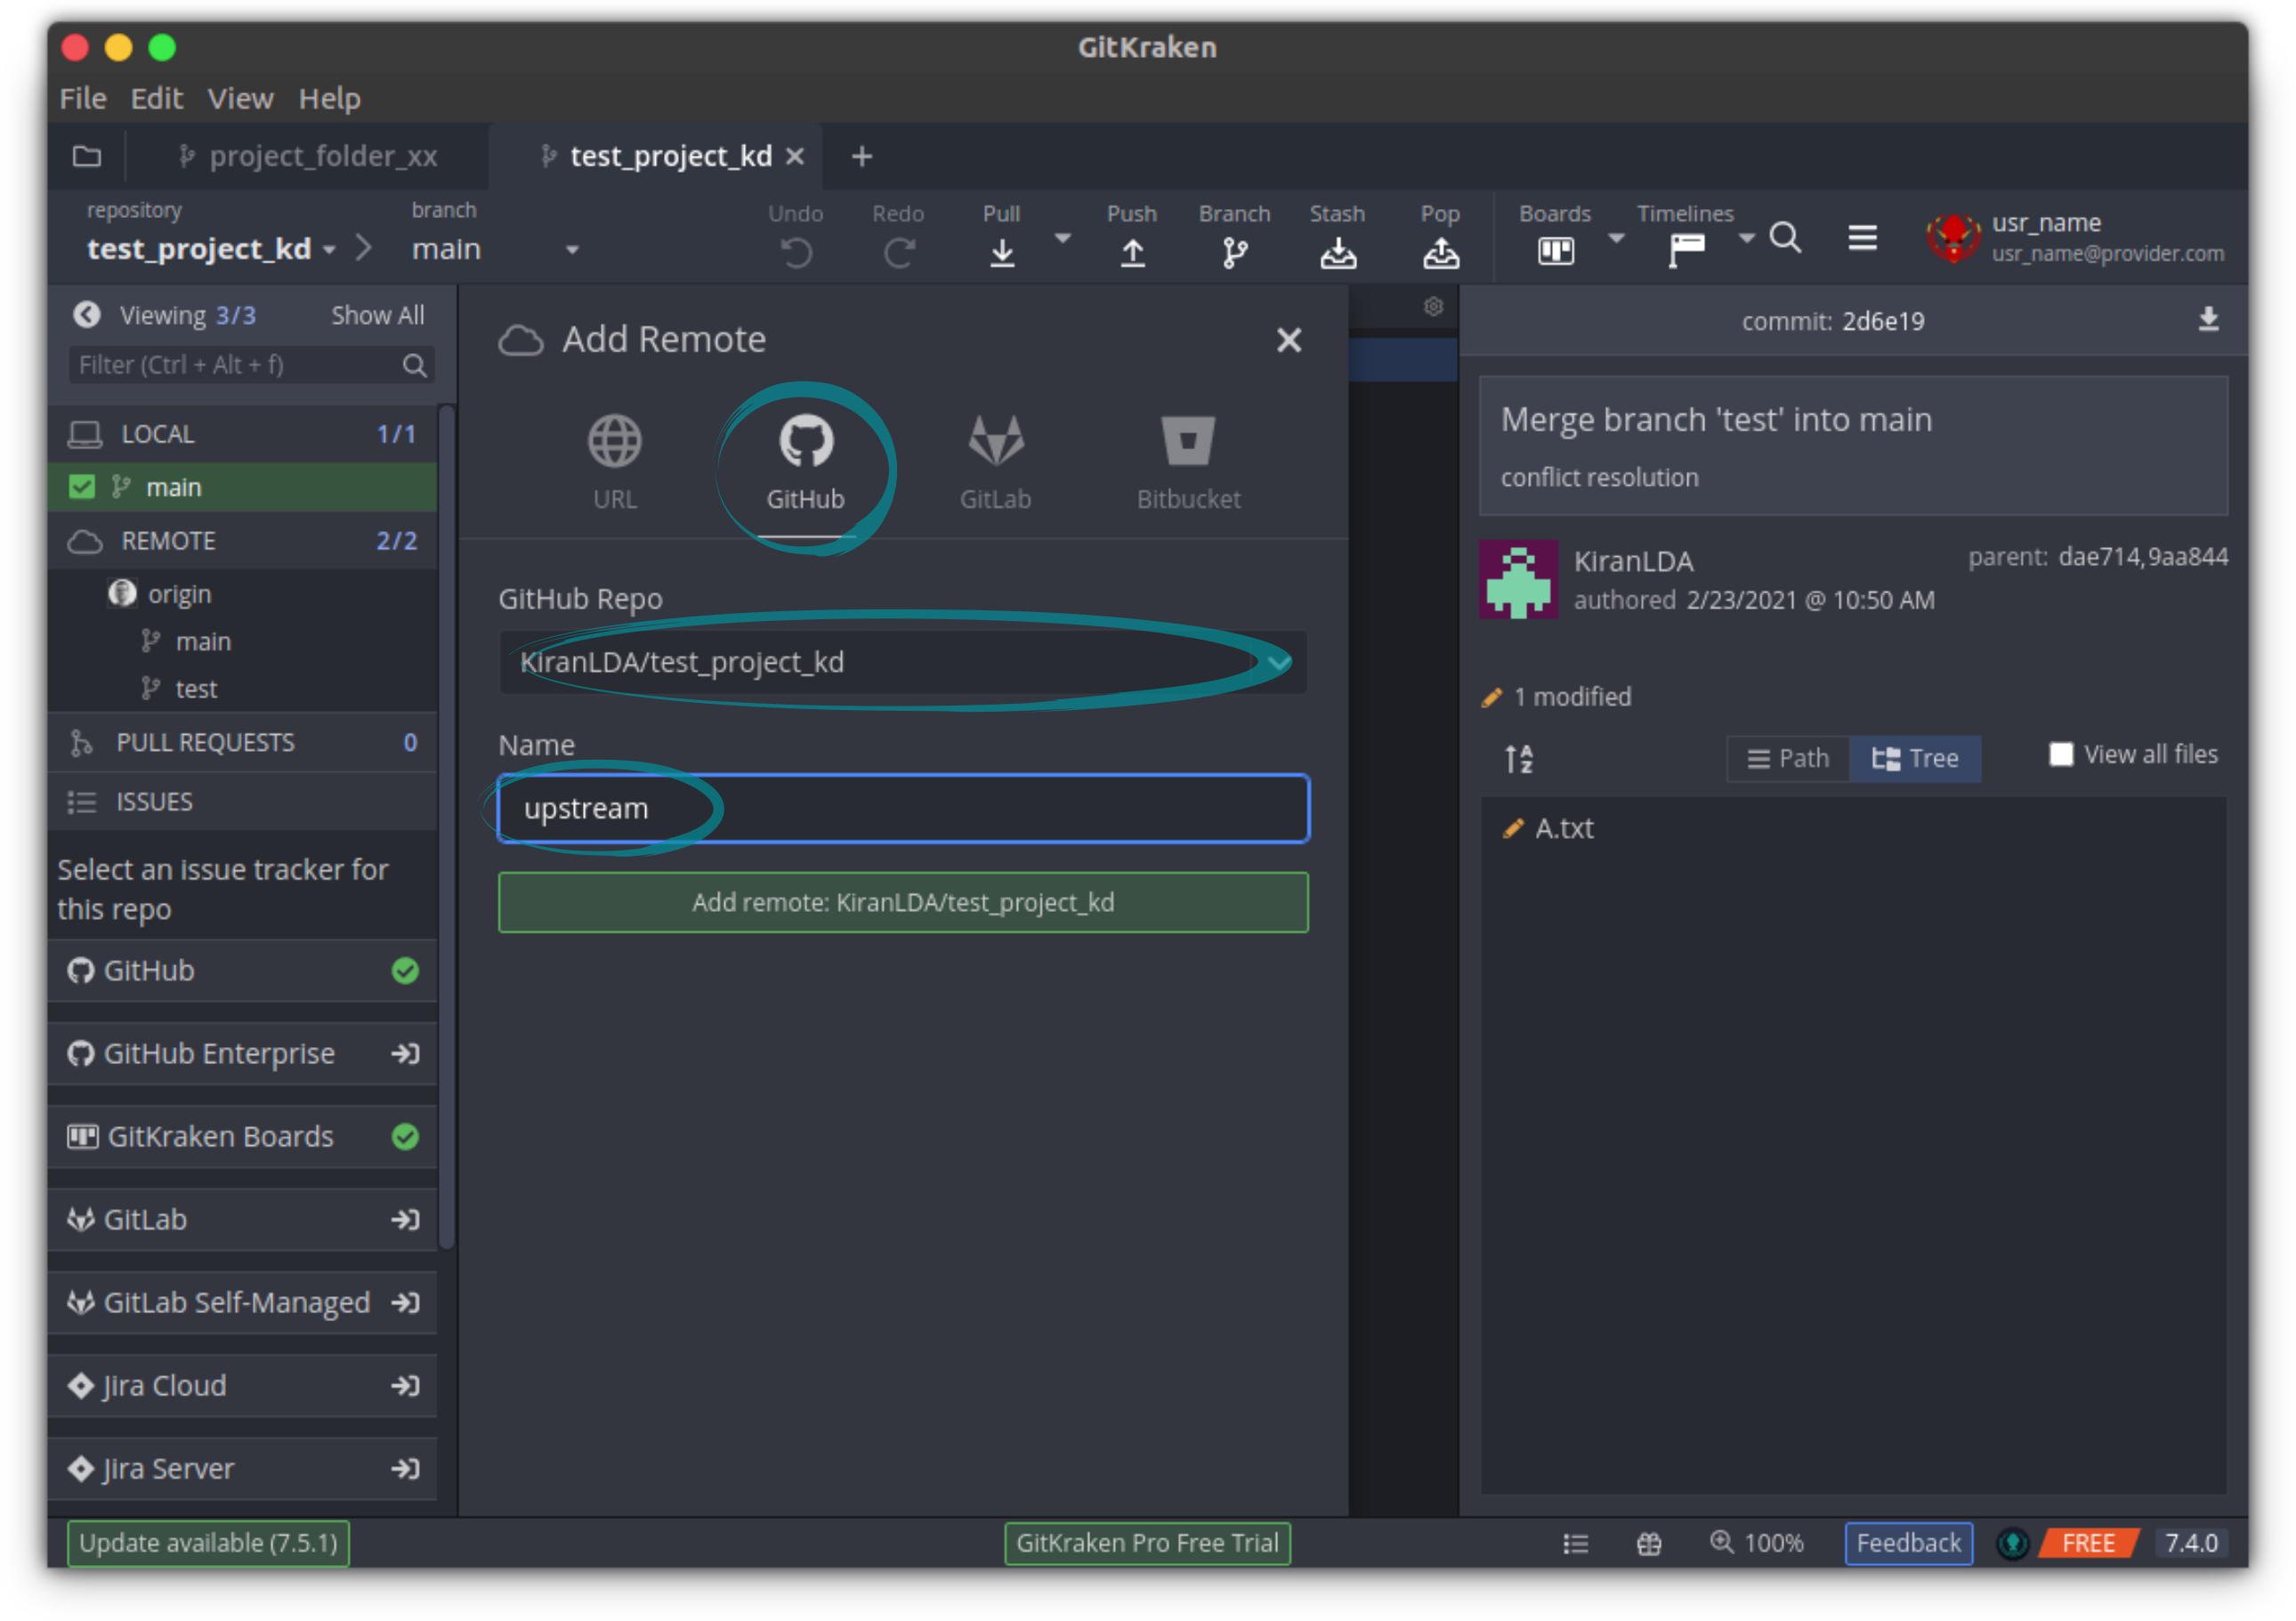
git remote add upstream https://github.com/friends_usr_name/project_folder_yy.gitPew — at this point, our fork is finally set up, we can finally get into the file production business 👍
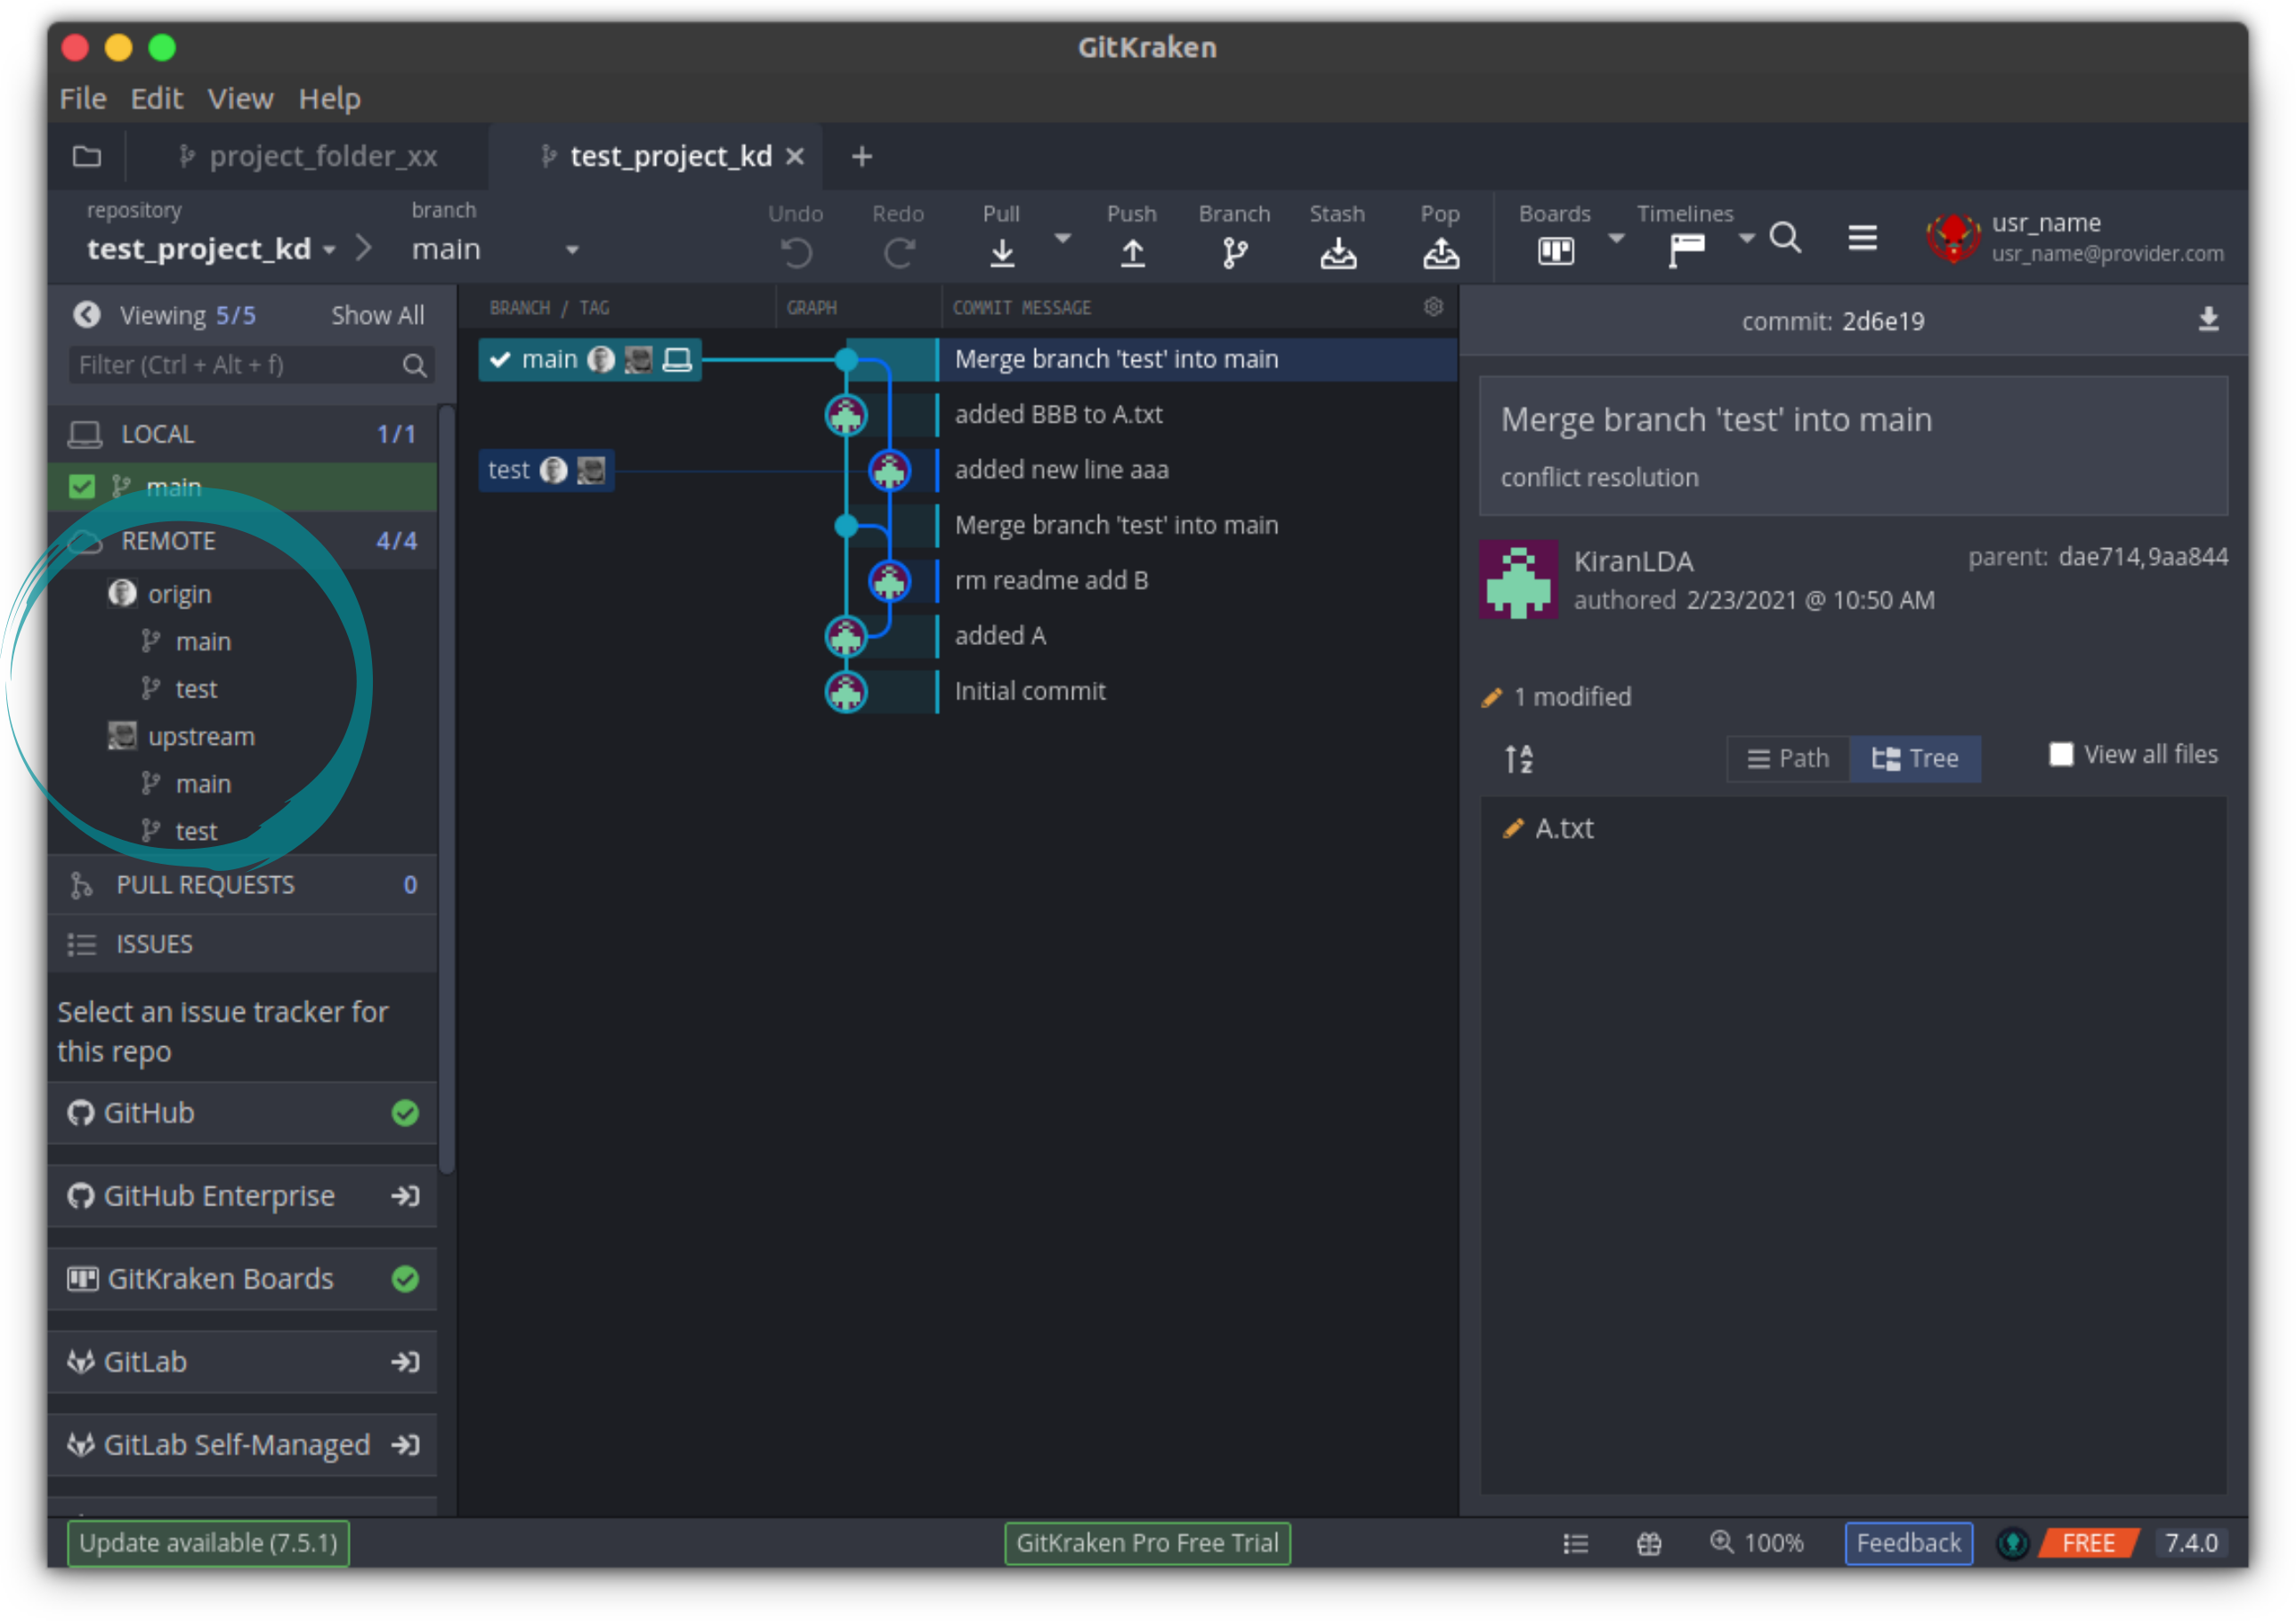
# checking all remotes on the command line
git remote -v
Break Out [5]
Changes by blue player
First, we are going to add the file C.txt to your friends repository. This is as glamorous as you might have expected: using your preferred text editor, create a text file called C.txt (filled with “CCC”) and save it within the folder project_folder_yy which you cloned.

echo "CCC" > C.txtAs always, we’ll need to stage and commit the changes in the repository.

git add C.txt
git commit -m "blue added C"
Now, we’ll push the latest commit to origin wich will update your github instance of the repository (not your friends one though).
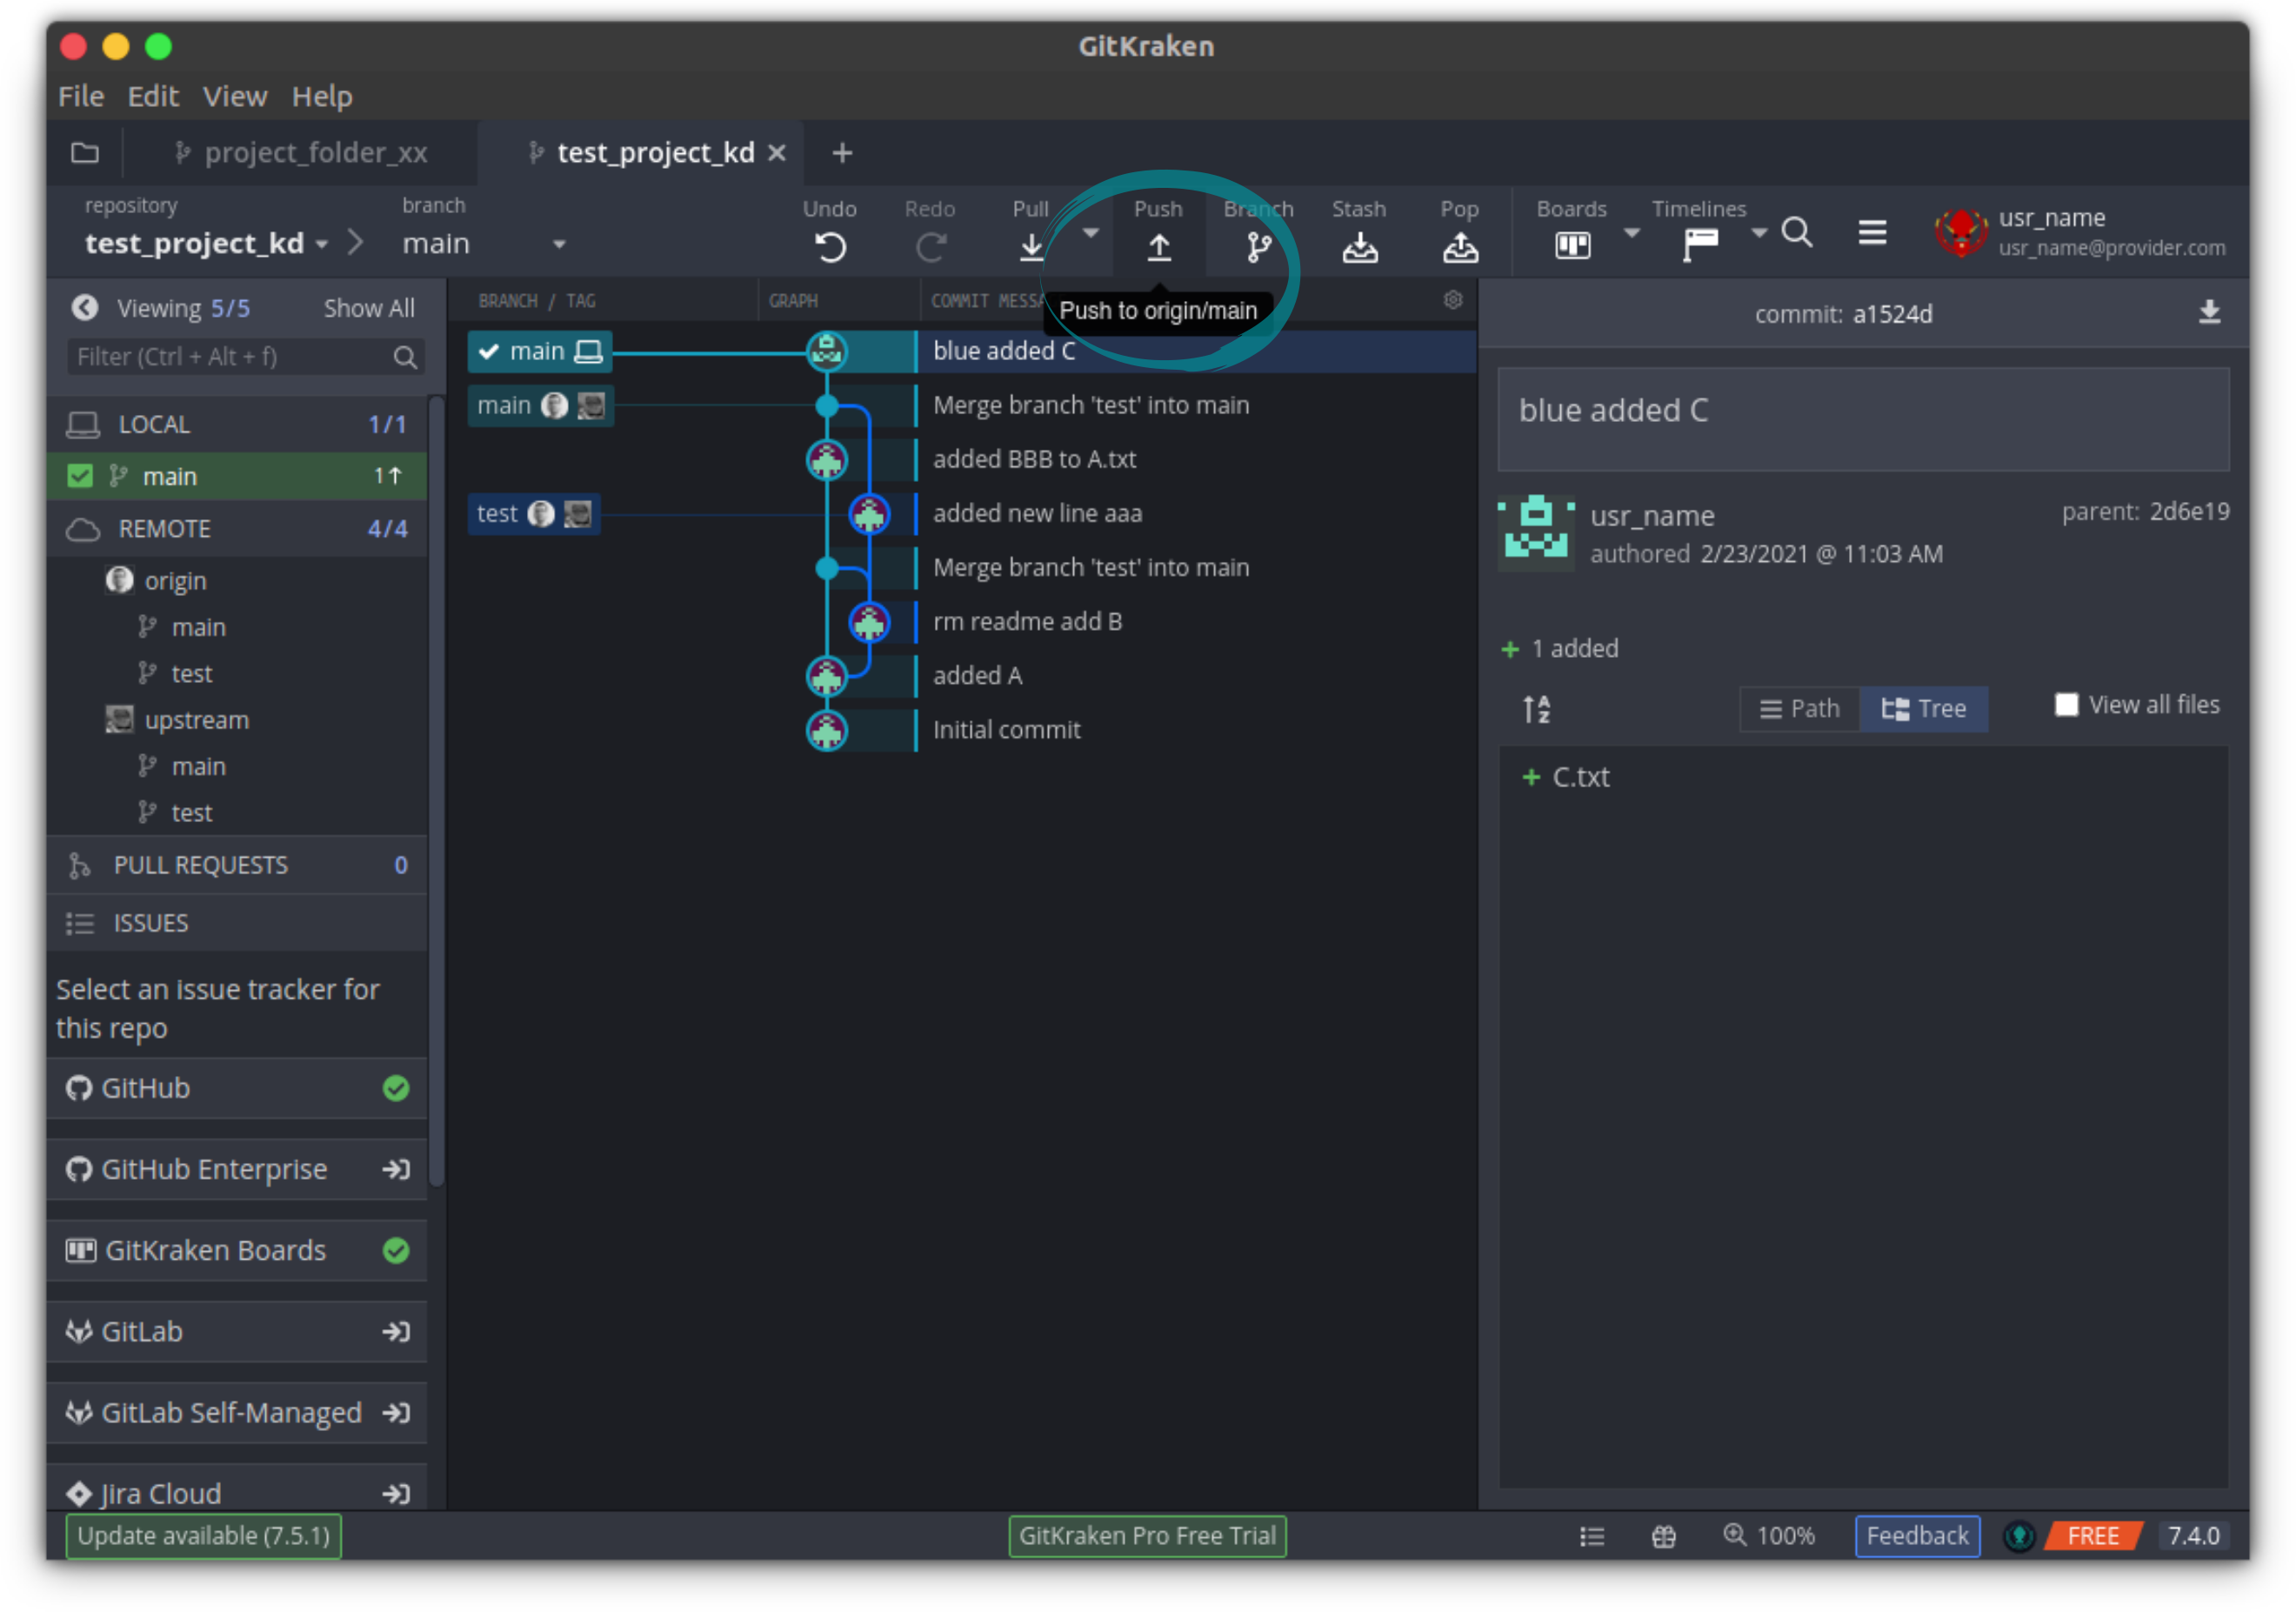

git push origin masterChanges by red player
Next, we’ll take care of the D.txt file (I’m sure you can guess its conent 🙄). This file will be added by the red player — that is, you will add this file to your own original repository (project_folder_xx).
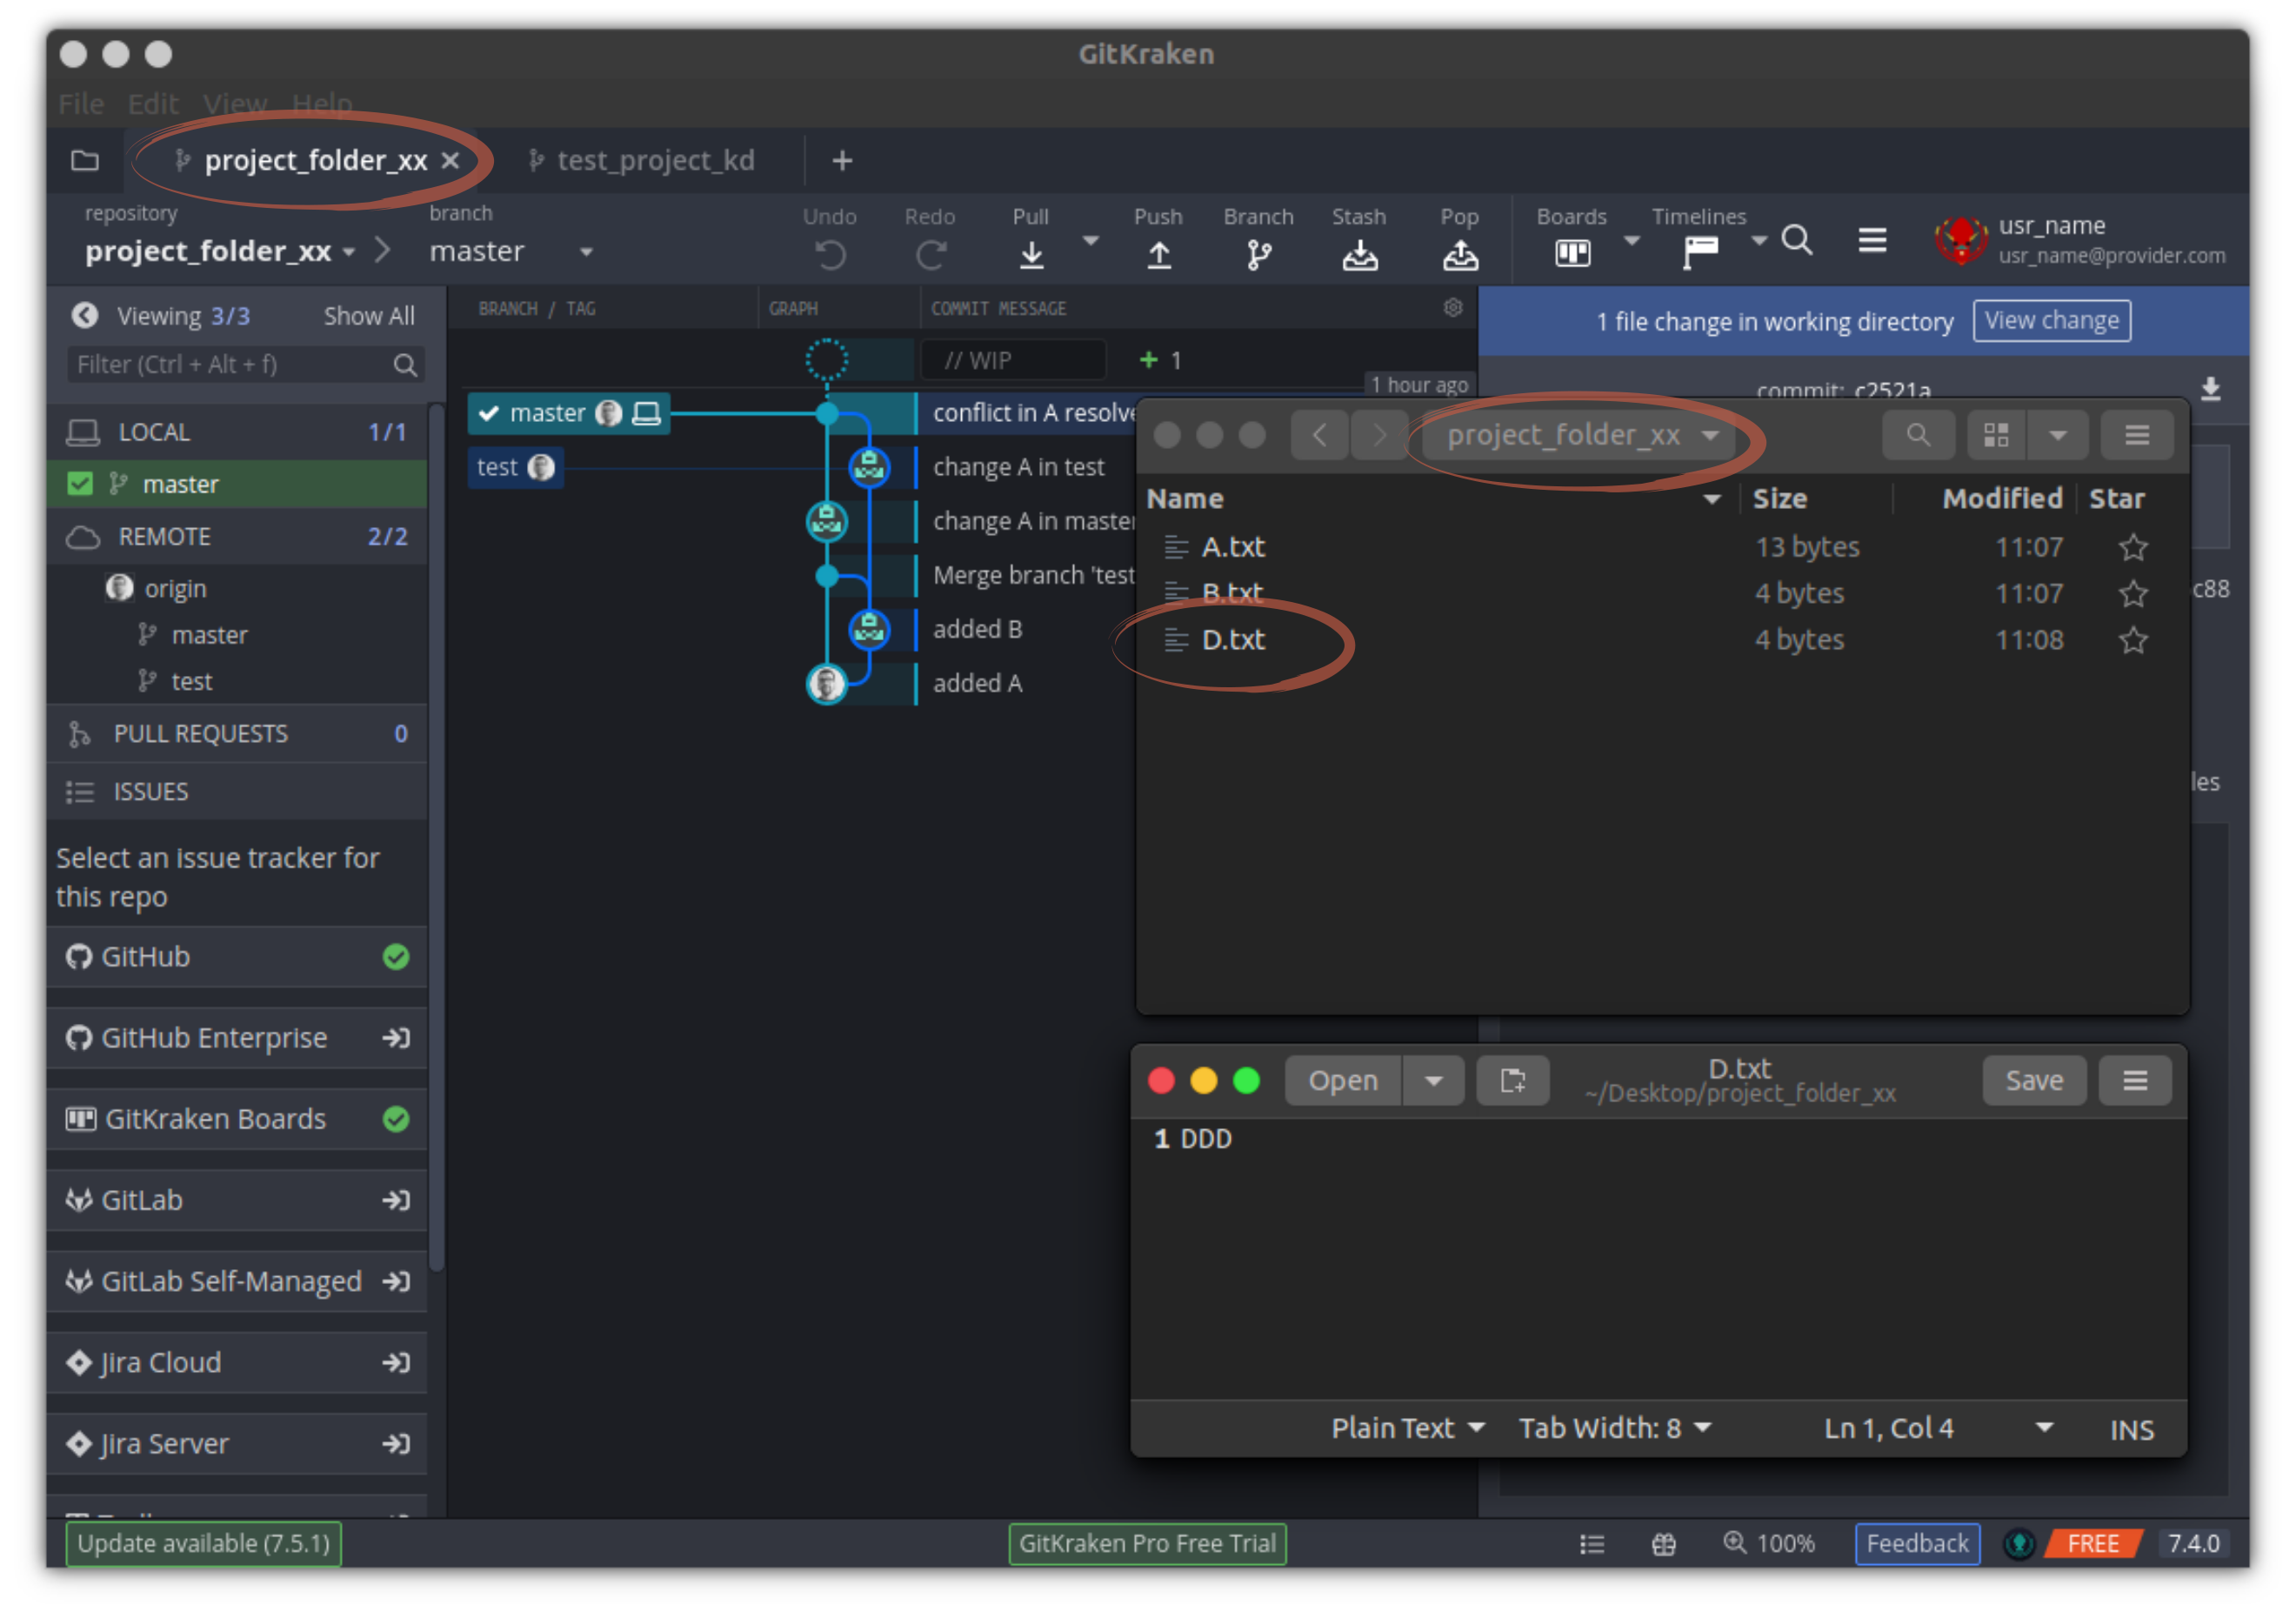
cd ~/Desktop/project_folder_xx
echo "DDD" > D.txt
Again, stage and commit the changes…
(Sorry, I forgot to screen shot 😬)git add D.txt
git commit -m "red added D"…and push the changes to origin (your github instance of your repository):
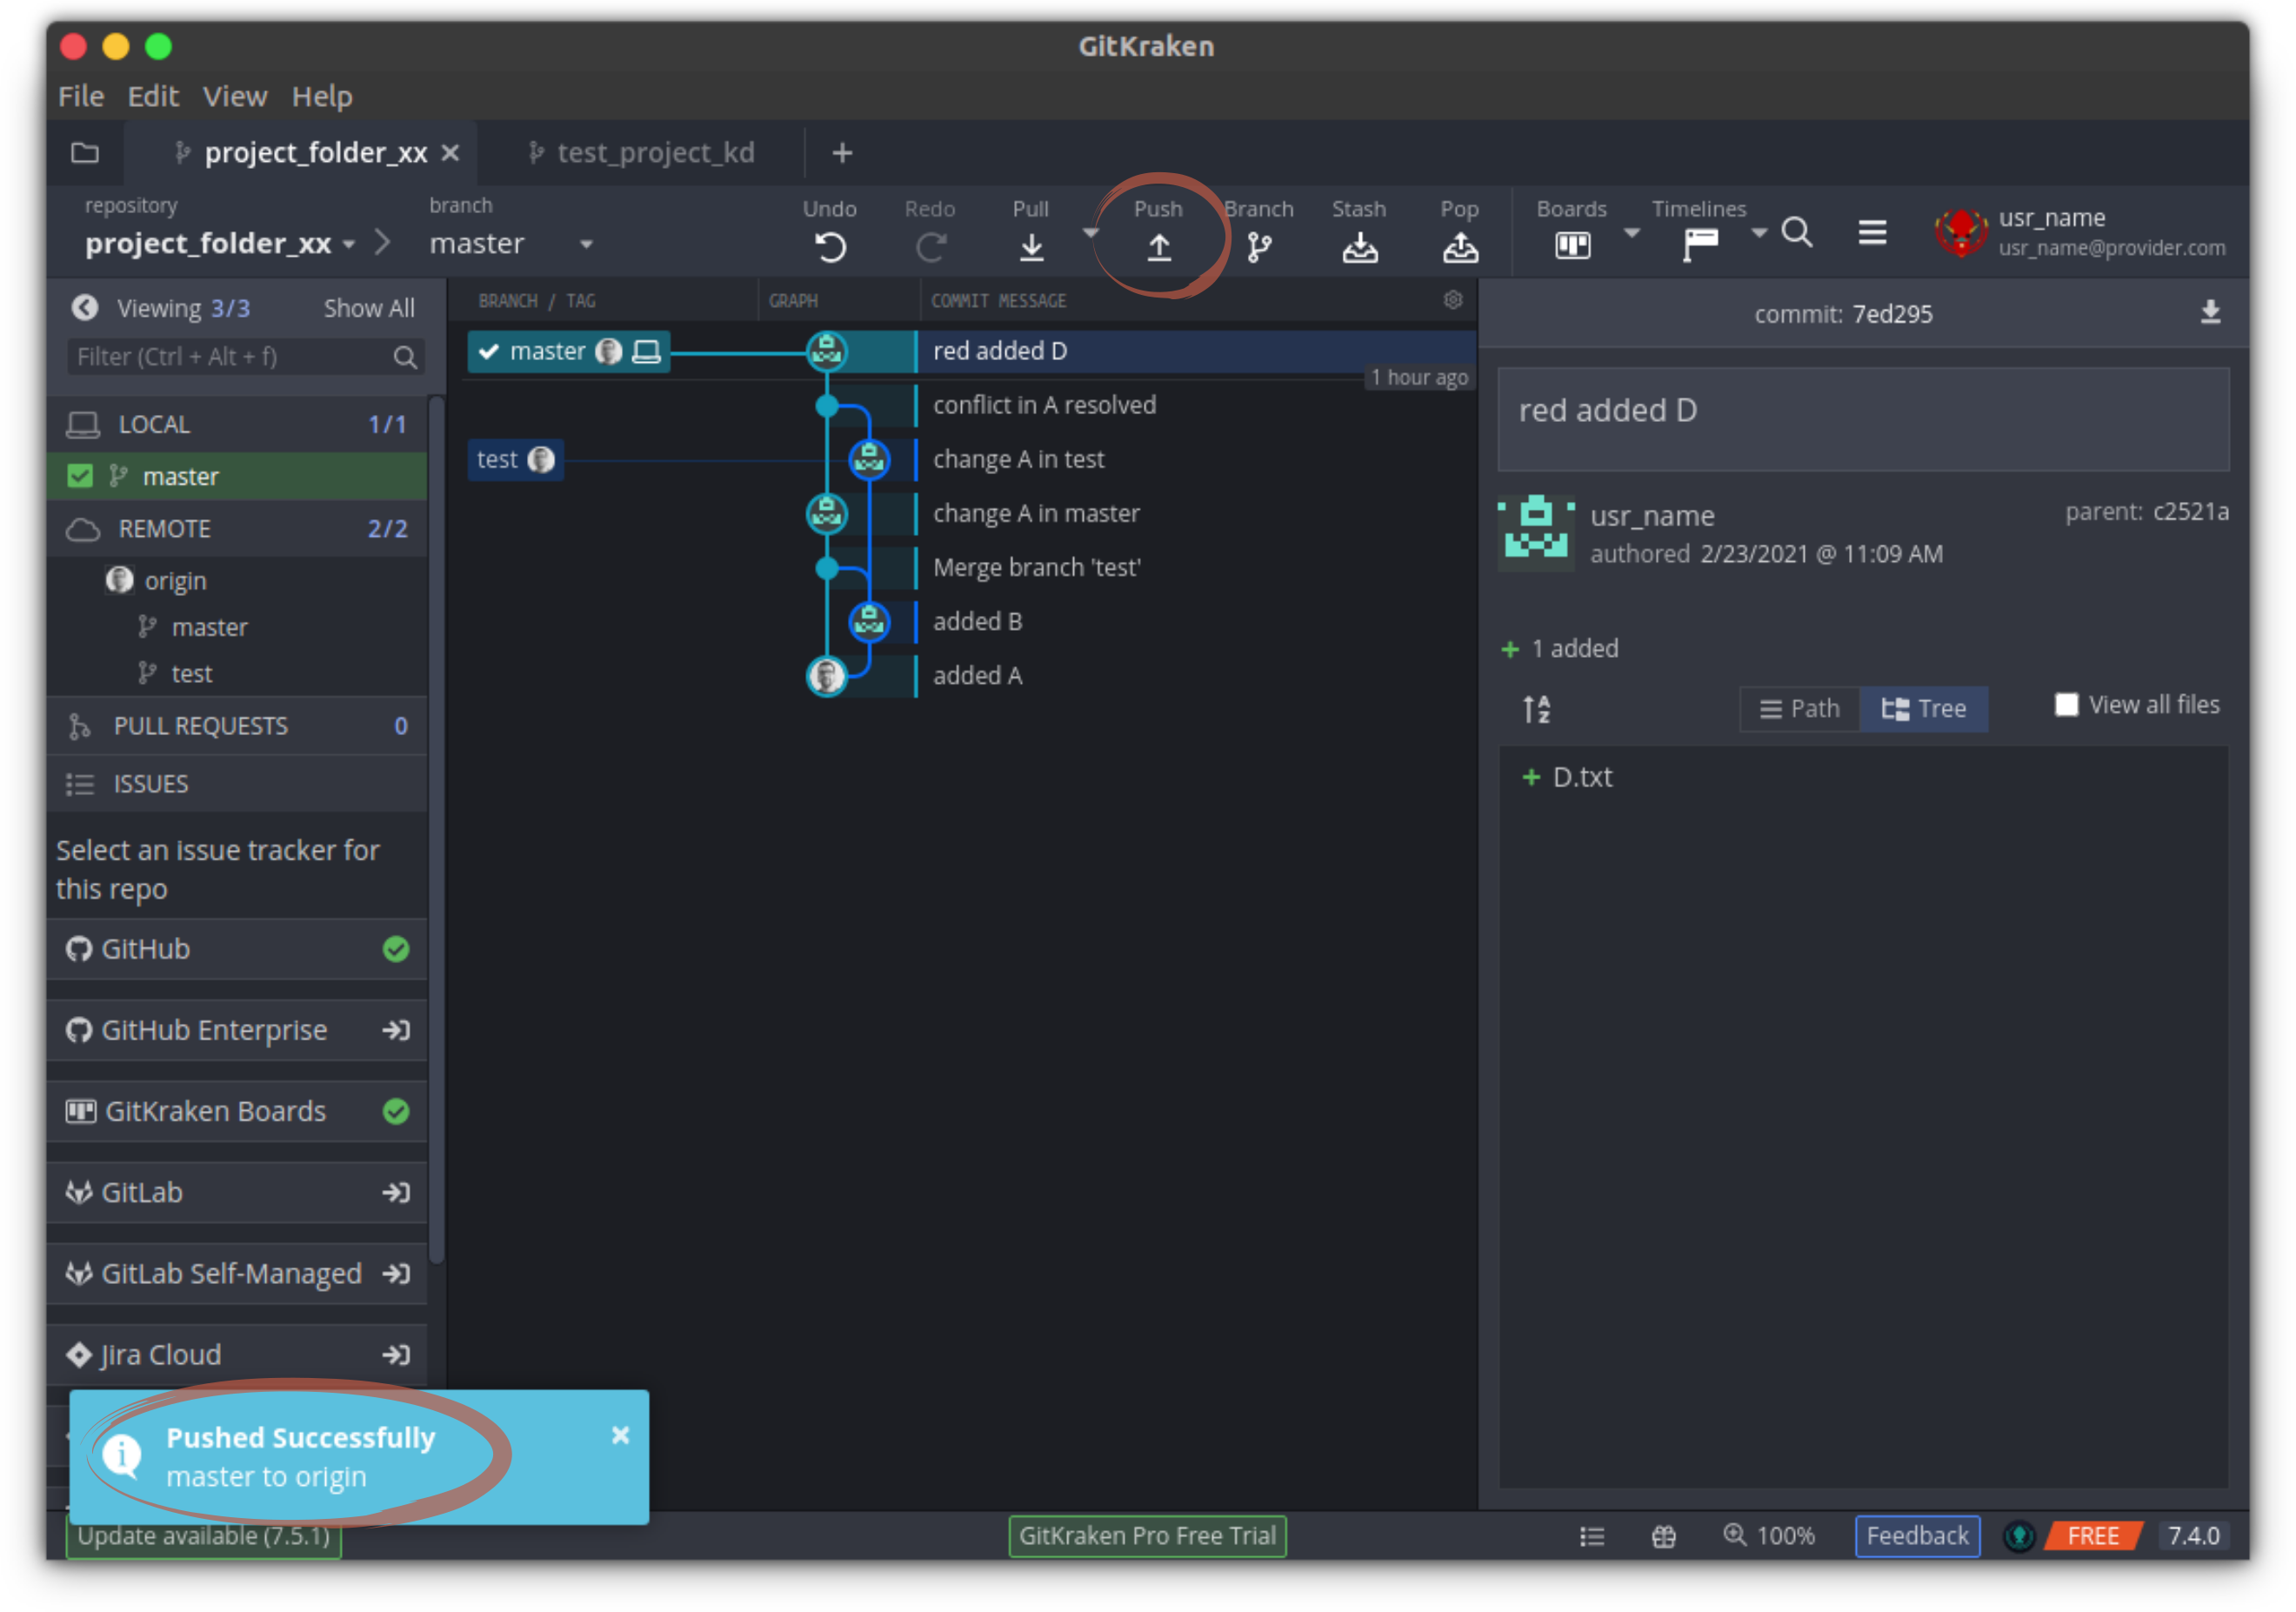
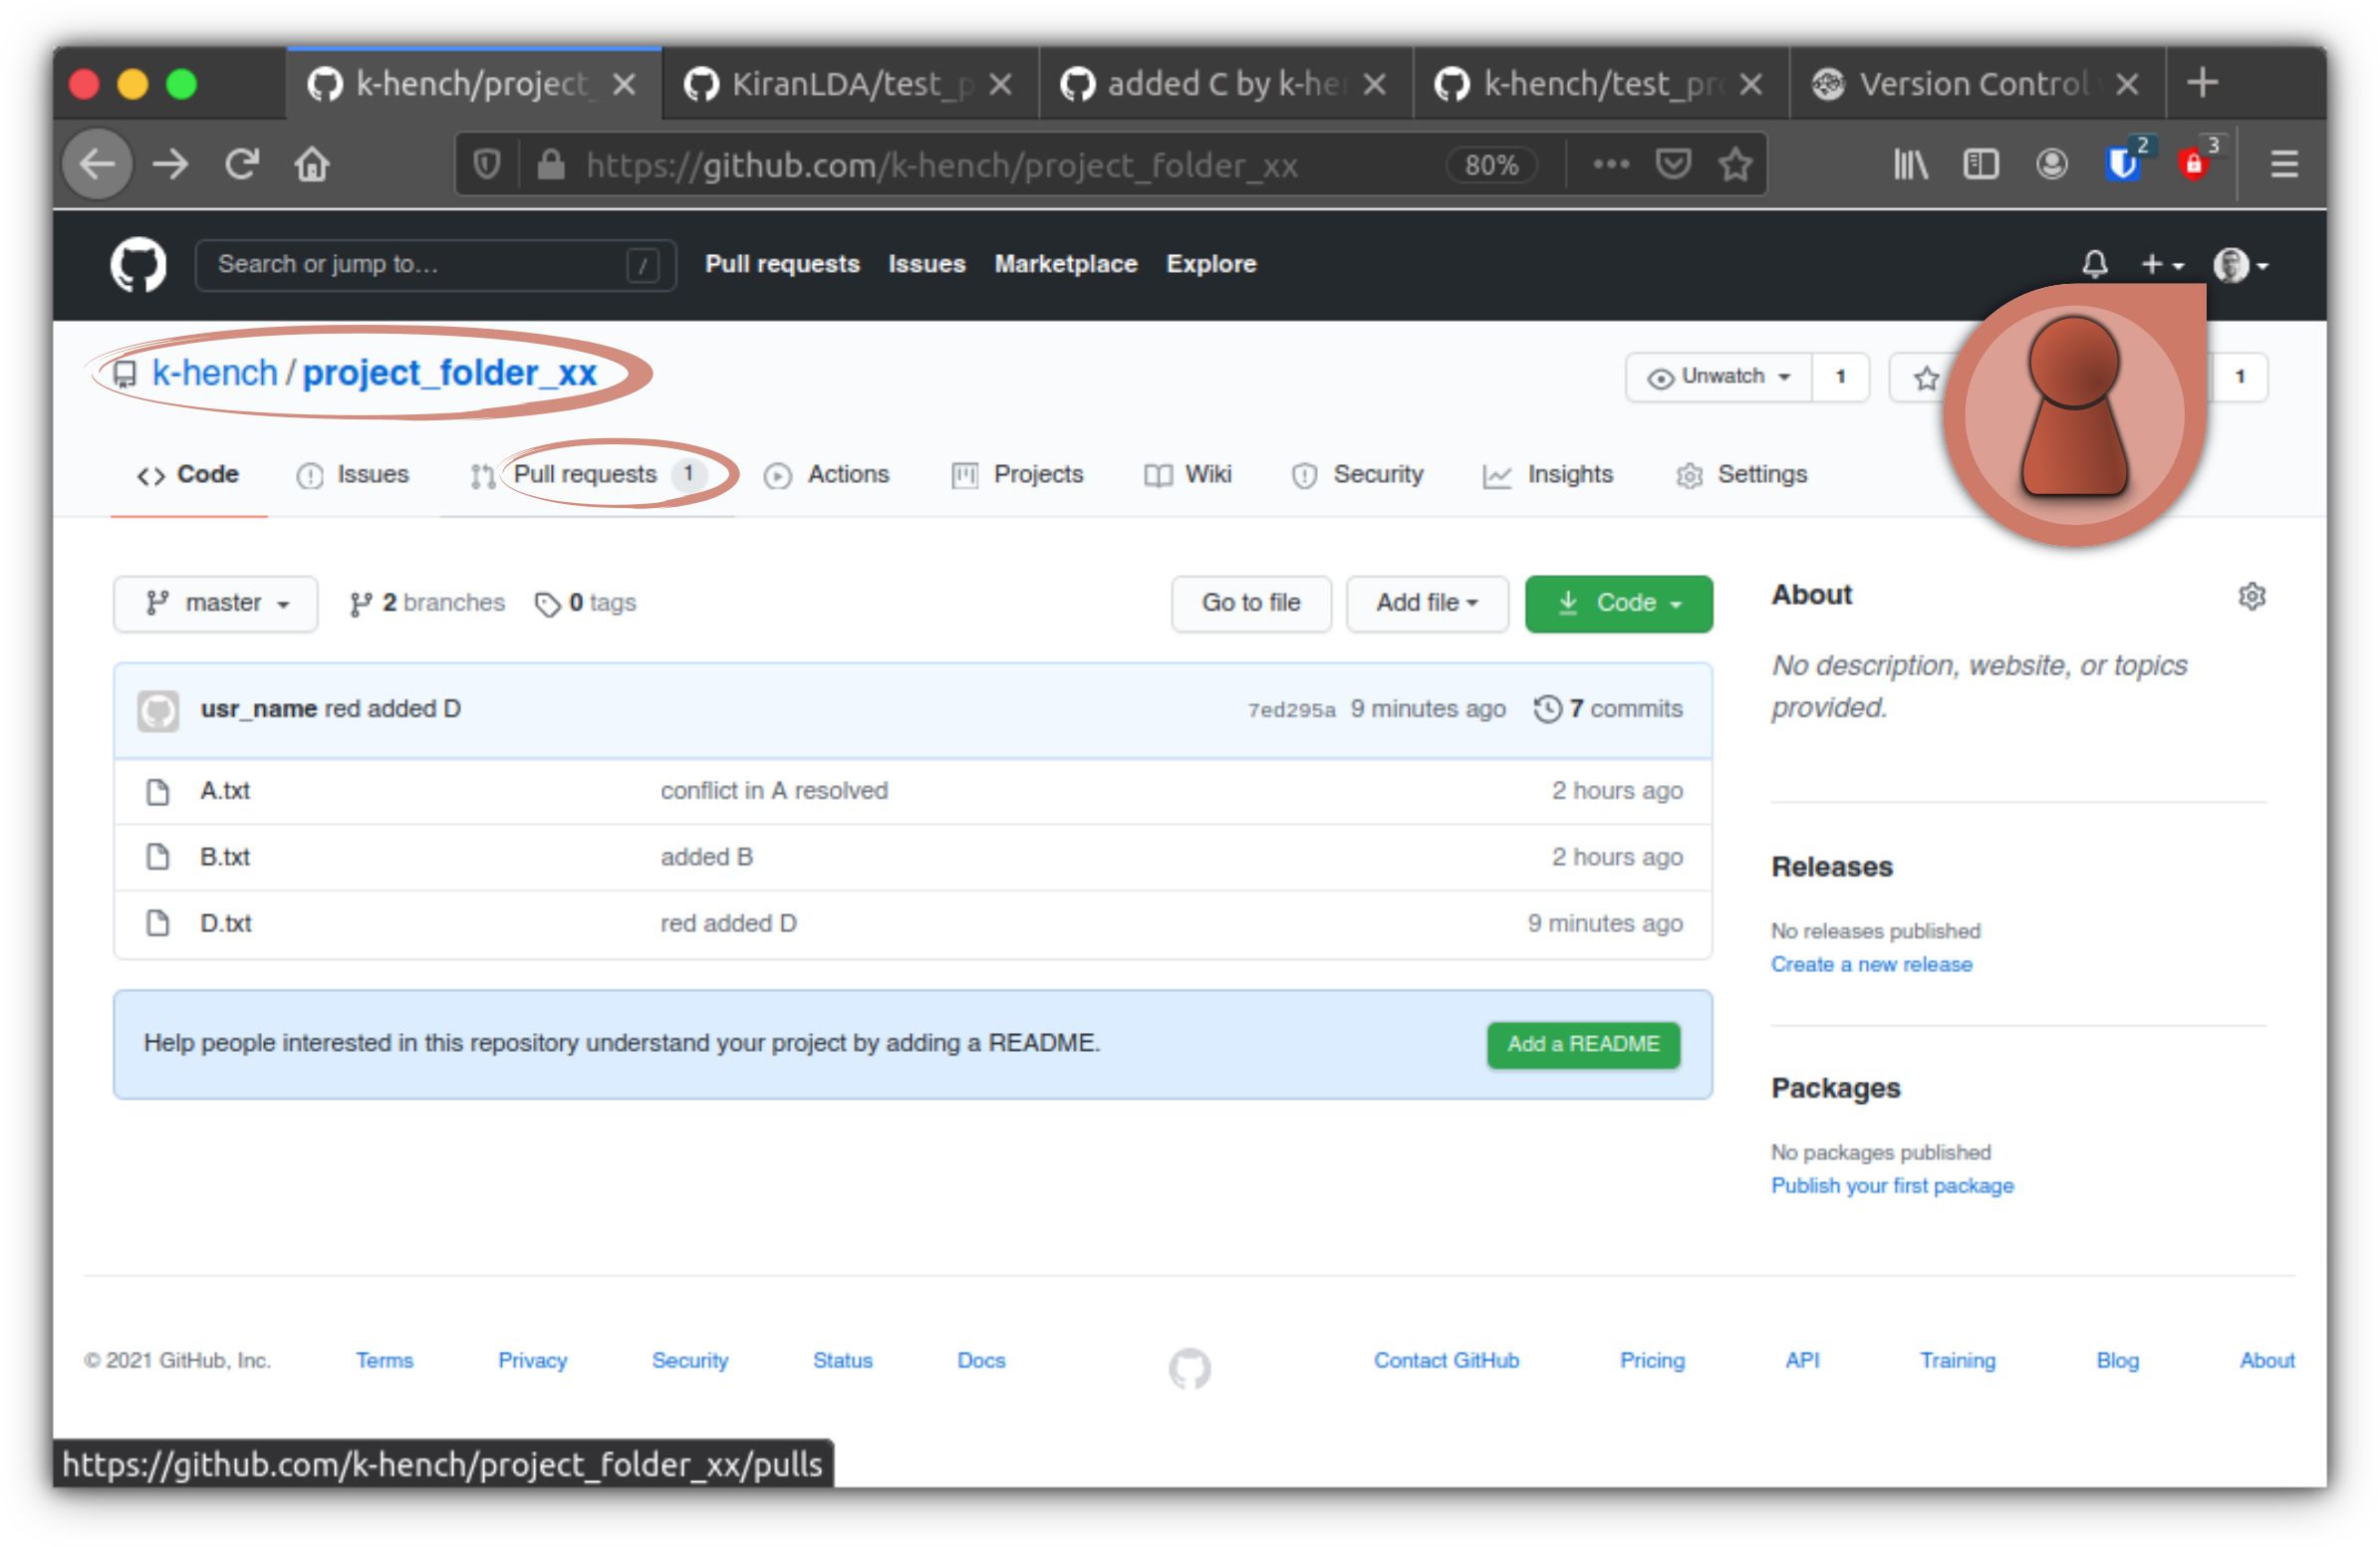
At this point, we have created all files that we planed to create — what remains is a matter of distribution. Taking stock, we should find the following files in place:

On github, the situation should look something like this:

Break Out [6]
Filing a pull request
We are first ask our friend to include our update to their repository (the added C.txt) into their original repository on github. In git speak, asking someone to integrate changes from your fork into their original repository is called a pull request".
We’ll only go through the pull request once based on the case where your friend is going to file a pull request for your project (xx) — remember that you will need to repeat that for your friends project as well (yy).
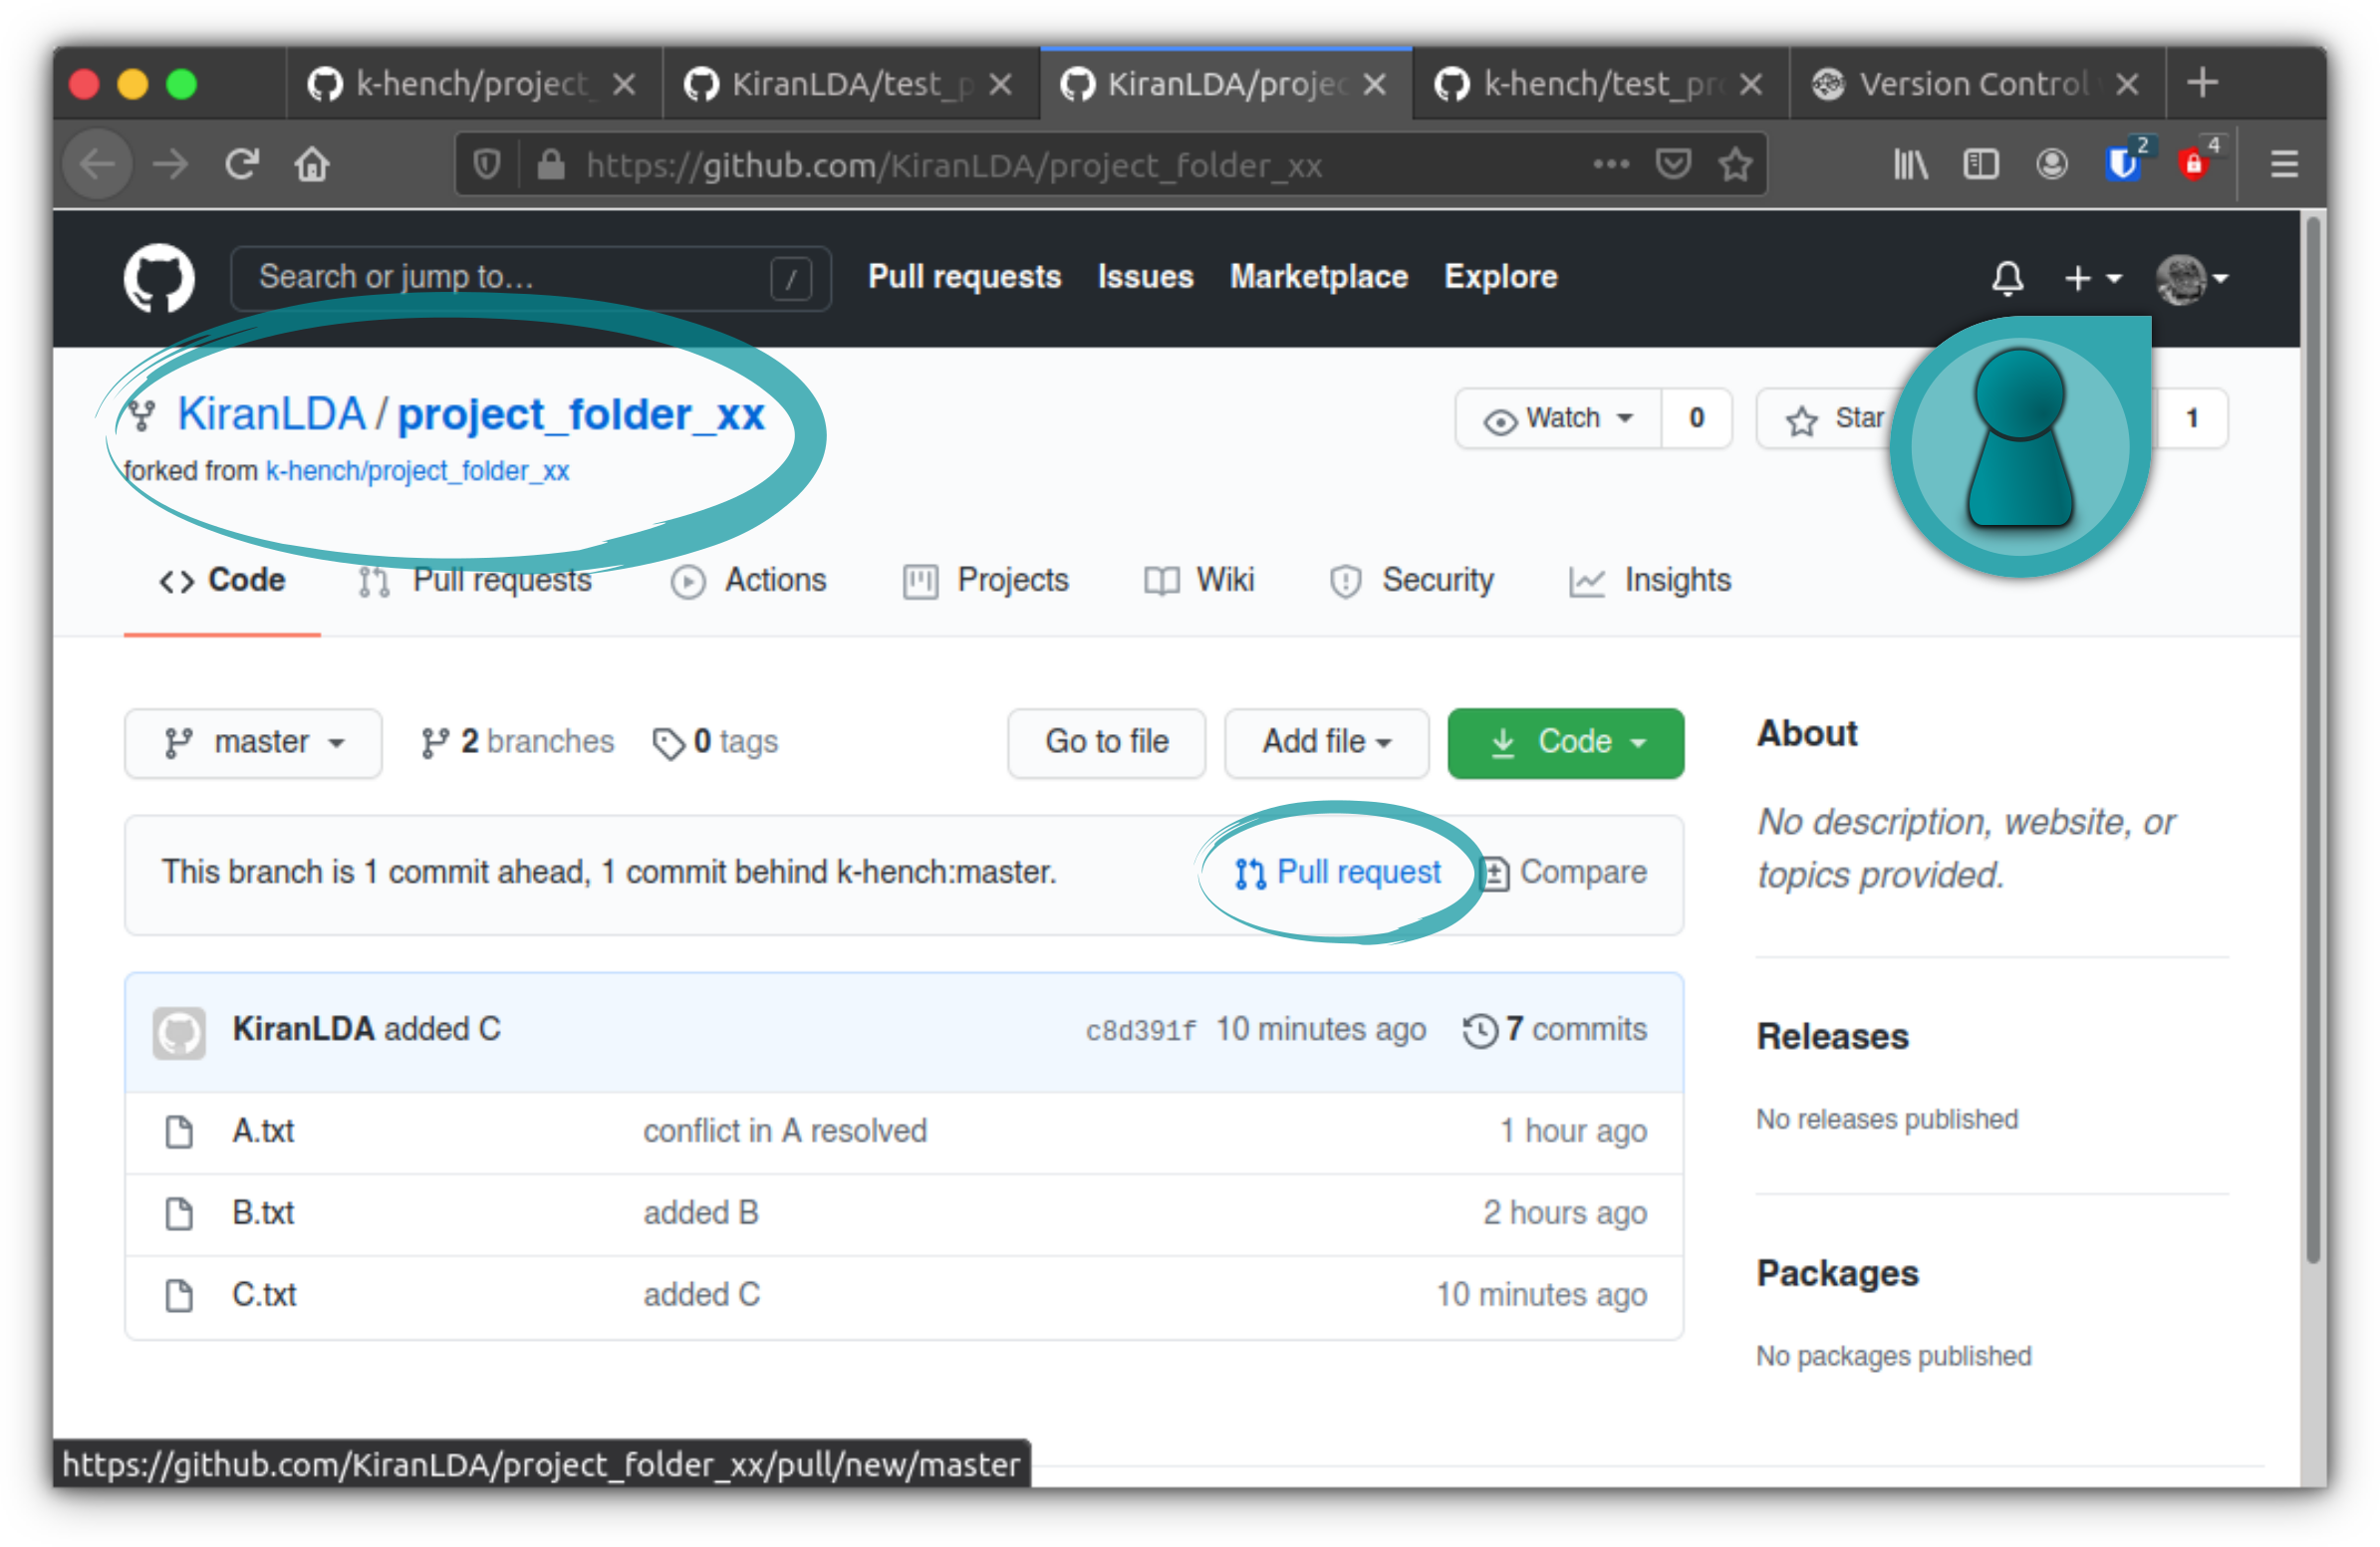
So, now your friend will log into github and go to their forked version of your project. They will see that they are ahead of the original repository and are offered the option to file a pull request:
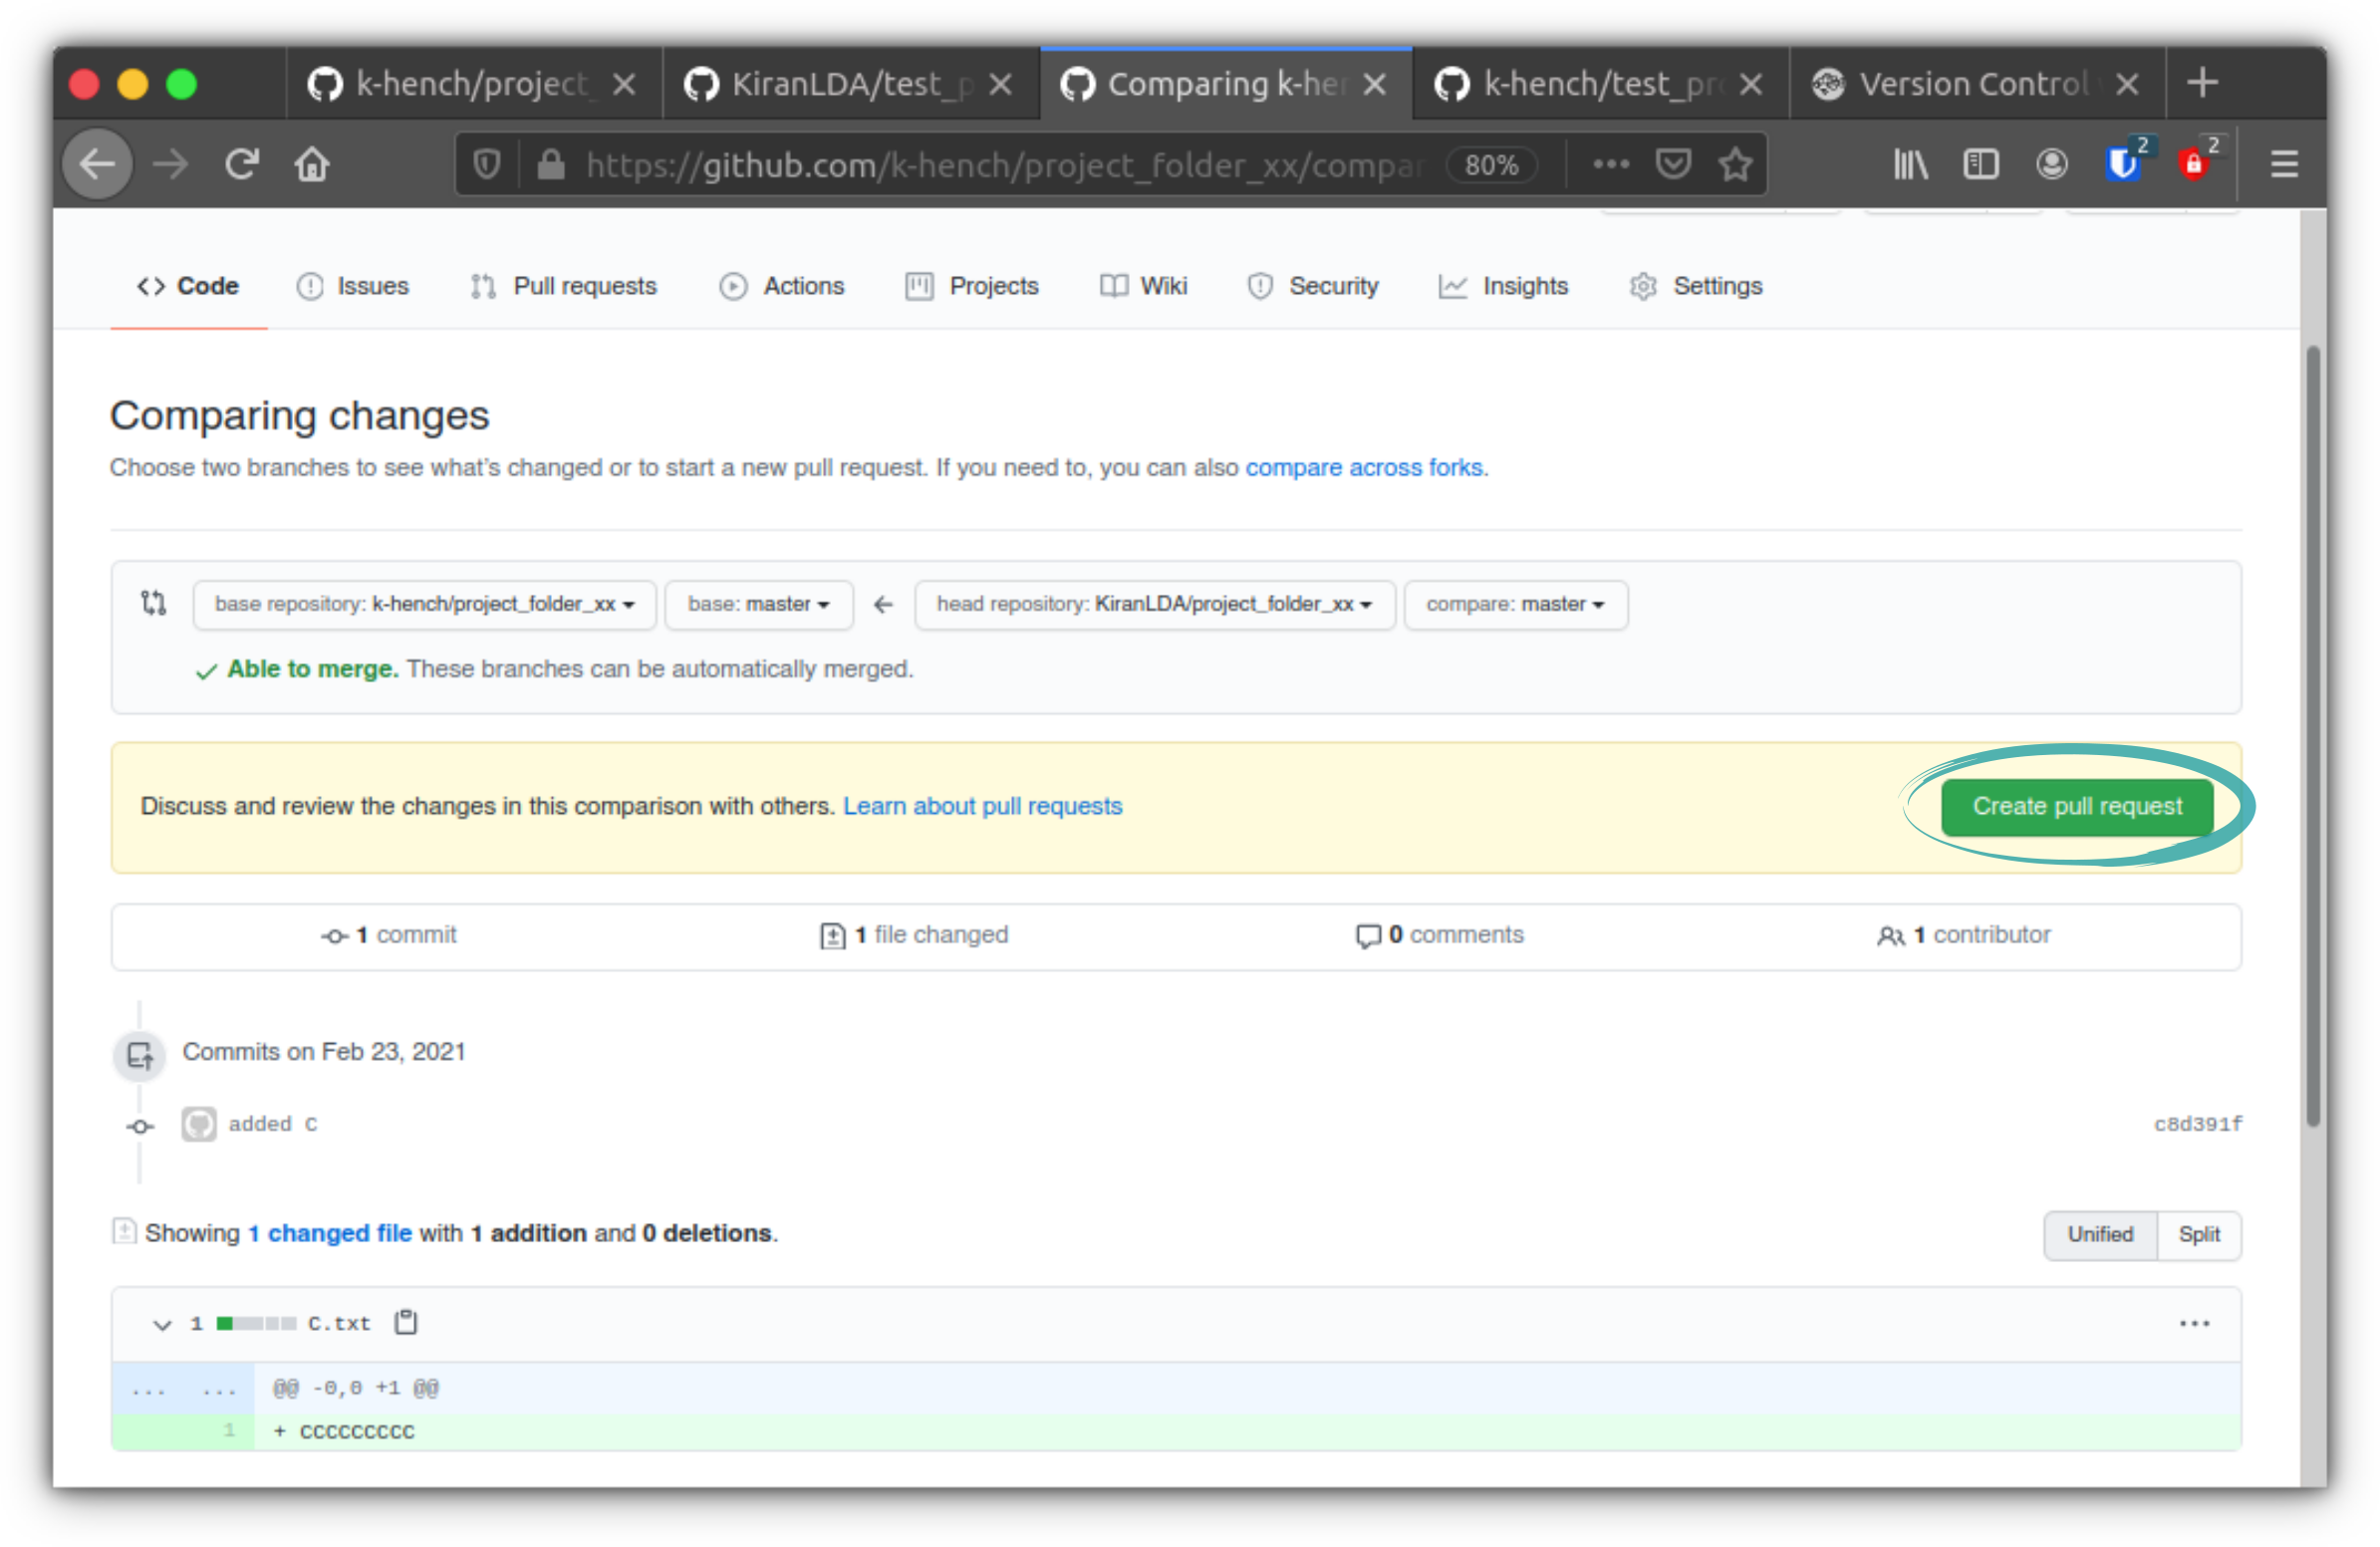
After clicking Pull request, there will be an overview of the changes that are going to be introduced to the original repository and (hopefully) a button to Create [a] pull request is available.
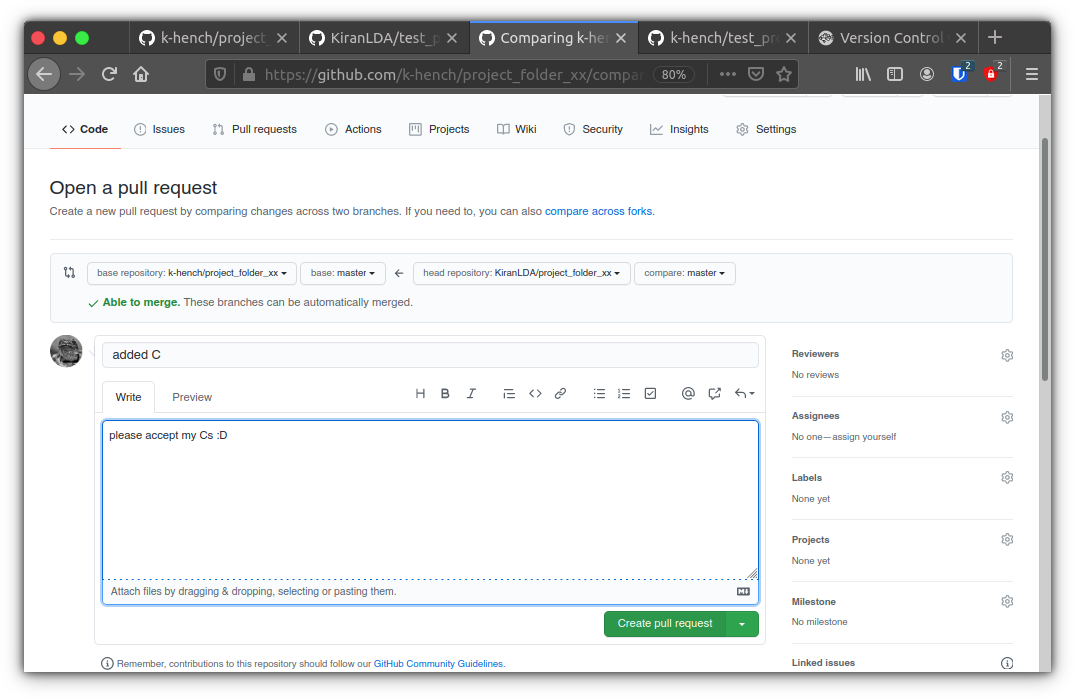
You friend has the option to write an elaborate explanation, why they think that inclouding C.txt is indeed a major improvement to the project and after clicking Create pull request, their part of the pull request is done
Now, it is your turn to accept the pull request — if you log into github and go to your original version of the repository. You should see a pending pull request:
When switching to the Pull requests tab, the request your friend just filed should be visible:
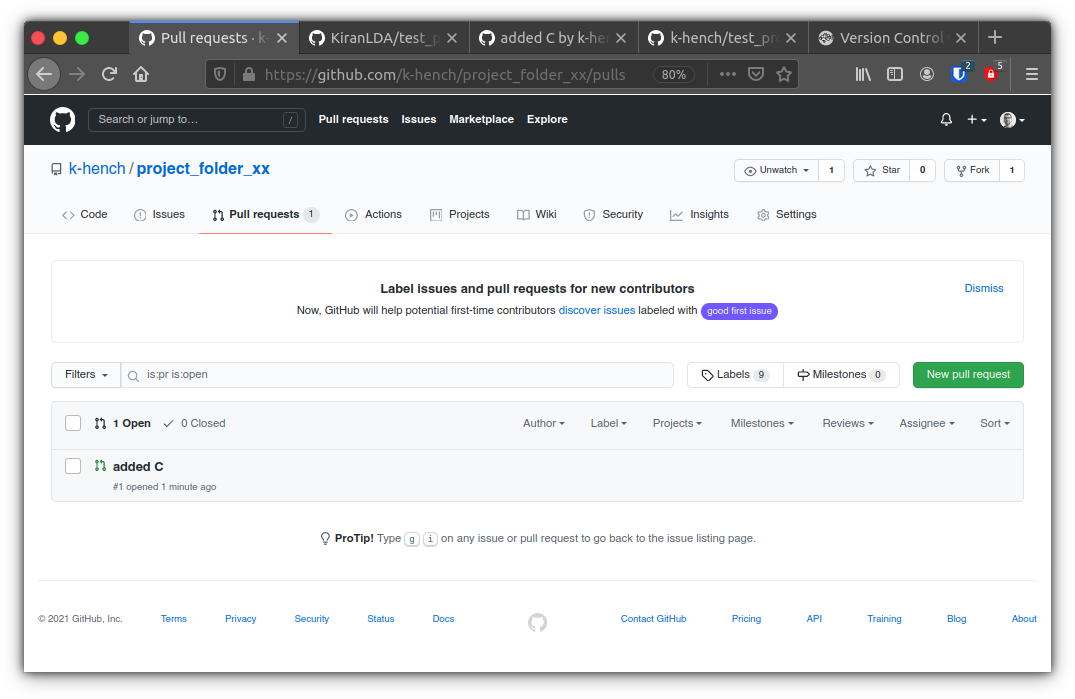
After selecting your friends pull request, you will be able to discuss the proposed additions and/or accept the pull request.
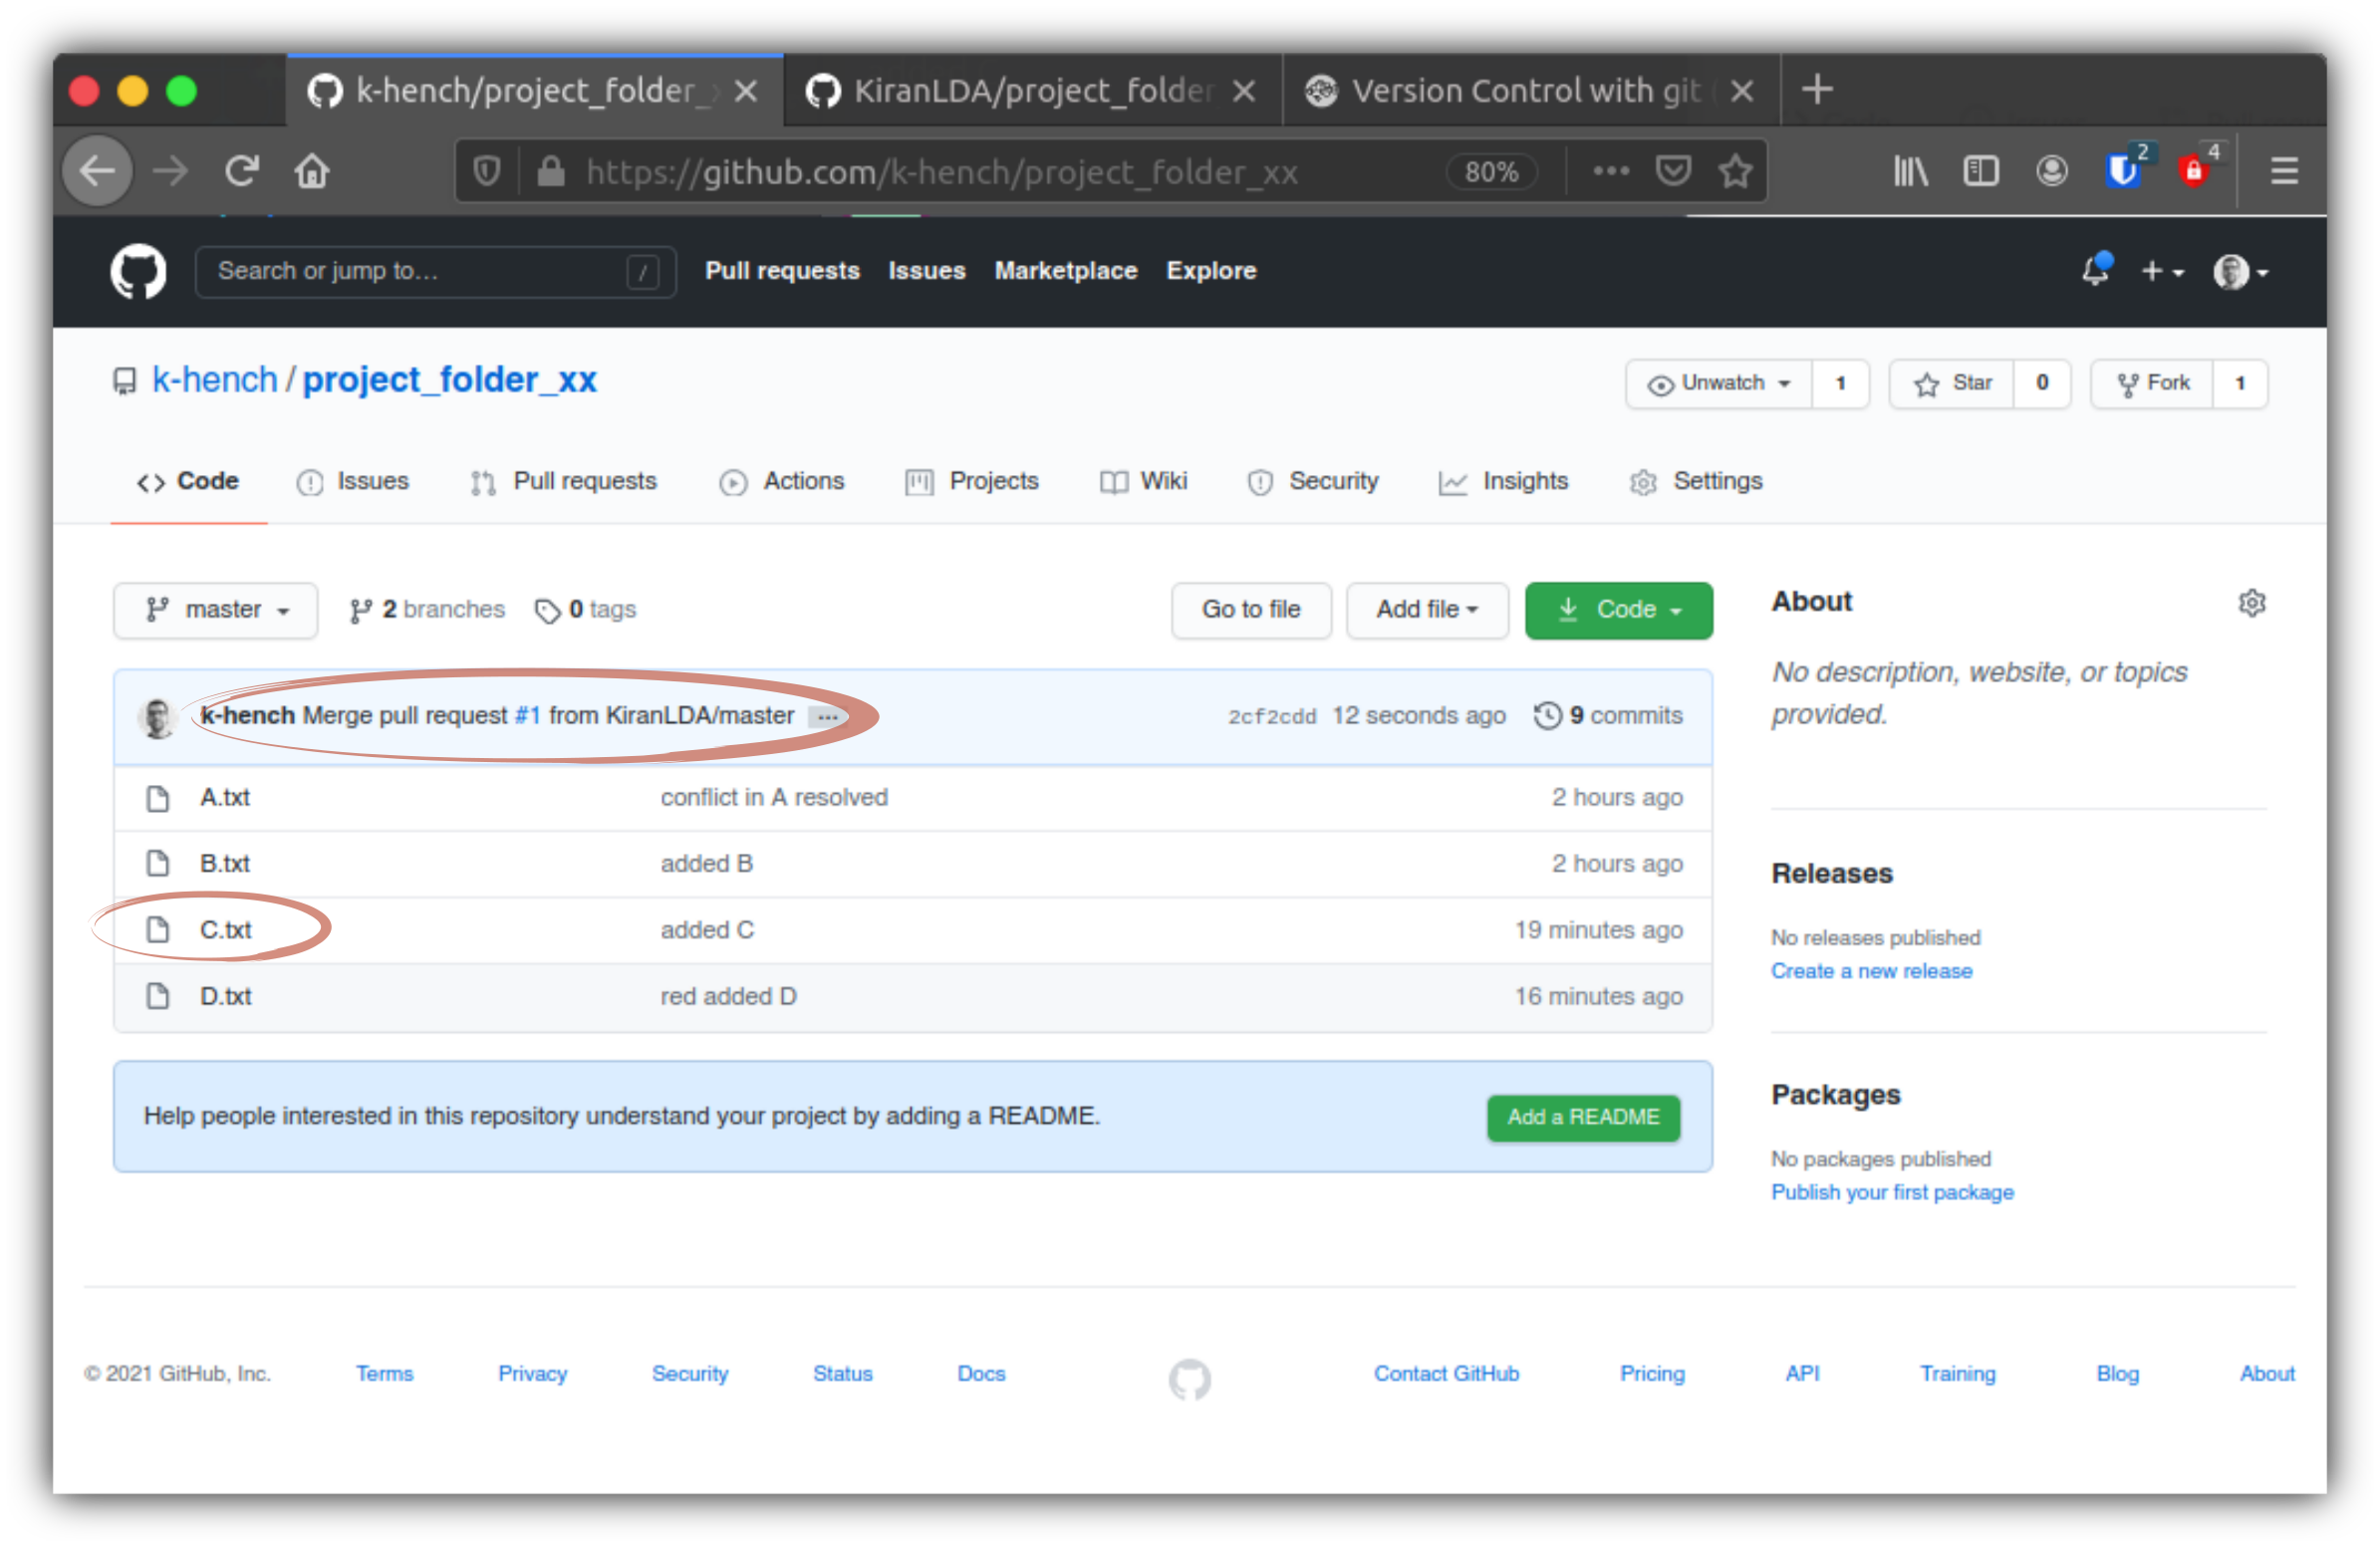
(Sorry, another screen shot missing - I have to trust your instict to accept the pull request 😉)Now, you should see C.txt nicely integrated in your project.
Your own project is complete on github, but we also want to to update the changes locally.
Break Out [7]
Pull request Aftermath

So, back in gitkraken with your own project open, we pull changes from the remote origin (your github version) to your local version of the repository.
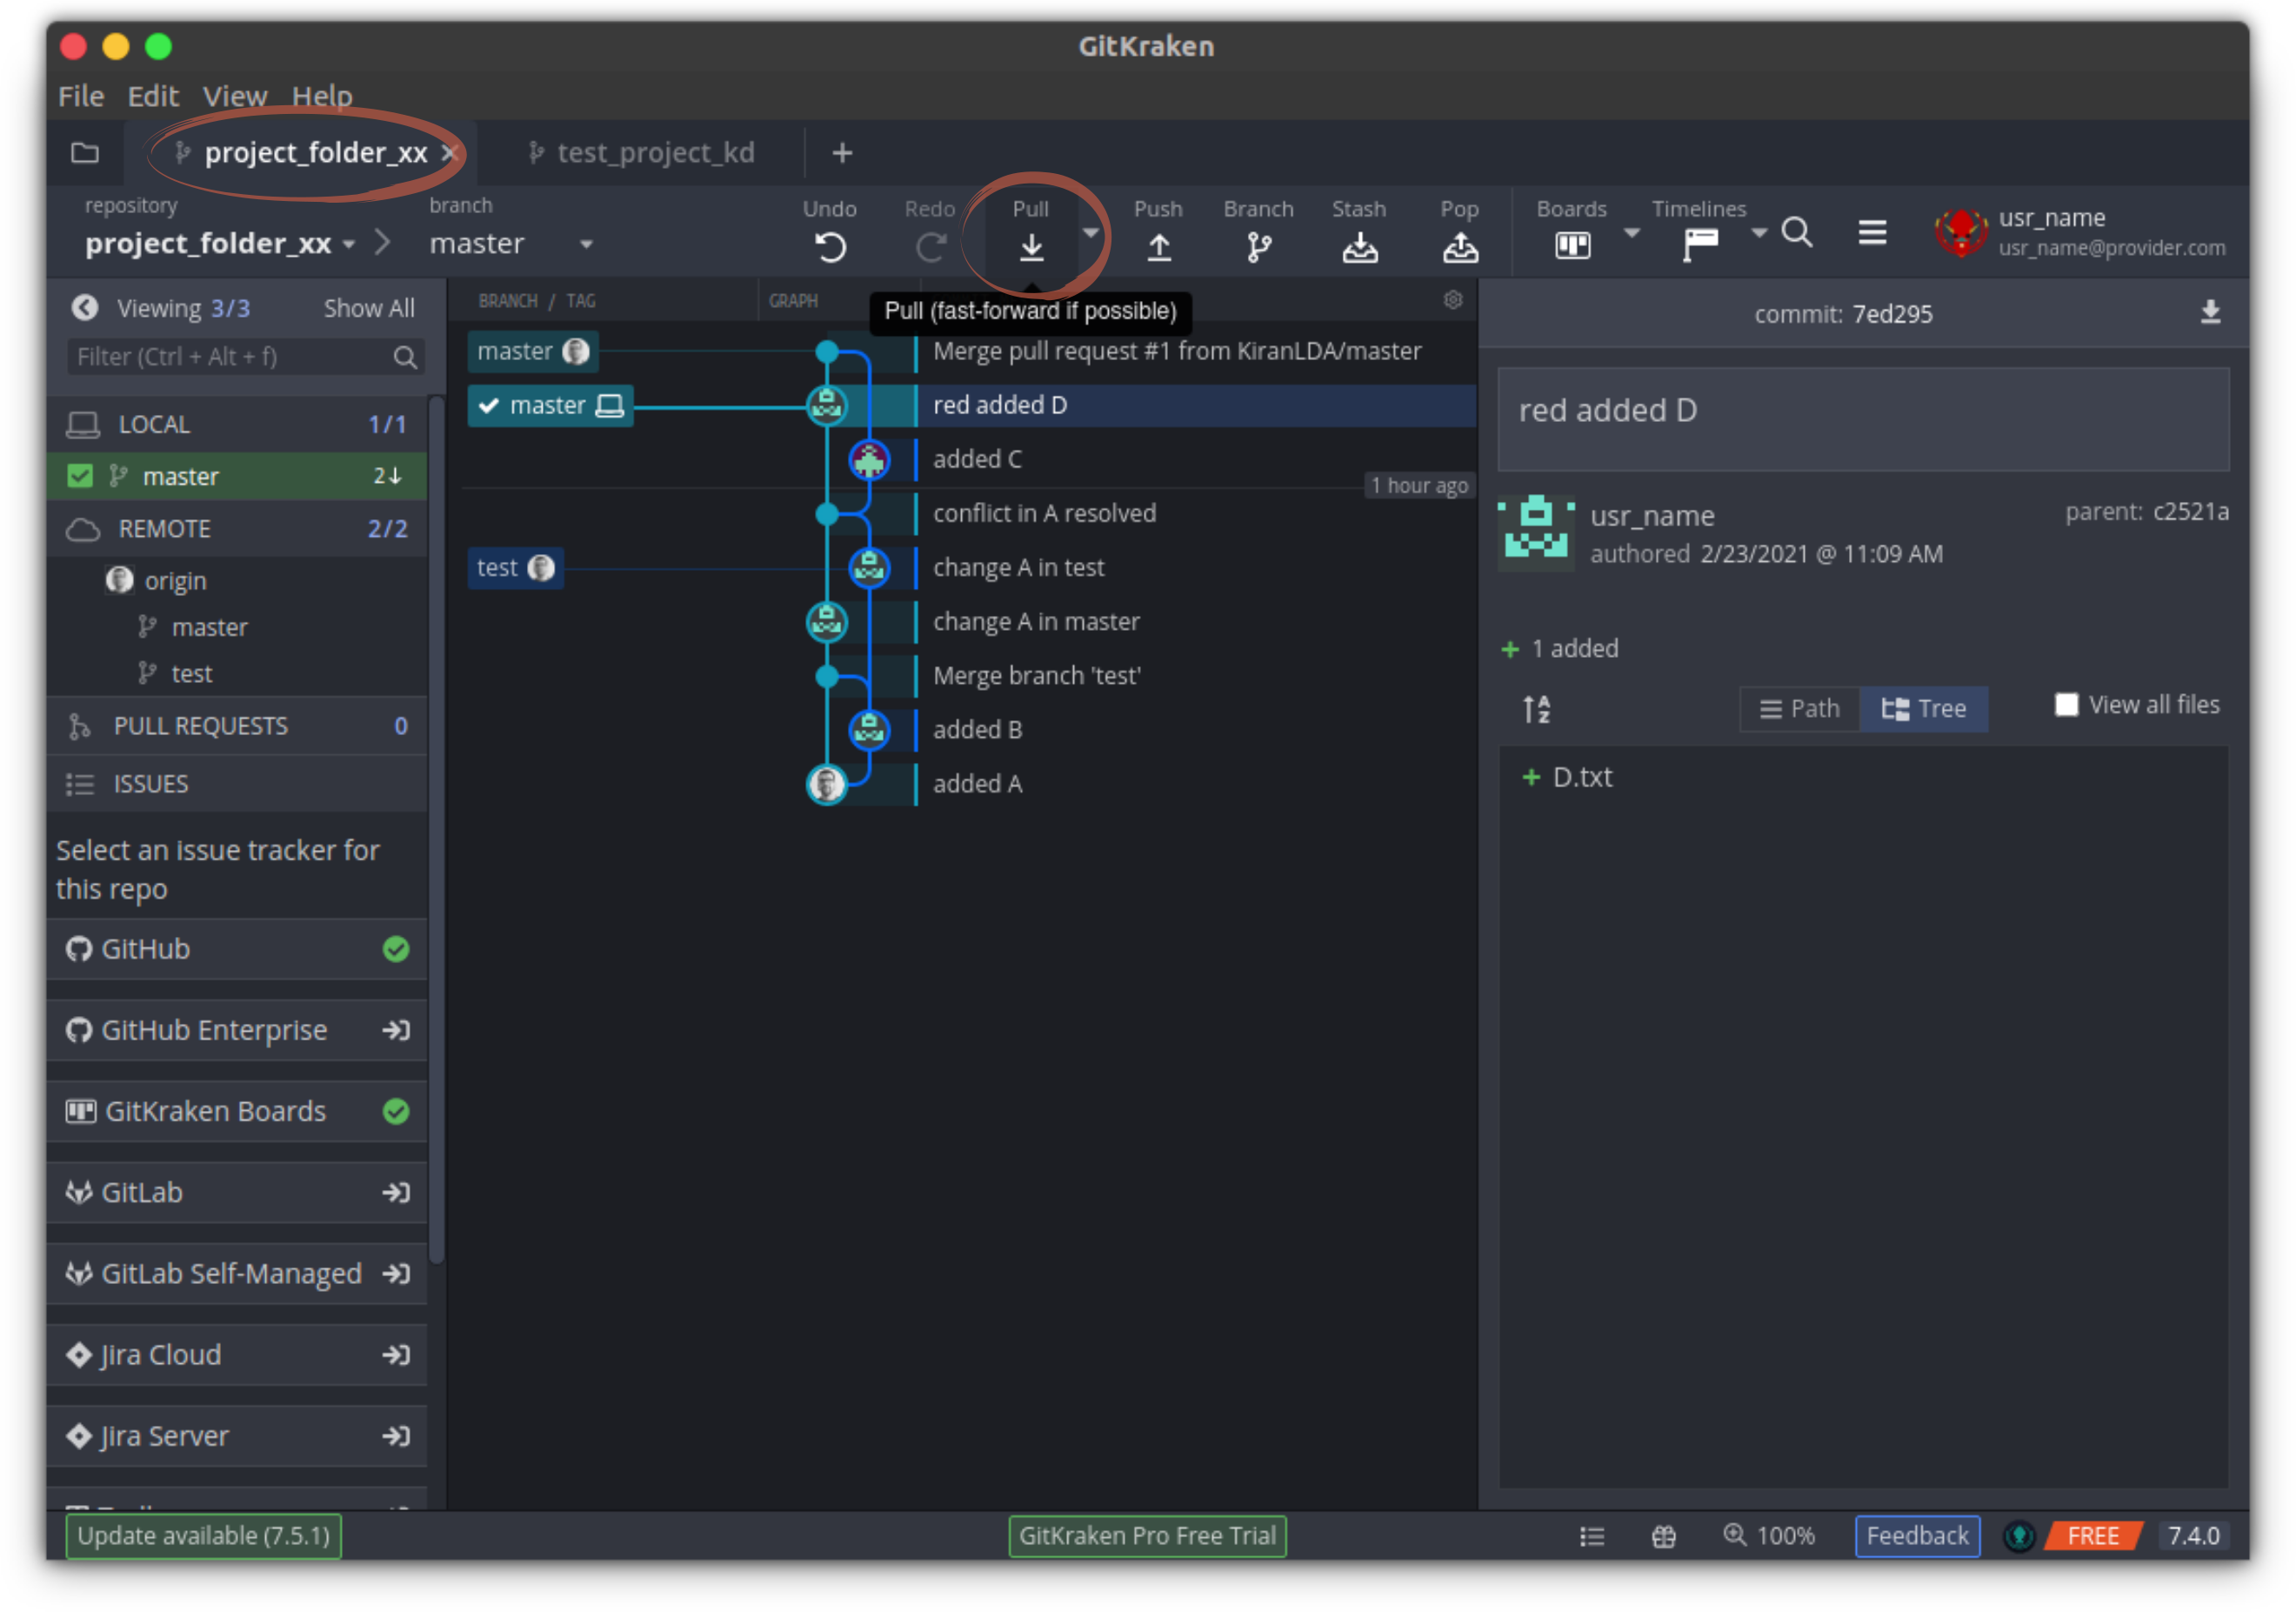
git pull origin master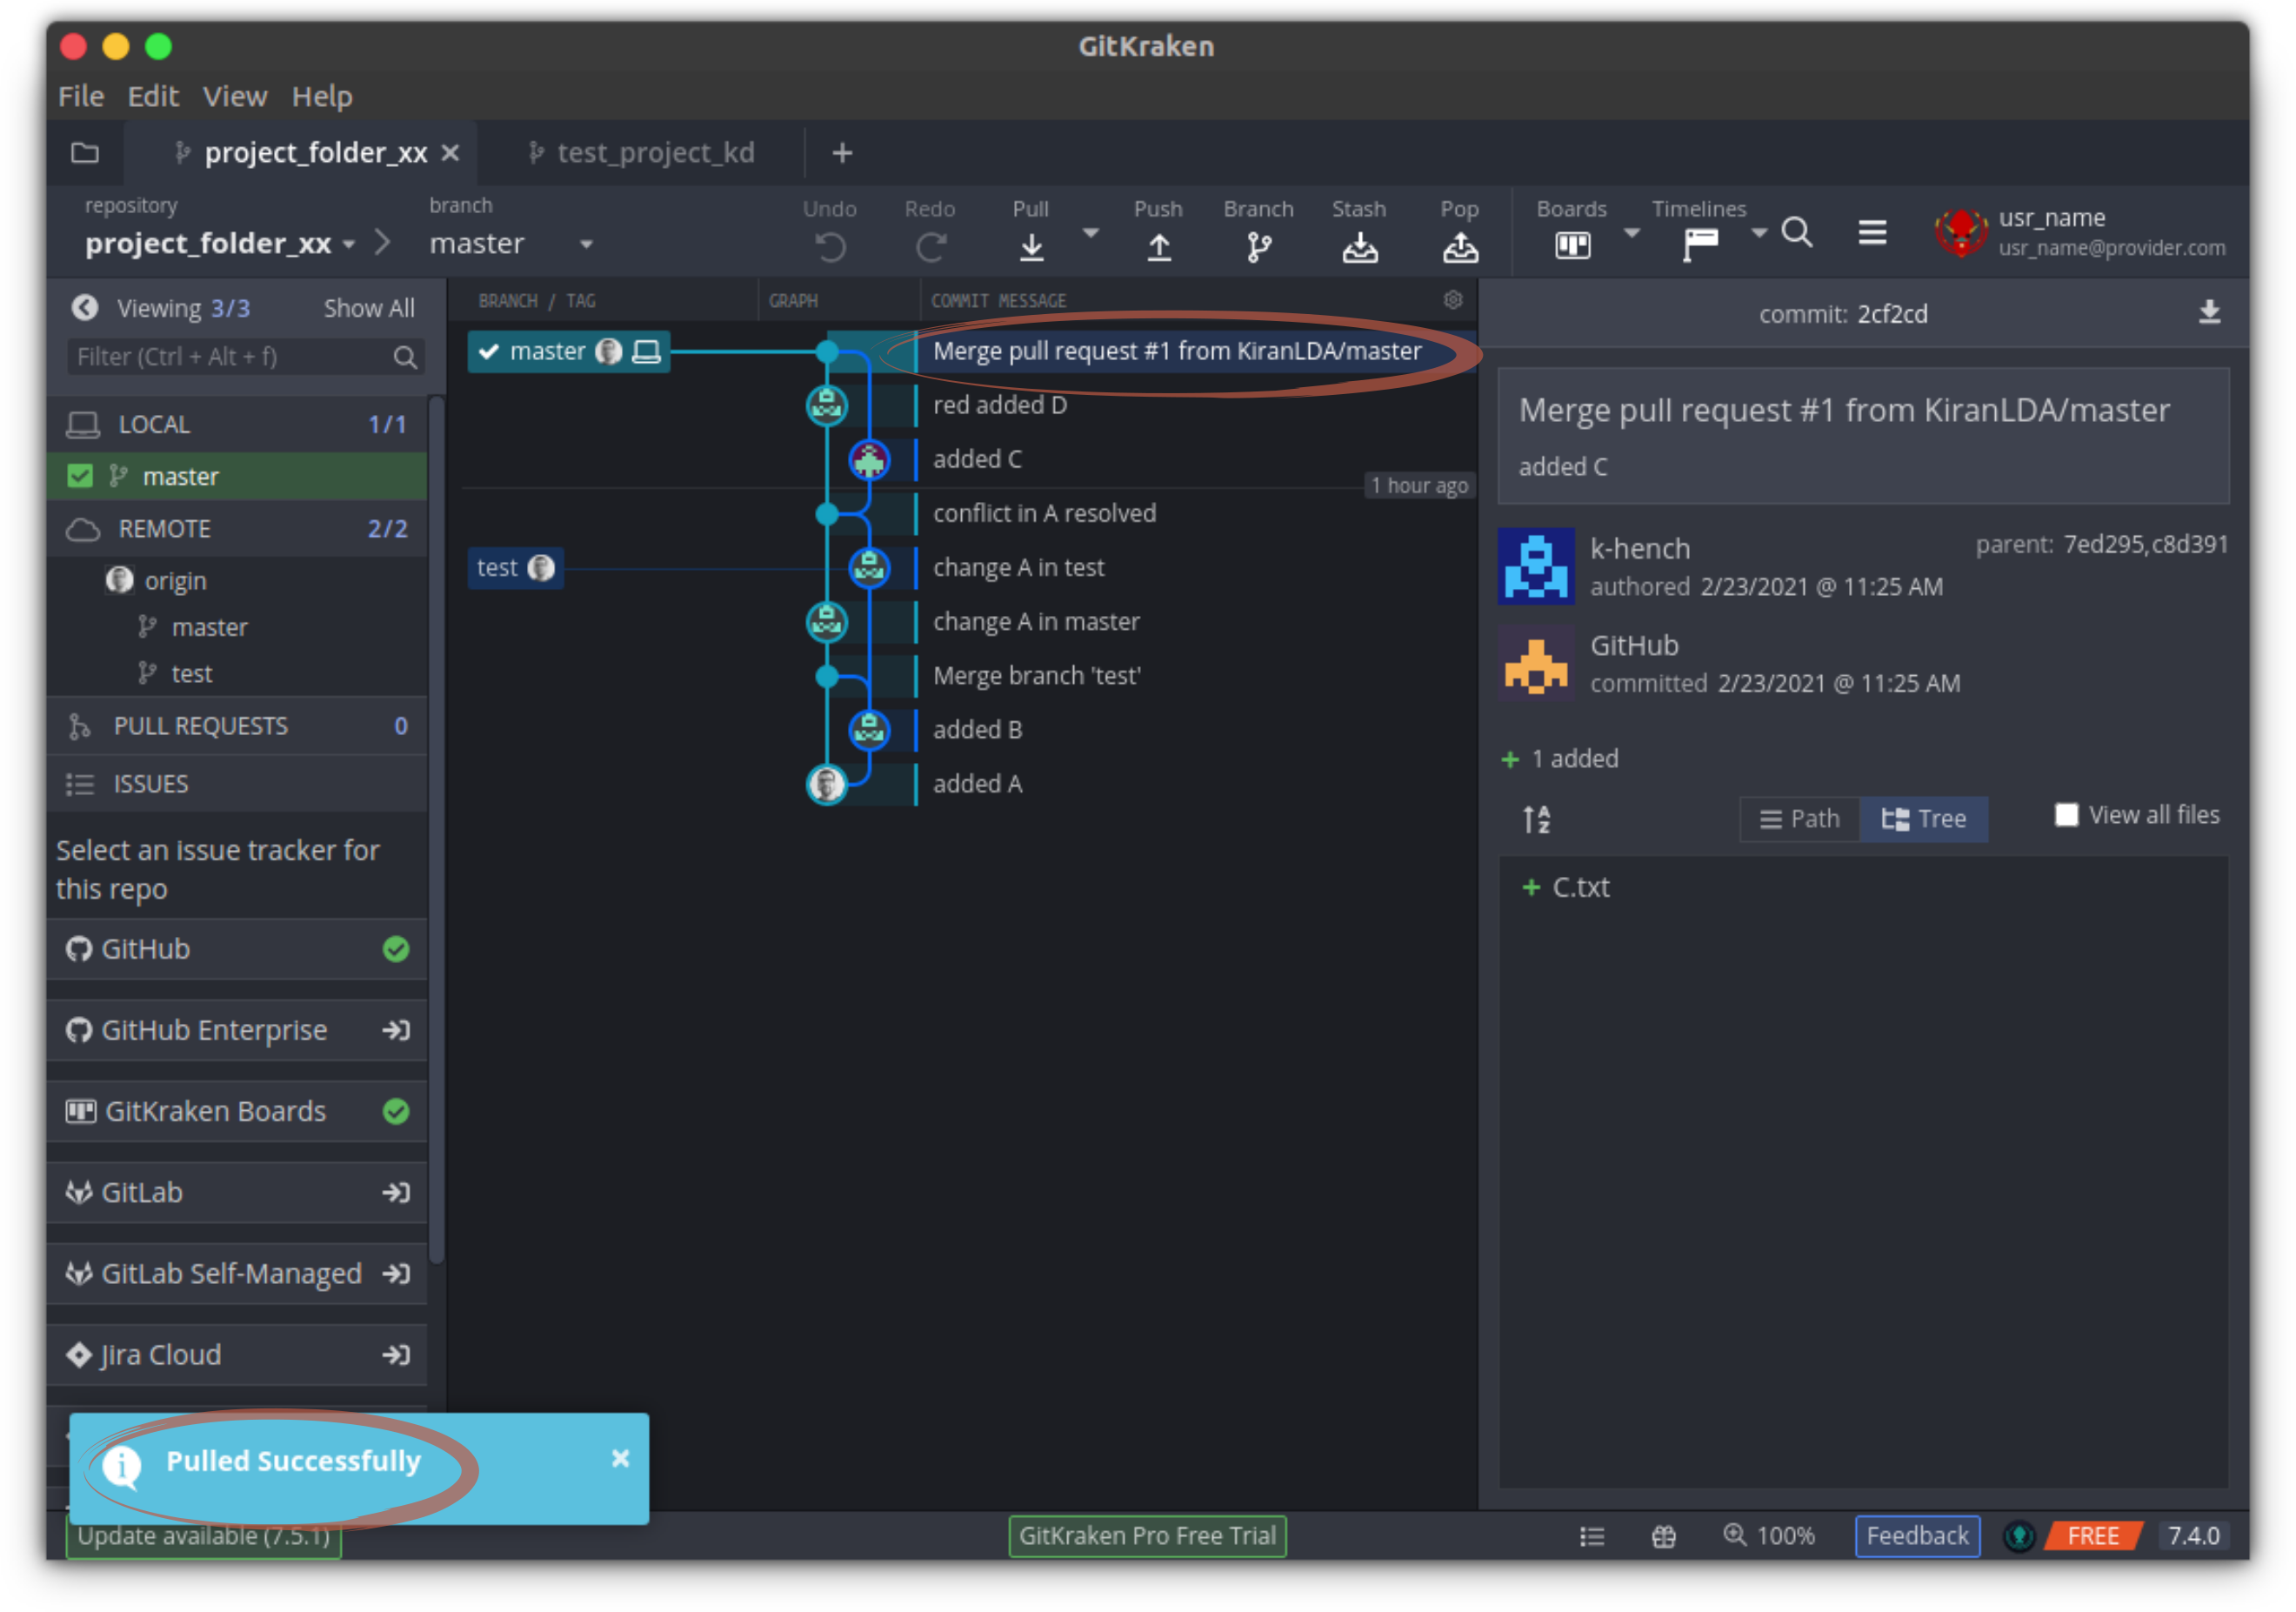
At this point, your own project is set and you have all files that we wanted in your folder — but there is one more issue with the repository you have forked: it is still missing D.txt ….

For the repository that you have forked the update is going to take a sightly different route:

So, to update the forked repository, we first switch back to that tab in gitkraken:

cd ~/Desktop/project_folder_yyNow, here we want to include changes (D.txt) that your friend added to their repository after you forked it. Luckily, we have added their github version as a remote. So, to integrate the latest changes, we need to pull the branch “main” of the remote “upstream” into the branch “main” of our local repository:

git pull upstream master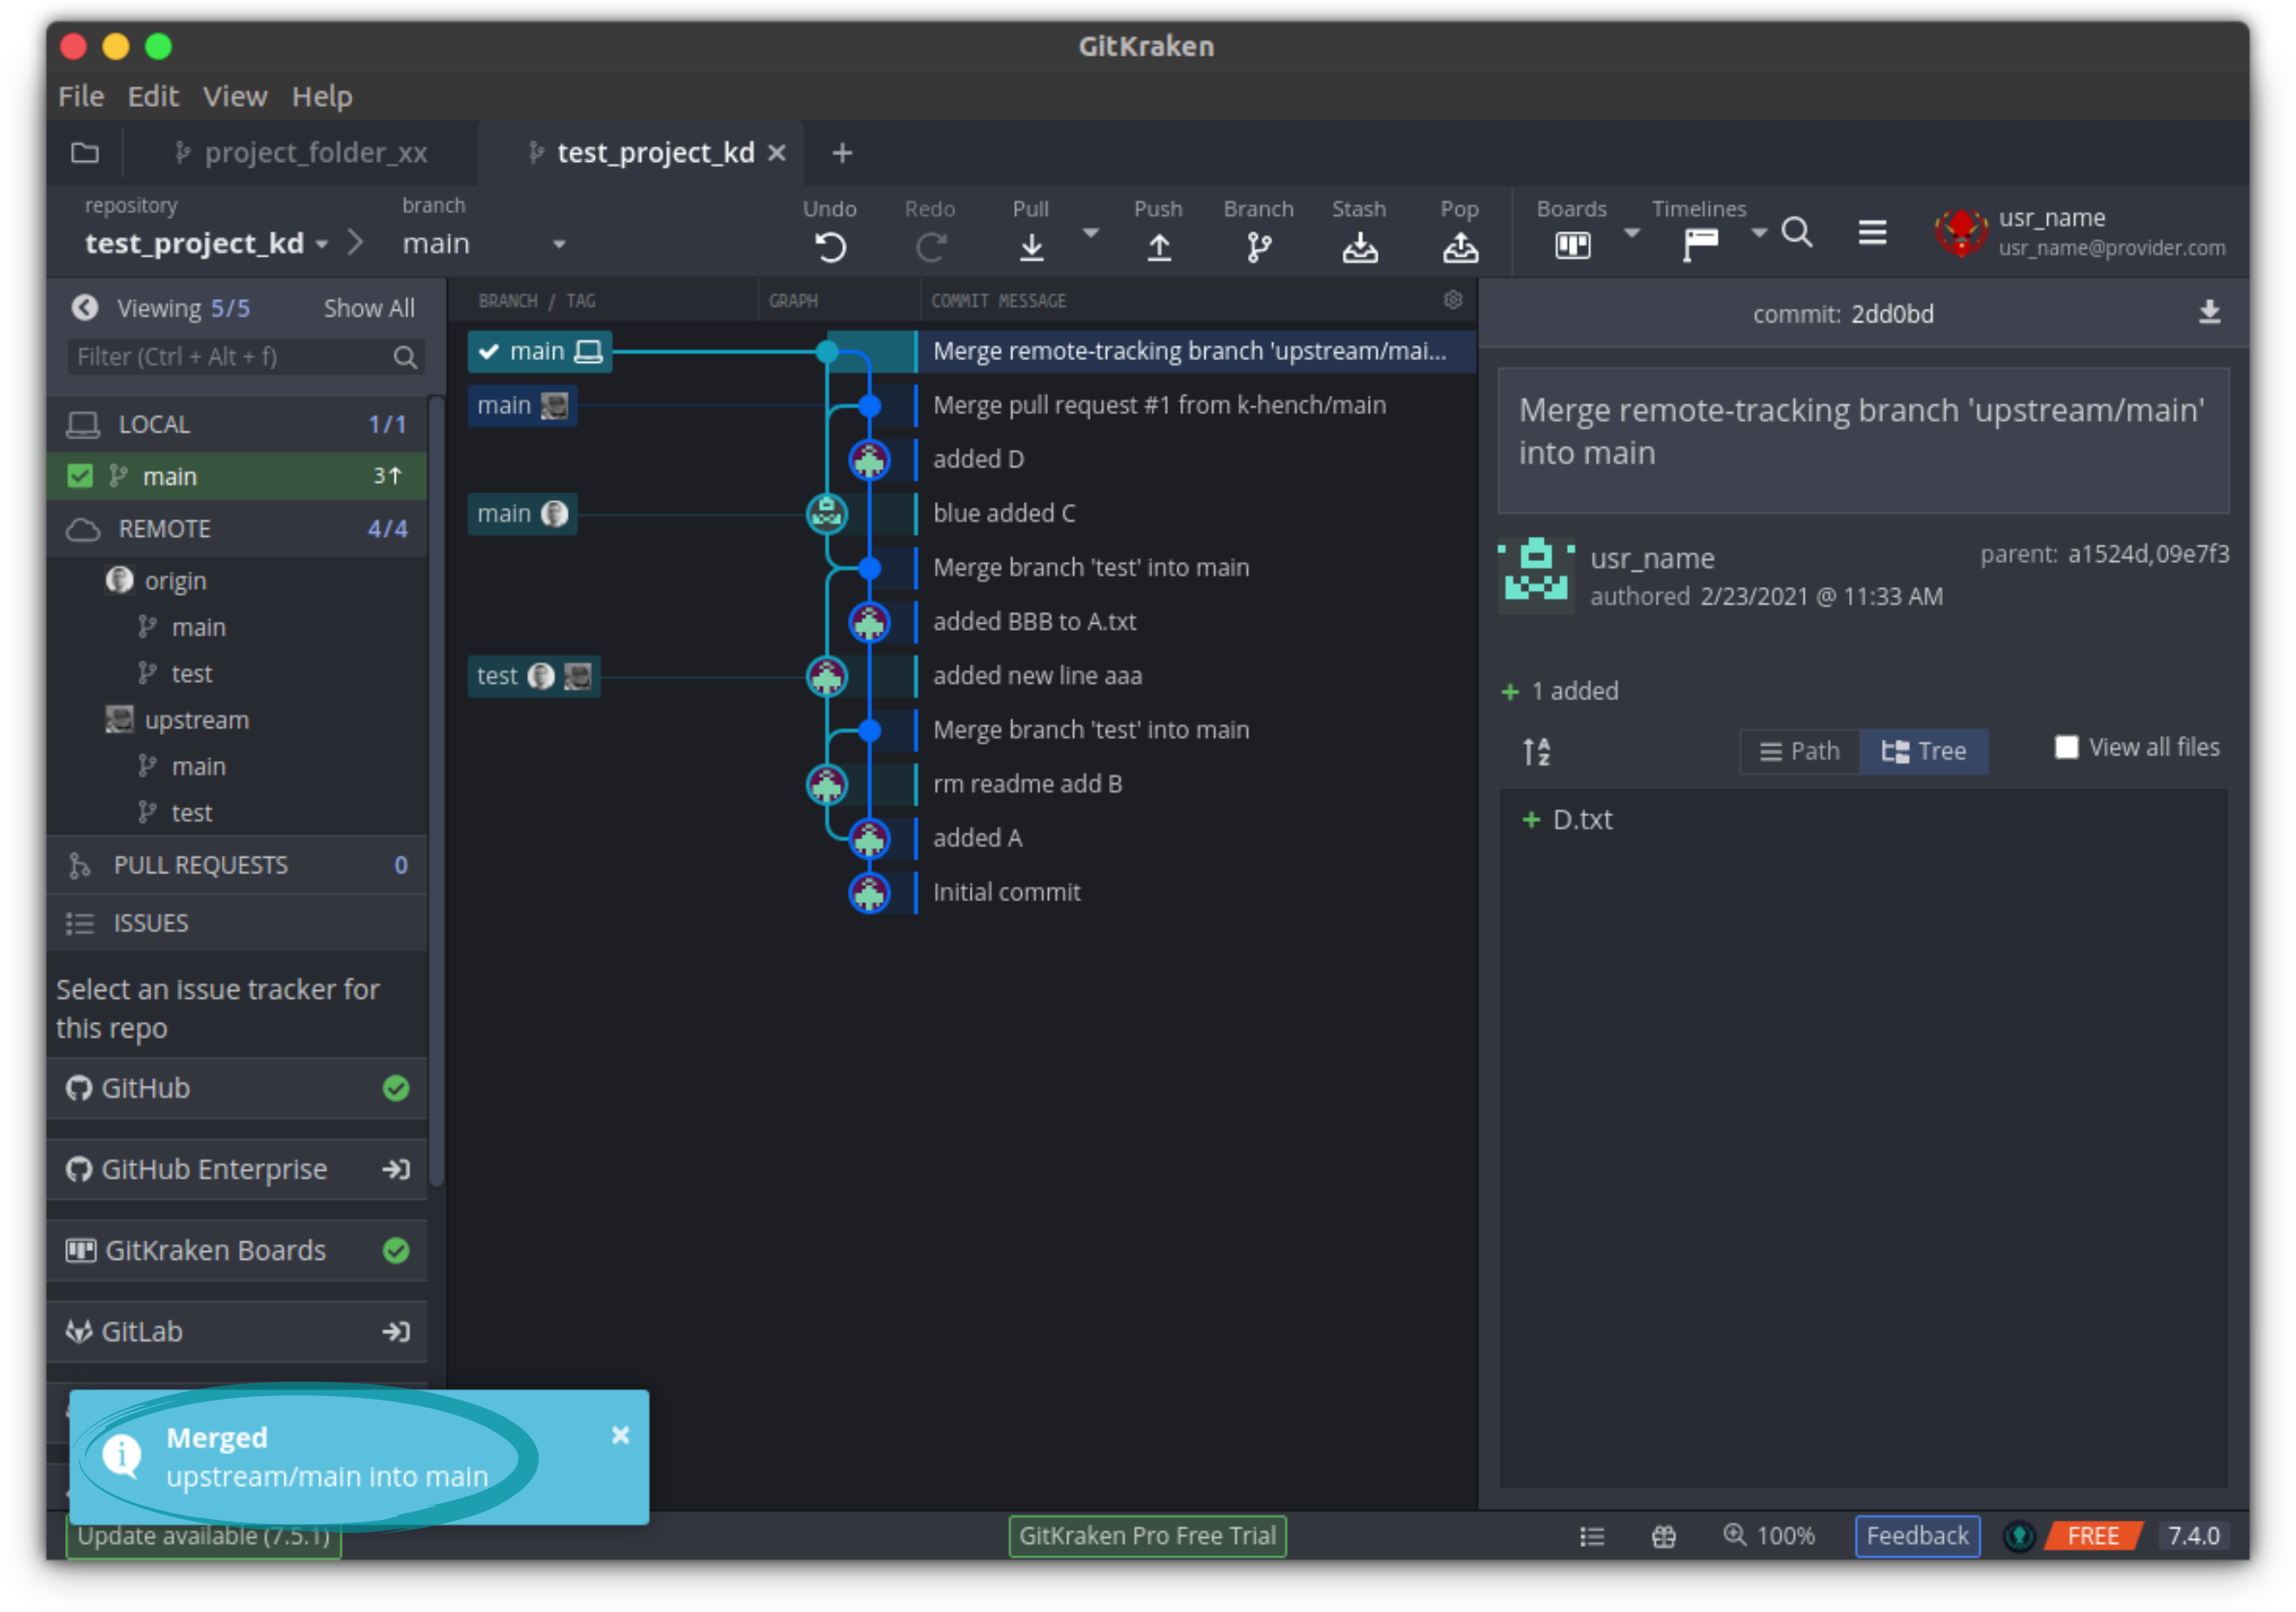
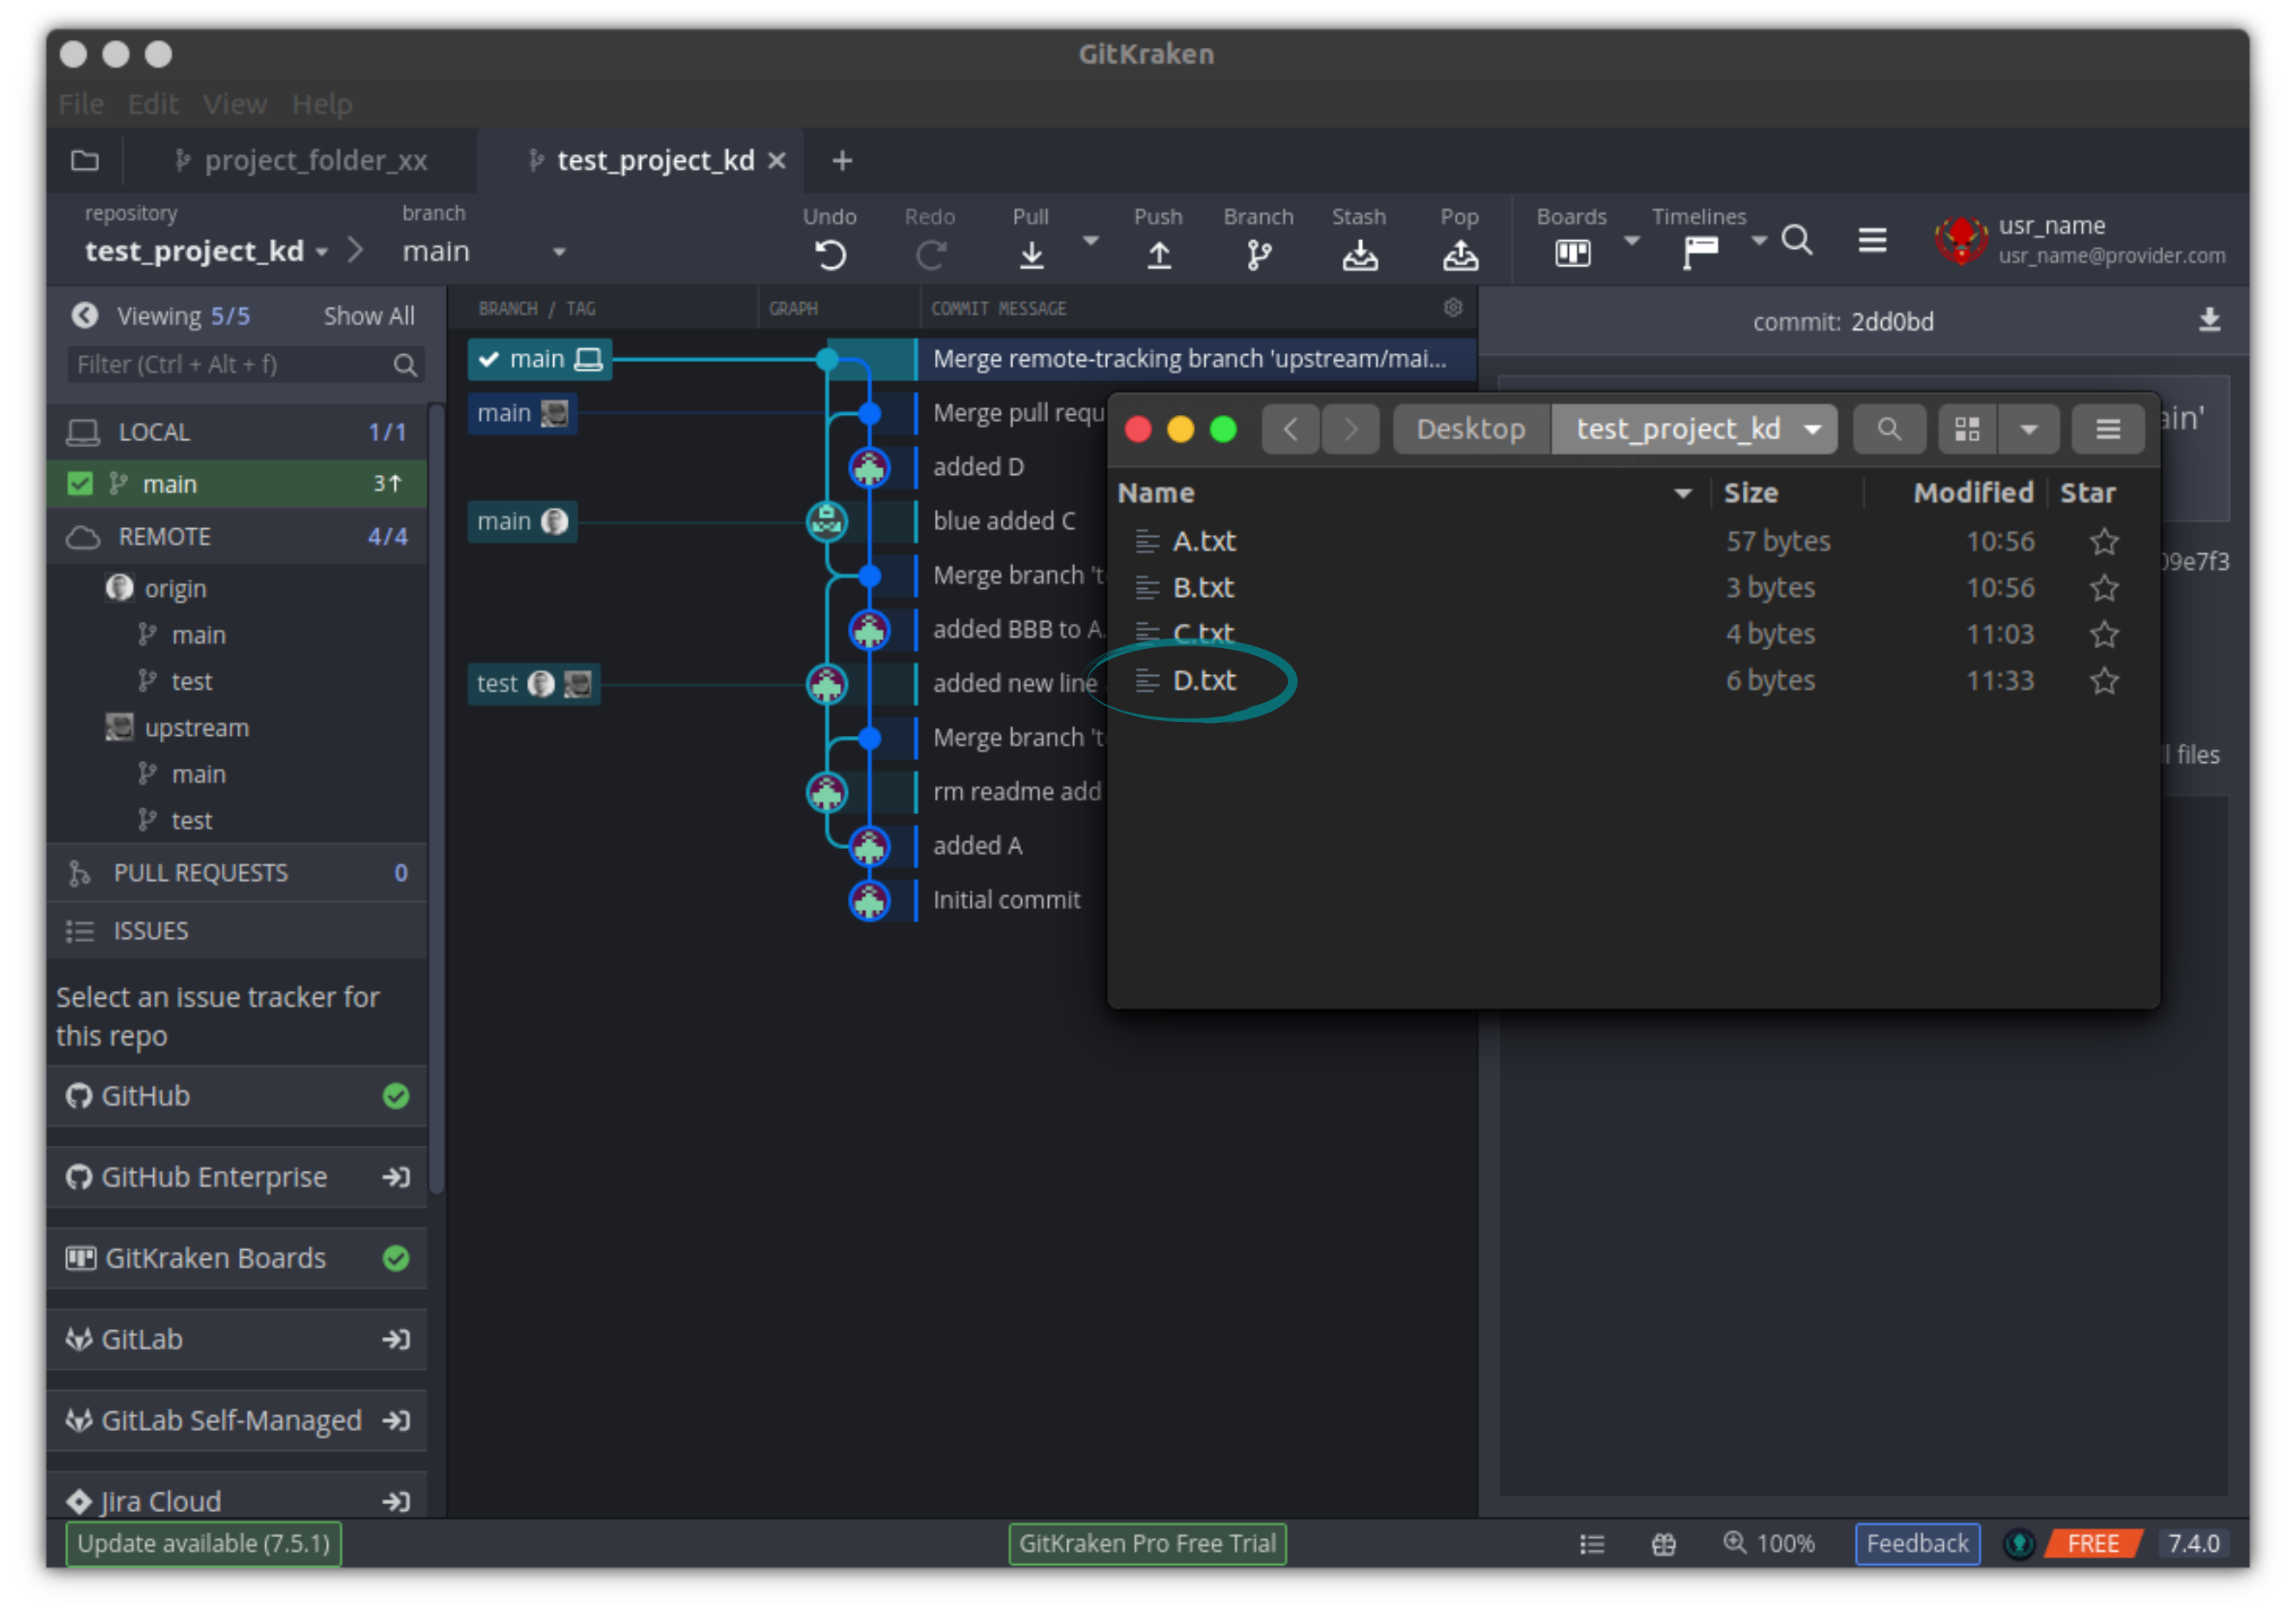
After a successful pull from upstream, your local forked repository is in shape and D.txt should pop up in your folder:
Now, the very last pending bit (I swear!), is to also update your forked repository on github. Luckily, this is pretty straight forward — simply push the local changes to origin
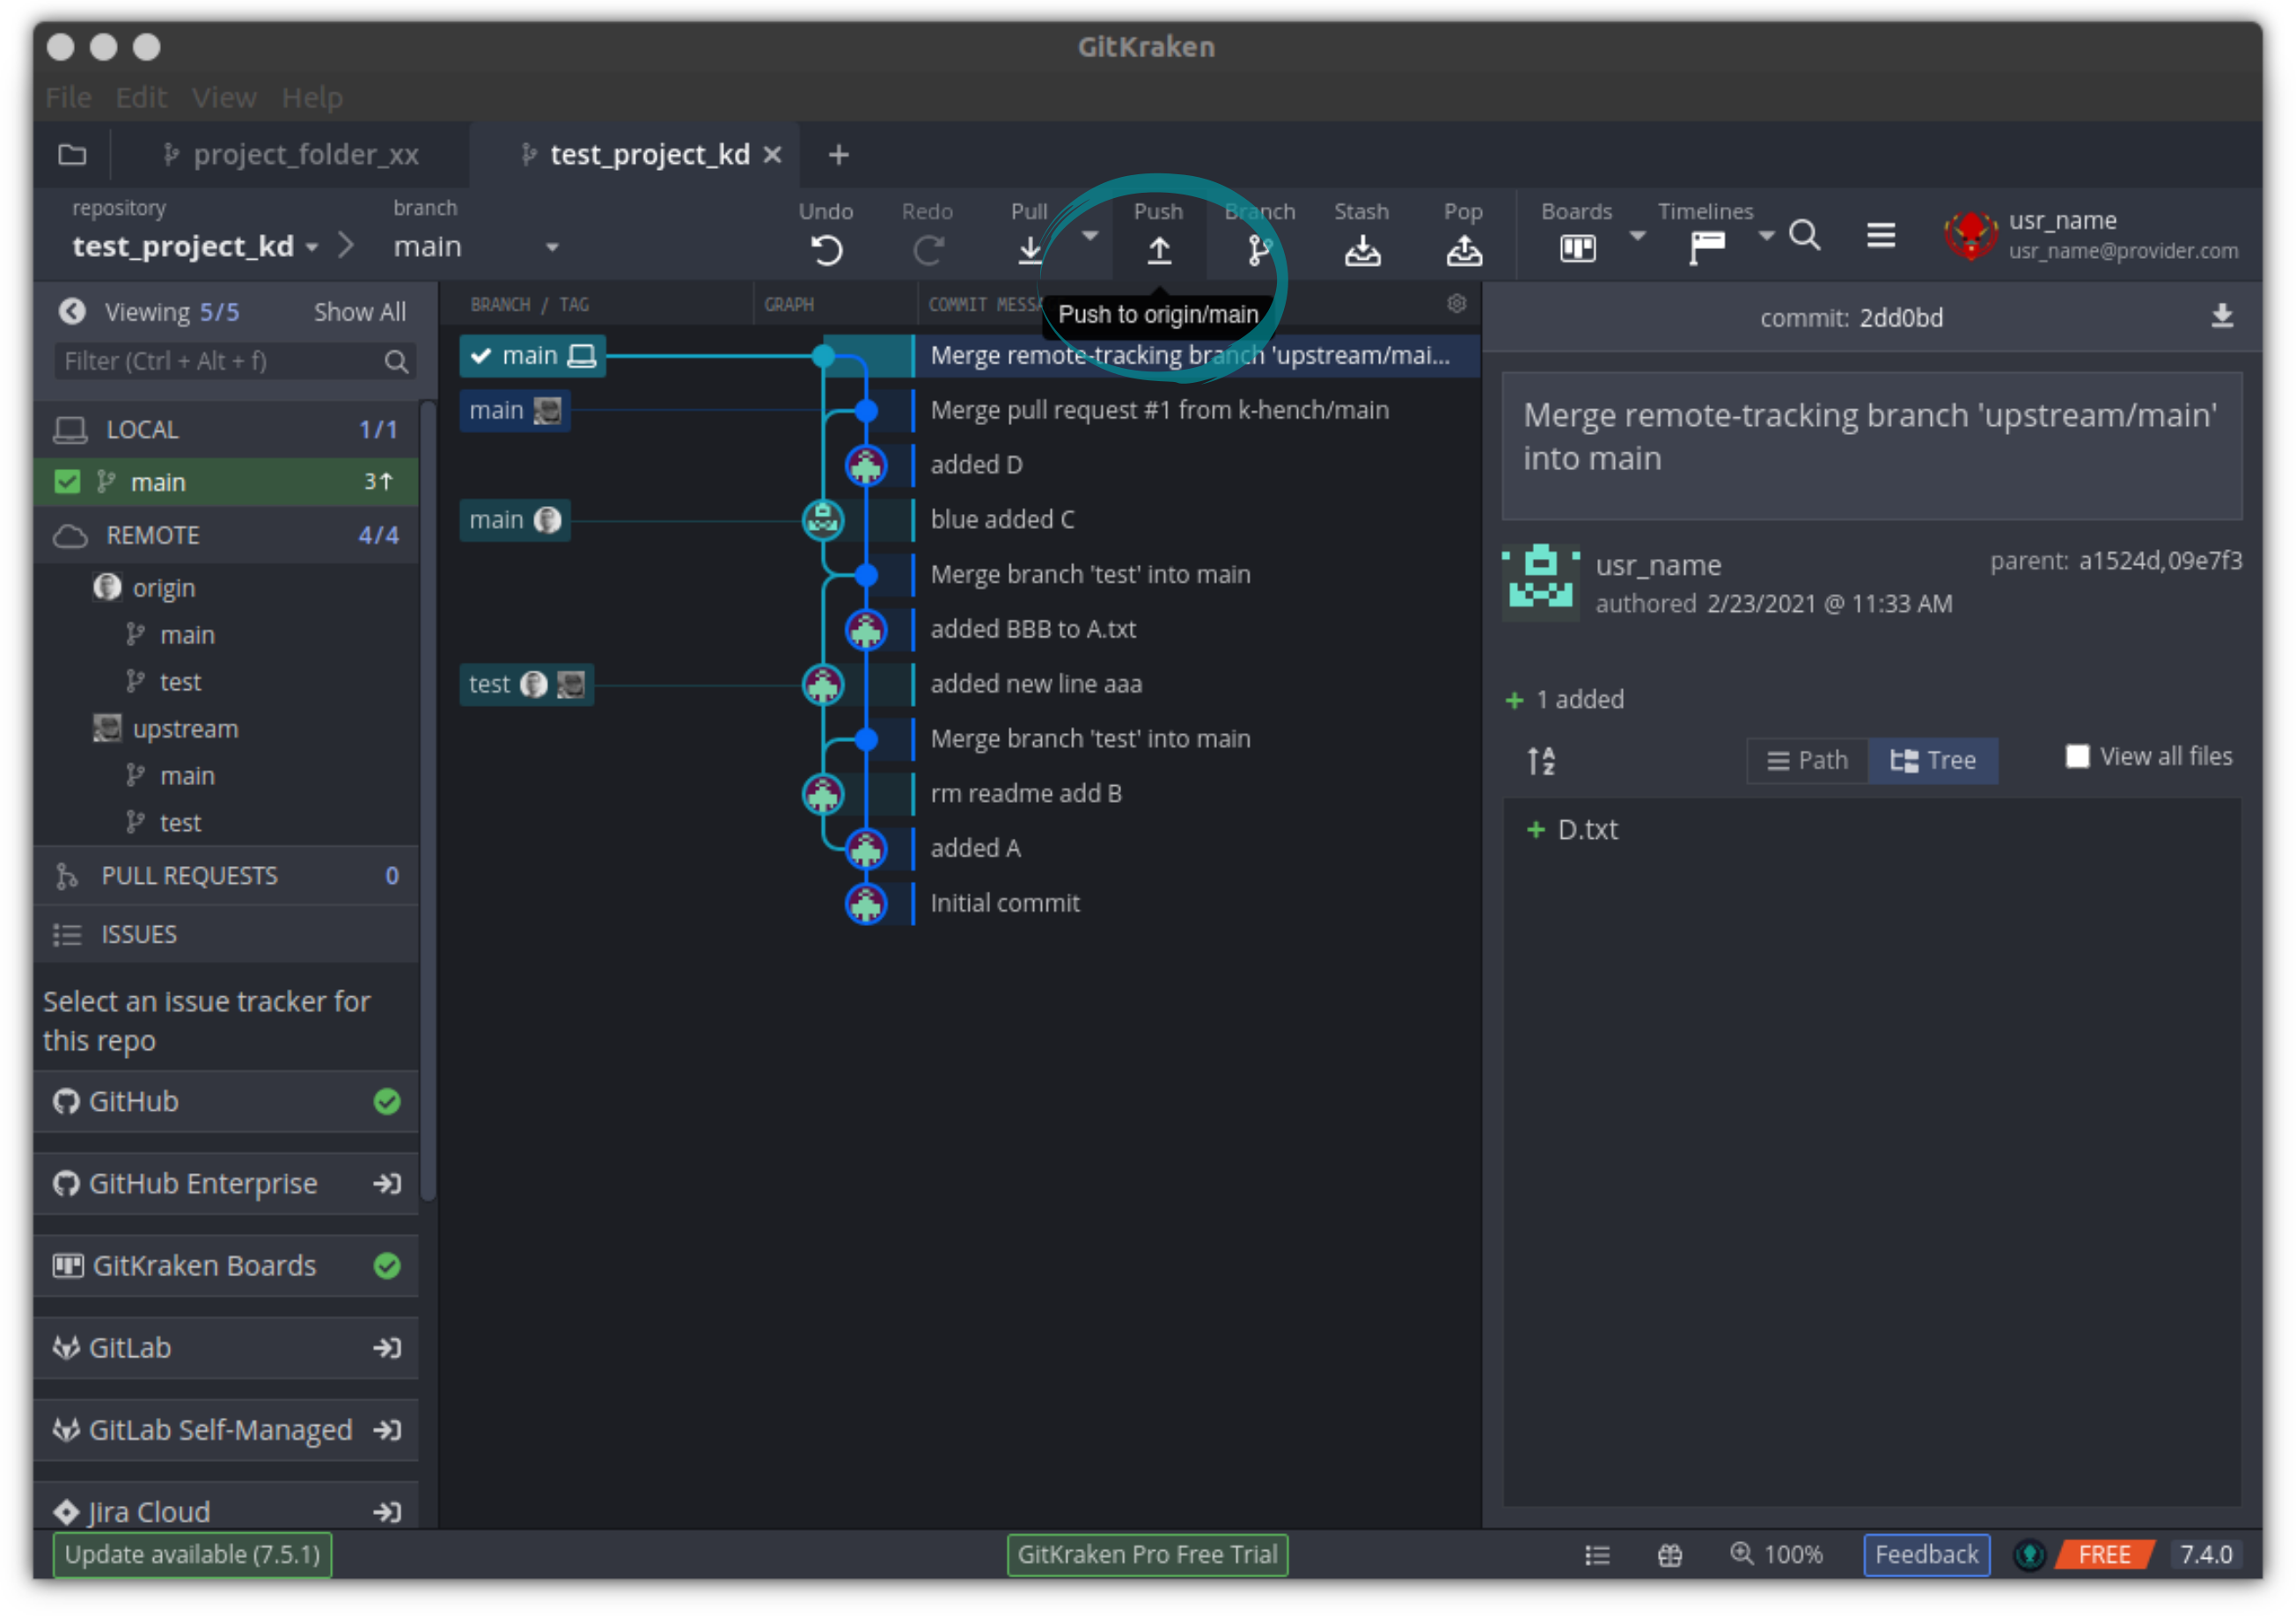
git push origin masterIf you see D.txt pop up on the forked repository on your github account, you are done 🥳

🎉🎉🎉

